

Check out these great references as well: |
|---|
| Our Wireless custom profile for Wireshark |
| Our Udemy course on Wireless Packet capture |
| Our other Wi-Fi related articles |
Let’s talk about Wi-Fi Network Monitoring & Manipulation in Parrot Linux.
If you are doing anything regarding security or penetration testing you know Linux is the only way to go. Back-Track and Kali Linux are excellent, however our choice is Parrot Linux. Everything shown below should work in Kali Linux as well.
In my example below, I have a laptop running Parrot Linux natively. I have my Ethernet plugged in (eth0) and I have a Wi-Fi built in wireless adapter. That said, you should also be able to do the process on a VM running Parrot as long as the Wi-Fi adapter is connected to the VM. It may have to be a stand alone USB Wi-Fi adapter, however.
Make sure you are connected to a network where you have permission to run Parrot and its associated software!
I always begin with the following command:
su root
Then I enter my password. This command essentially switches me to the root user.
Next, lets look at my interfaces with the following command:
ifconfig
You should have something that looks like this:
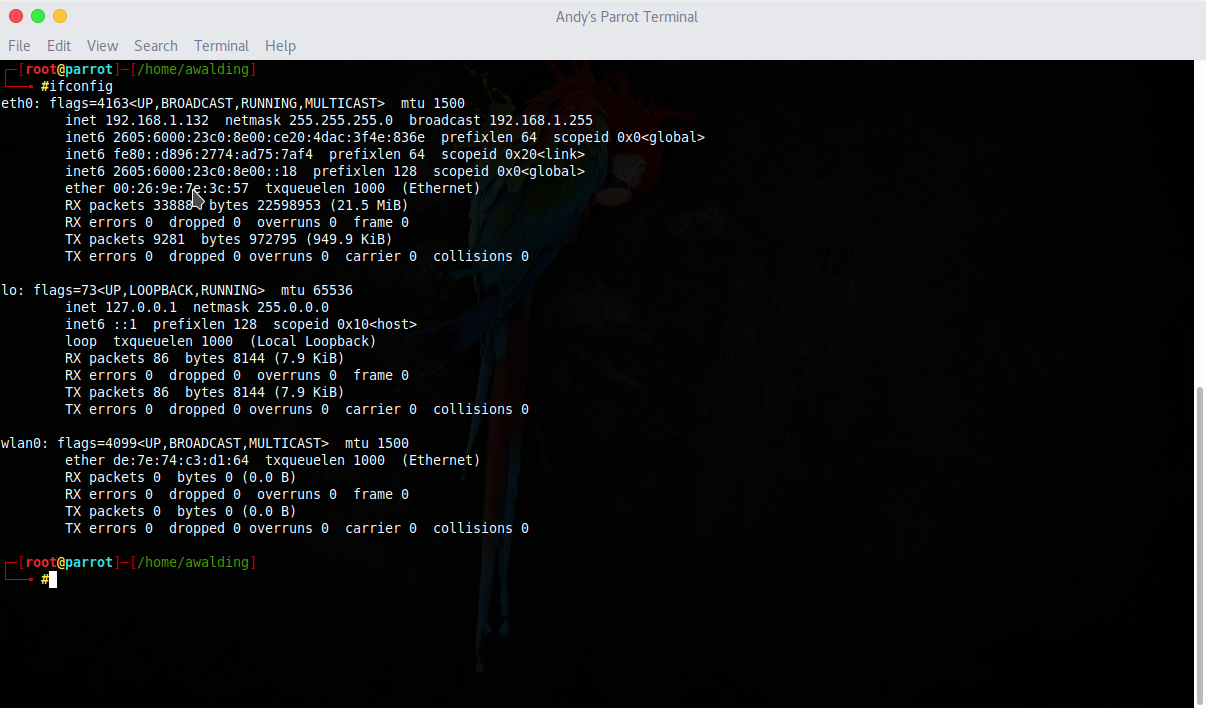
We see the eth0, loopback and wlan0 interfaces.
After clearing the screen:
clear
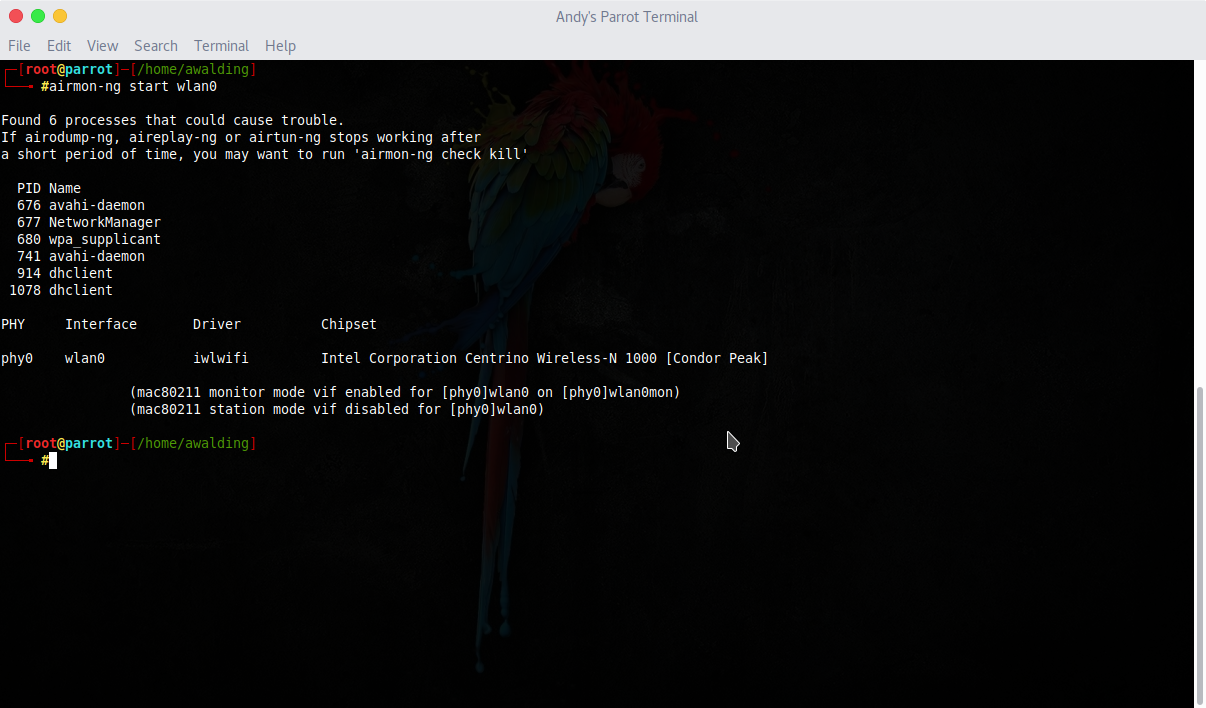
I use airmon-ng to put the wlan0 interface into monitor mode:
airmon-ng start wlan0
After a clear screen, we can verify with the following command:
ifconfig
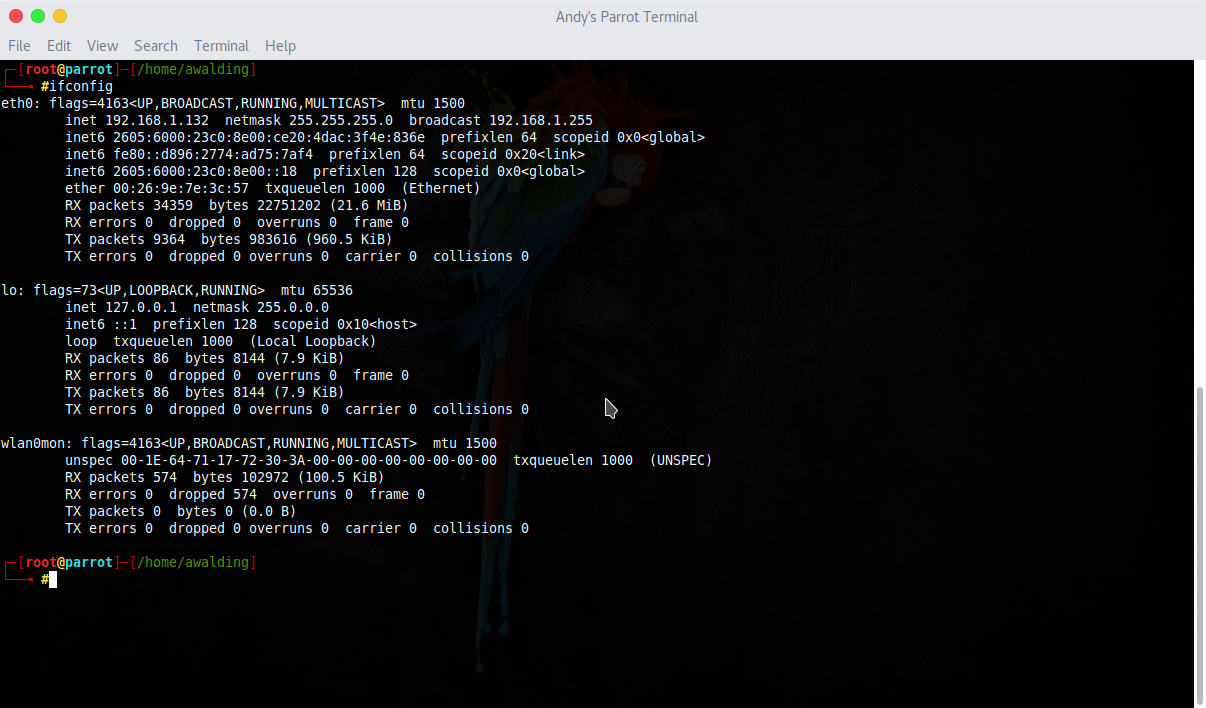
We see that the wlan0mon interface is now started. In other Linux distributions it may be called mon0.
Now, to actually use that interface, we need to use airodump-ng.
Clear the screen again and issue the following command:
airodump-ng wlan0mon
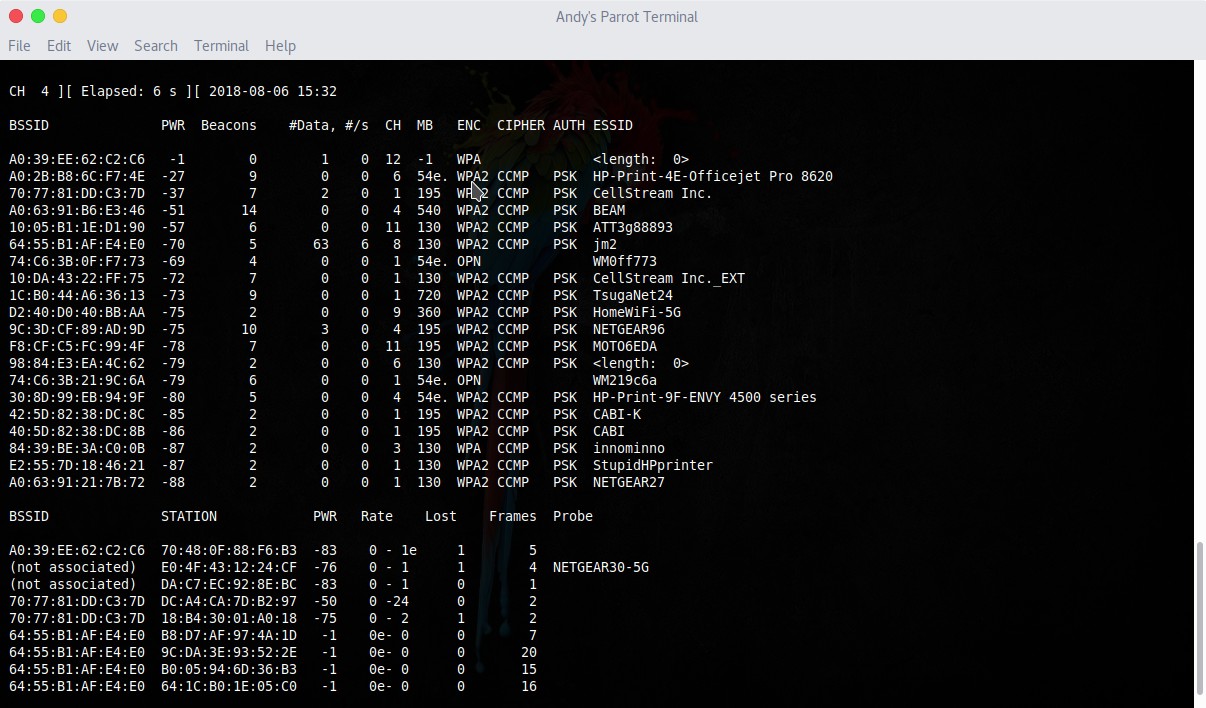
The longer you let this run, the more you will see. Quit the monitoring with CTRL-C.
In the top portion of the output you will find all BSSID beacons, the MAC address of the AP, the power level, the channel they are operating on, and their ESSID.
Length zero are SSID’s that are “hidden”.
Stations that are associated or not associated will be shown in the bottom part of the screen. Unassociated stations will often send out probes for networks they often connect to. If they do this, the SSID of the probed network will be displayed.
There are several options you should be aware of.
First you can set the channel to monitor rather than scanning all channels. For example, let’s scan just channel 11:
airodump-ng -c 11 wlan0mon
Second, if you are curious about those hidden SSID’s, as you should be, you can force stations associated with the hidden SSID AP’s to re-associate, or at least send out probes. This is done using the aireplay-ng tool:
aireplay-ng -0 2 -a {MACADDRESS} wlan0mon
Run the airodump-ng command again to see if you can learn them.
You can force your Wi-Fi adapter to associate with a particular AP using the following command:
iwconfig wlan0 essid {SSID} channel {#}
If the AP you want to associate to has MAC filtering in place that prevents you from associating, you can easily change your MAC address to one of the stations associated with the AP, by examining the output from airodump-ng. Get one of the station MAC addresses that worked, then do the following two things:
First, make sure monitor mode is turned off:
airmon-ng stop wlan0mon
Then, use macchanger:
macchanger -m {MAC ADDRESS} wlan0
Now associate again and you should be good to go! Any thoughts or comments? Please add below.
I hope you find this article and its content helpful. Comments are welcomed below. If you would like to see more articles like this, please support us by clicking the patron link where you will receive free bonus access to courses and more, or simply buying us a cup of coffee!, and all comments are welcome!