

Check out these additional IPv6 Resources: |
| Our IPv6 overview course at Udemy |
| Our IPv6 Custom Profiles for Wireshark |
| Our IPv6 classes at the Online School |
With more and more networking professionals tackling IPv6 and the changes incorporated into this next generation protocol, necessity requires that we look closely at the Internet Control Message Protocol as it has been highly modified for IPv6 support.
The experiment outlined below will walk you through a packet capture that contains ICMPv6 packet exchanges. You will need to use Wireshark(TM). Wireshark is available for download at www.wireshark.org.
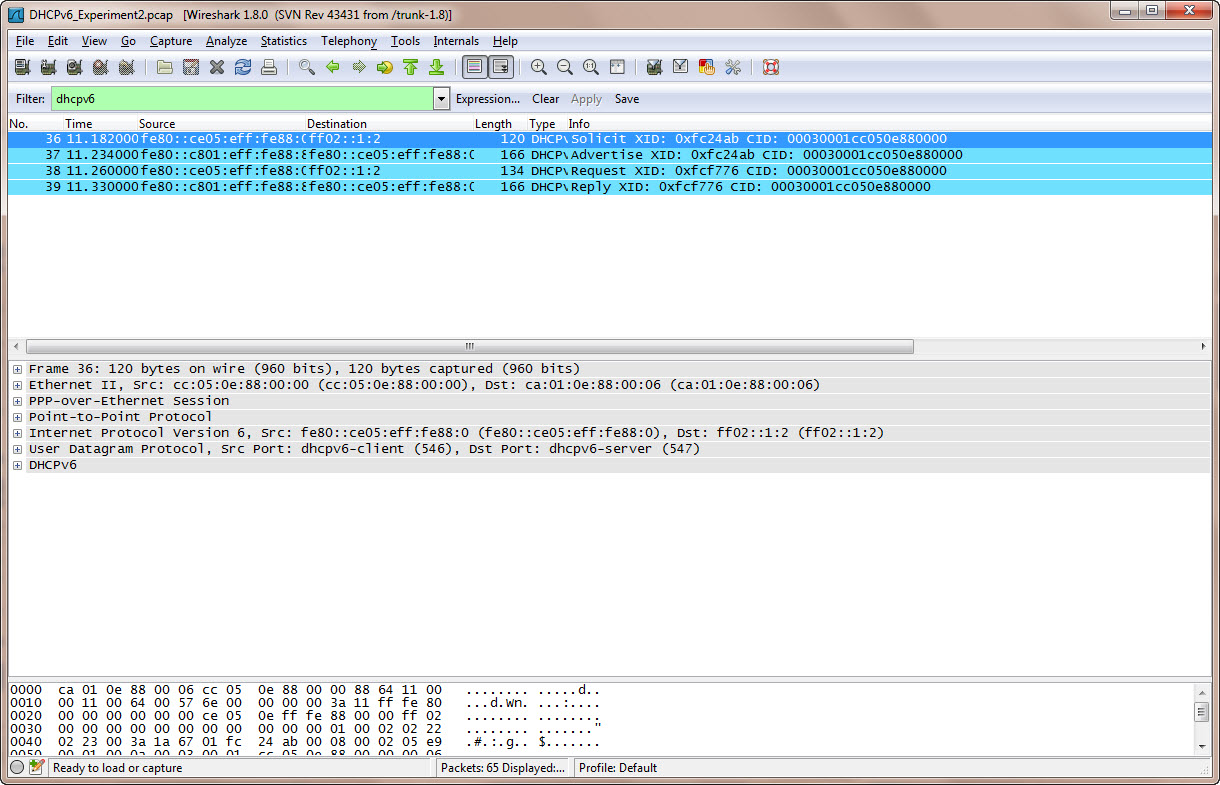
With Wireshark available, the next preparation you must make is to download this file by simply clicking on the name: DHCPv6_Experiment2.pcap
If the file did not open immediately in Wireshark, then double click on the file in your download directory, or open it via the Wireshark interface. You should have a screen that looks something like this (actual output may vary based on your Wireshark configuration):
Background
Before we look at this capture, let’s fill in a little background. New to IPv6, and more specifically, ICMPv6 adds “Stateless Autoconfiguration” as an option for getting IPv6 address prefixes onto devices you wish to access the Internet. Those of you familiar with IPv4 know that we use DHCP or manually configure IPv4 addresses so that nodes can operate in their appropriate network. In contrast to the Stateless Autoconfiguration for IPv6, we have an updated DHCPv6 that we call Stateful Address Configuration.
When an IPv6 node boots up, it installs a Link Local address on its interface(s). The node then ensures its address is unique on the local network or VLAN. The node then may receive a message from the local router advising where the DHCPv6 server is, or based on configuration will then contact the DHCPv6 server.
An overview of the process is shown in the following diagram:
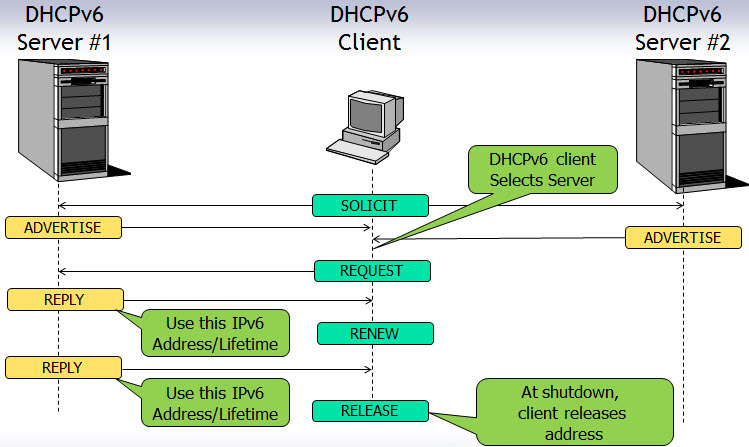
We can see that the process begins with the DHCPv6 client soliciting the DHCPv6 server(s). The response to this solicitation is Advertisement messages. If there is more than one server, multiple advertisements may be received. The DHCPv6 client will select the message that is received first, assuming the delay in that server is low and/or the distance and delay to that server is small. Once selected, the client then send a request message to the server it selected.
Experiment
In this experiment, you will analyze the DHCPv6 protocol process. Now lets explore this process by examining the packet capture more closely.
Step 1
In the Wireshark display, click on the first packet in the packet list (packet number 36).
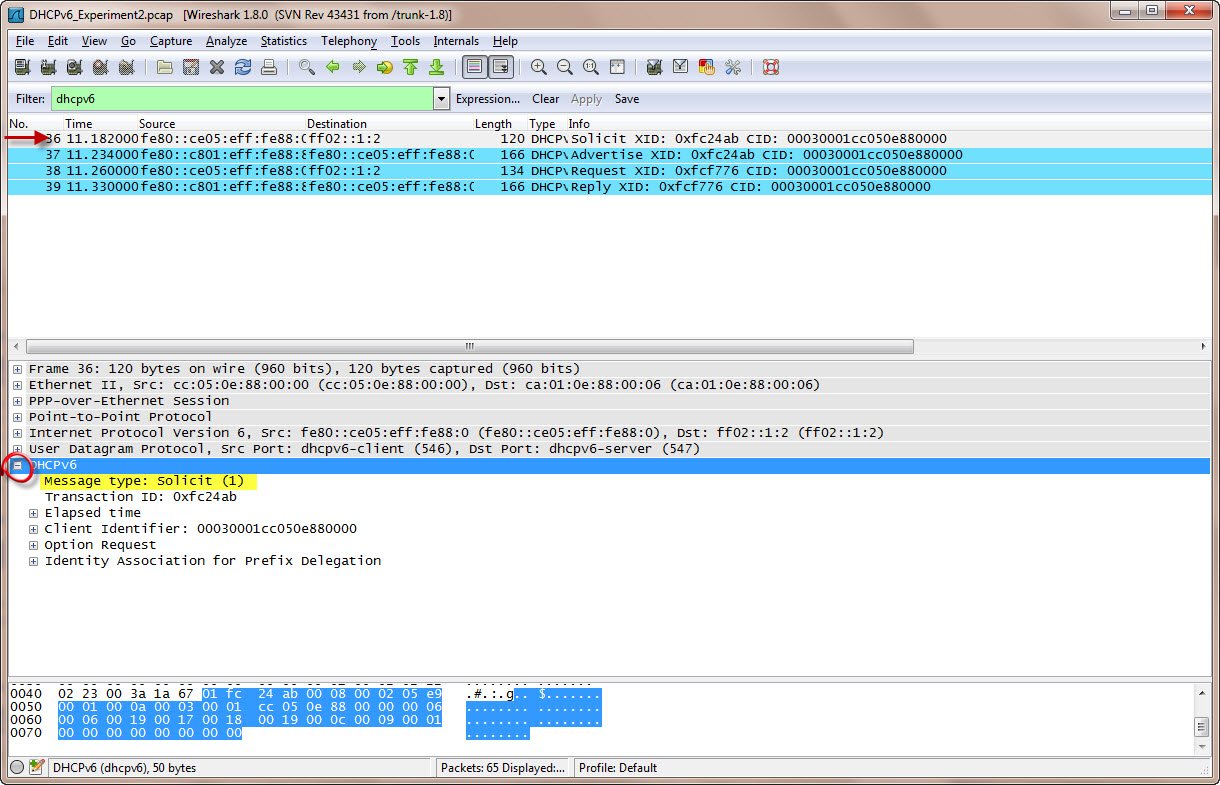
Then, expand (click on the small ‘+’) the ICMPv6 protocol. We can see that this is the DHCPv6 SOLICIT message being sent from the client out to any DHCPv6 servers using the FF02::1:2 address to locate those servers using the IPv6 Multicast address format. We can also note that this DHCPv6 packet is being sent in the UDP protocol (look just above the DHCPv6 line you expanded).
Step 2
Now expand the Identity Association for Prefix Delegation field:
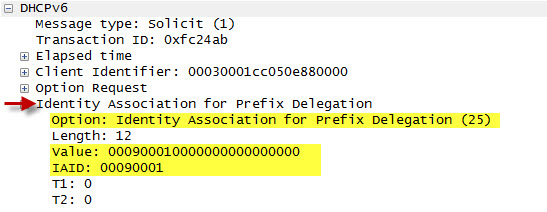
We see that the client is providing an Identity Association ID so the DHCPv6 server can correlate the address it assigns to this instance. This additional association is needed because in IPv6, we can have multiple IPv6 addresses associated with a single interface.
Step 3
The response to the client’s SOLICIT message should be a DHCPv6 server ADVERTISE.
Click on the next packet, packet #37.
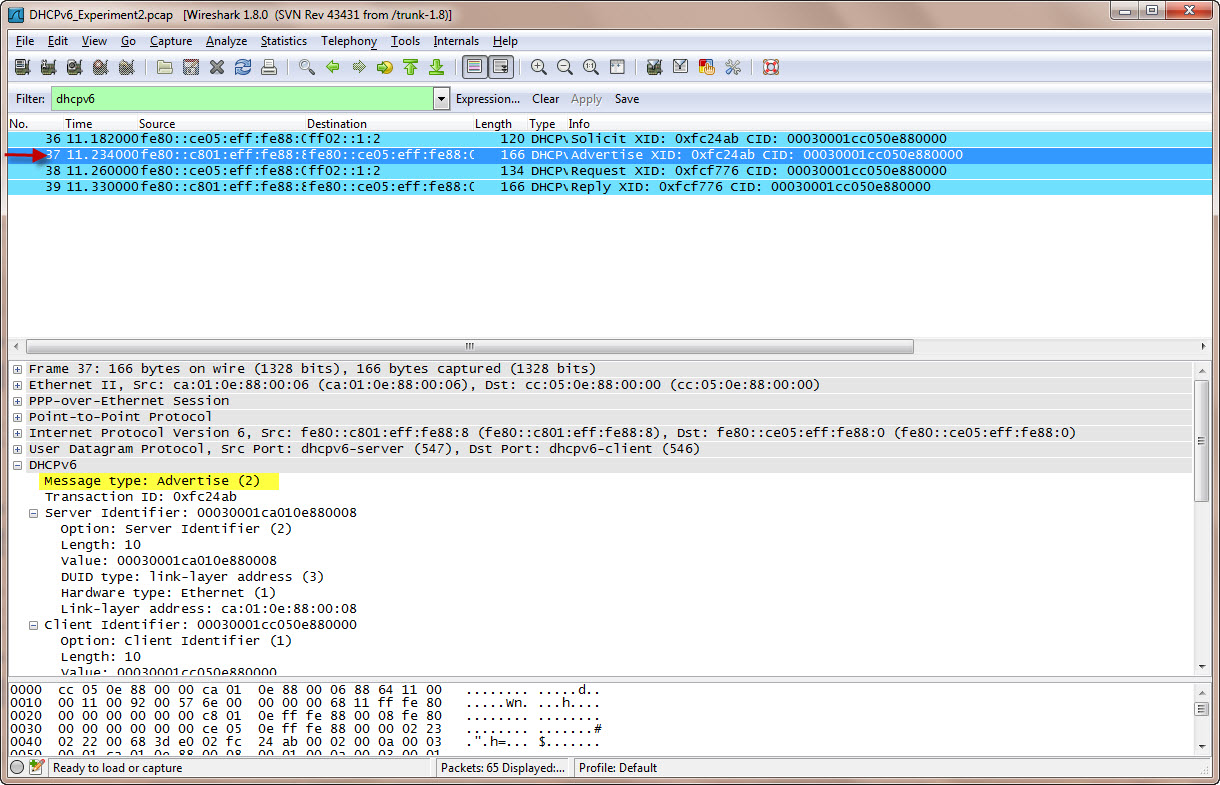
We can see that, indeed, this is the advertisement we expected.
Step 4
You will have to scroll your window to view the entire contents of this part of the protocol.
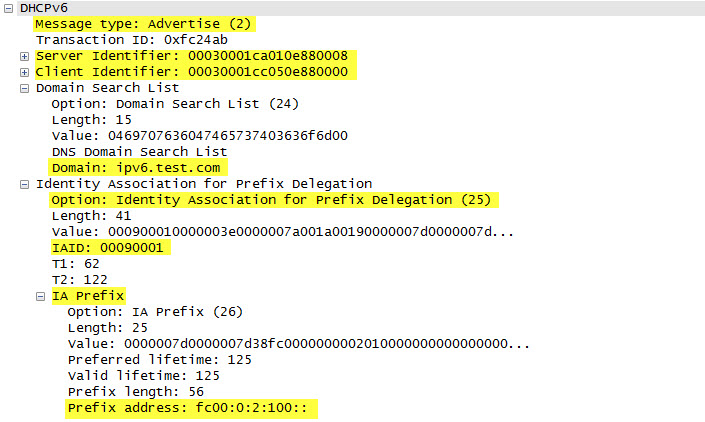
We see that the DHCPv6 server is advertising (message type 2) and has a Server Identifier and created a Client Identifier. The next field is the Domain Search List and the domain has been provided to the client. Then the server is providing the Identity Association to Prefix that is expected to be assigned.
Step 5
Now the client knows everything it needs to know to formally request an address assignment from the DHCPv6 server.
Click on packet #38.
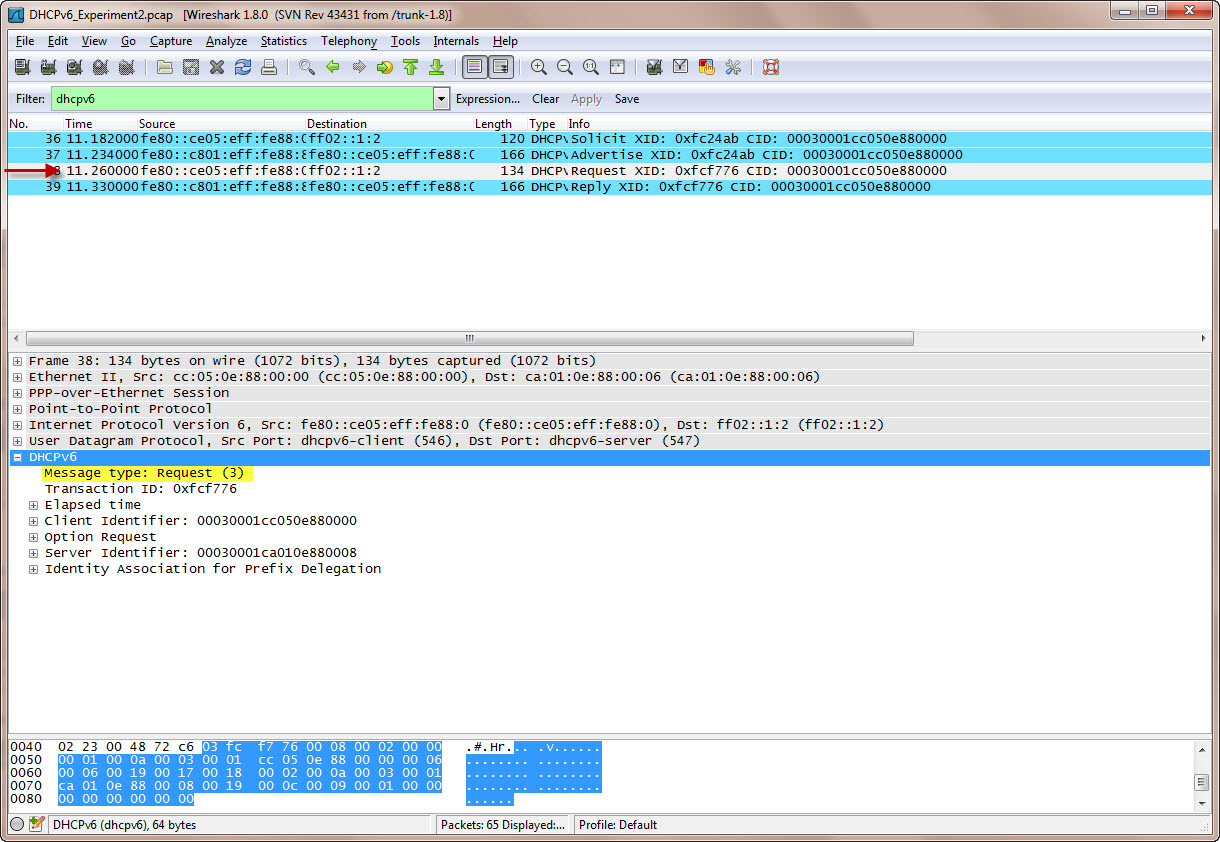
Indeed, what we see in this next packet is a DHCPv6 Request message being sent from the client to the server. Note that UDP continues to be used.
Step 6
Let’s look more closely at the packet contents:
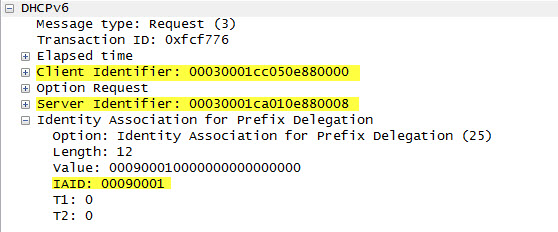
Remember that UDP is being used, so neither the server nor the client are sure that information has been received. Therefore the client is sending the request, repeating for verification, with the appropriate Client and Server identifiers as well as the Identity Association.
Step 7
The response to the DHCPv6 client REQUEST is expected to be the REPLY from the server. Let’s look at the next packet in the capture, packet #39:
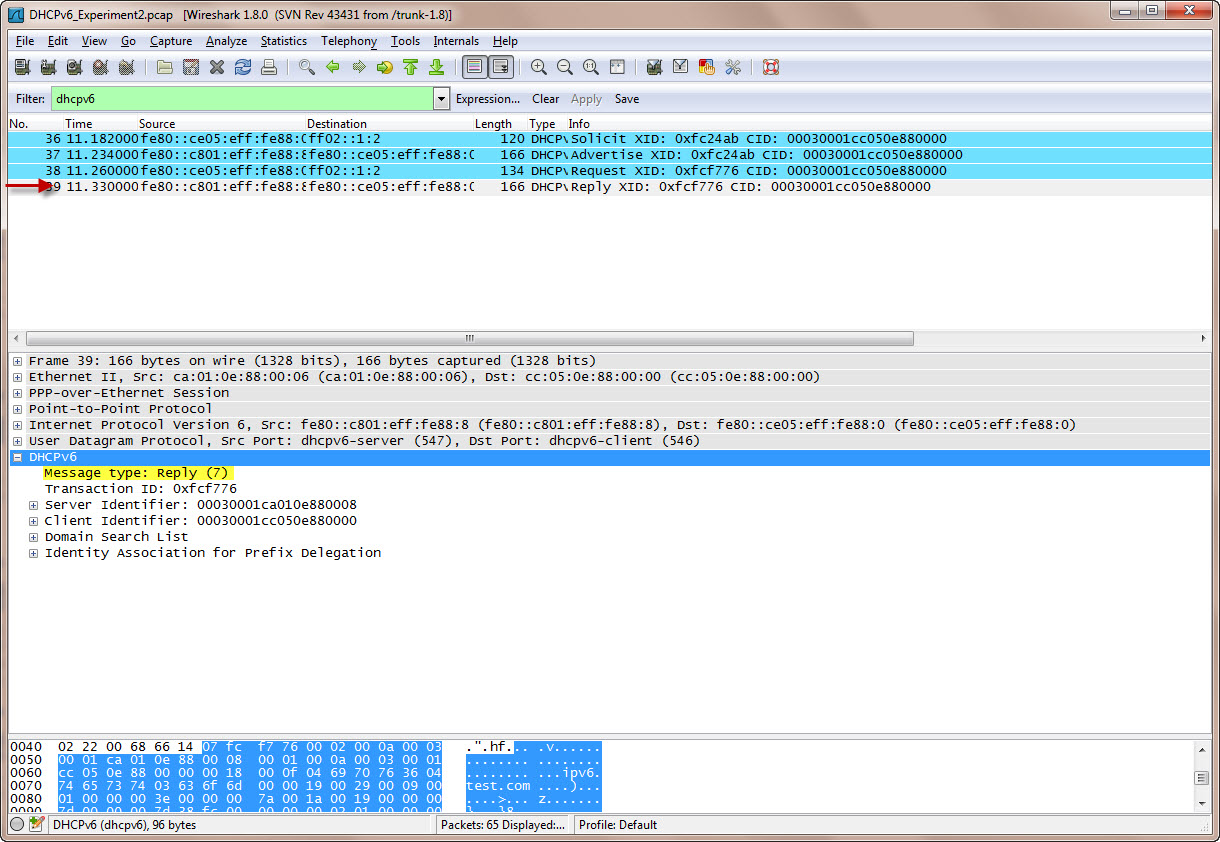
Step 8
Expand the Identity Association for Prefix Delegation and then further expand the IA Prefix field by clicking on the ‘+’ signs.
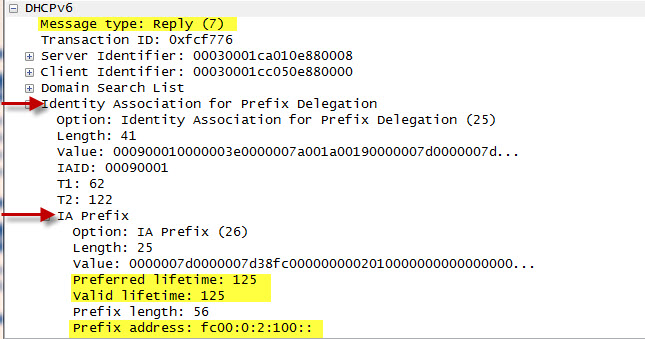
Here we see the final assignment of the IPv6 prefix to be used – FC00:0:2:100, and the lifetimes (valid and preferred) for the associated prefix.
At this point the client installs this prefix onto its interface along side the FE80::/10 link local prefix.
Summary
This experiment has shown the DHCPv6 protocol operation for IPv6 Stateful Address Configuration. We have seen how a node locates the DHCPv6 servers via the SOLICIT message, how DHCPv6 servers then ADVERTISE themselves, how the client then REQUESTs a prefix, and finally how the DHCPv6 server REPLY assigns the prefix.
Other Links of Interest
You may be further interested in the following items:
- You can download a Wireshark Display Filter Cheat Sheet here!
- We have a 2-day Hands On Wireshark class available. If you or your company is interested, check out the course information here.
- You can download a TCPDUMP Cheat Sheet here!
I hope you find this article and its content helpful.
Comments are welcomed below from registered users. You can also leave comments at our Discord server.
If you would like to see more content and articles like this, please support us by clicking the patron link where you will receive free bonus access to courses and more, or simply buying us a cup of coffee!