

Check out these great references as well: |
|---|
| Our Wireless custom profile for Wireshark |
| Our Udemy course on Wireless Packet capture |
| Our other Wi-Fi related articles |
Ok all you Mac users, here is the way you capture Wi-Fi/WLAN frames using your Mac and Wireshark.
First, Mac users get a really easy time of putting their interface into Monitor Mode, because the Wireshark interface works simply and easily, plus you don’t need any other drivers or anything to make it work.
If you are a Windows user look here: https://www.cellstream.com/reference-reading/tipsandtricks/332-capturing-wi-fi-wlan-packets-on-windows-for-free
Linux users, look here: https://www.cellstream.com/reference-reading/tipsandtricks/335-capturing-wi-fi-wlan-packets-in-wireshark-on-linux
OK – Mac users – here we go.
First simply install Wireshark from www.wireshark.org.
Second – you are going to need our Wi-Fi/WLAN profile – get it here: https://www.cellstream.com/reference-reading/tipsandtricks/284-a-wireshark-wifi-profile Honestly, this is optional but if you want to do it right…. 🙂
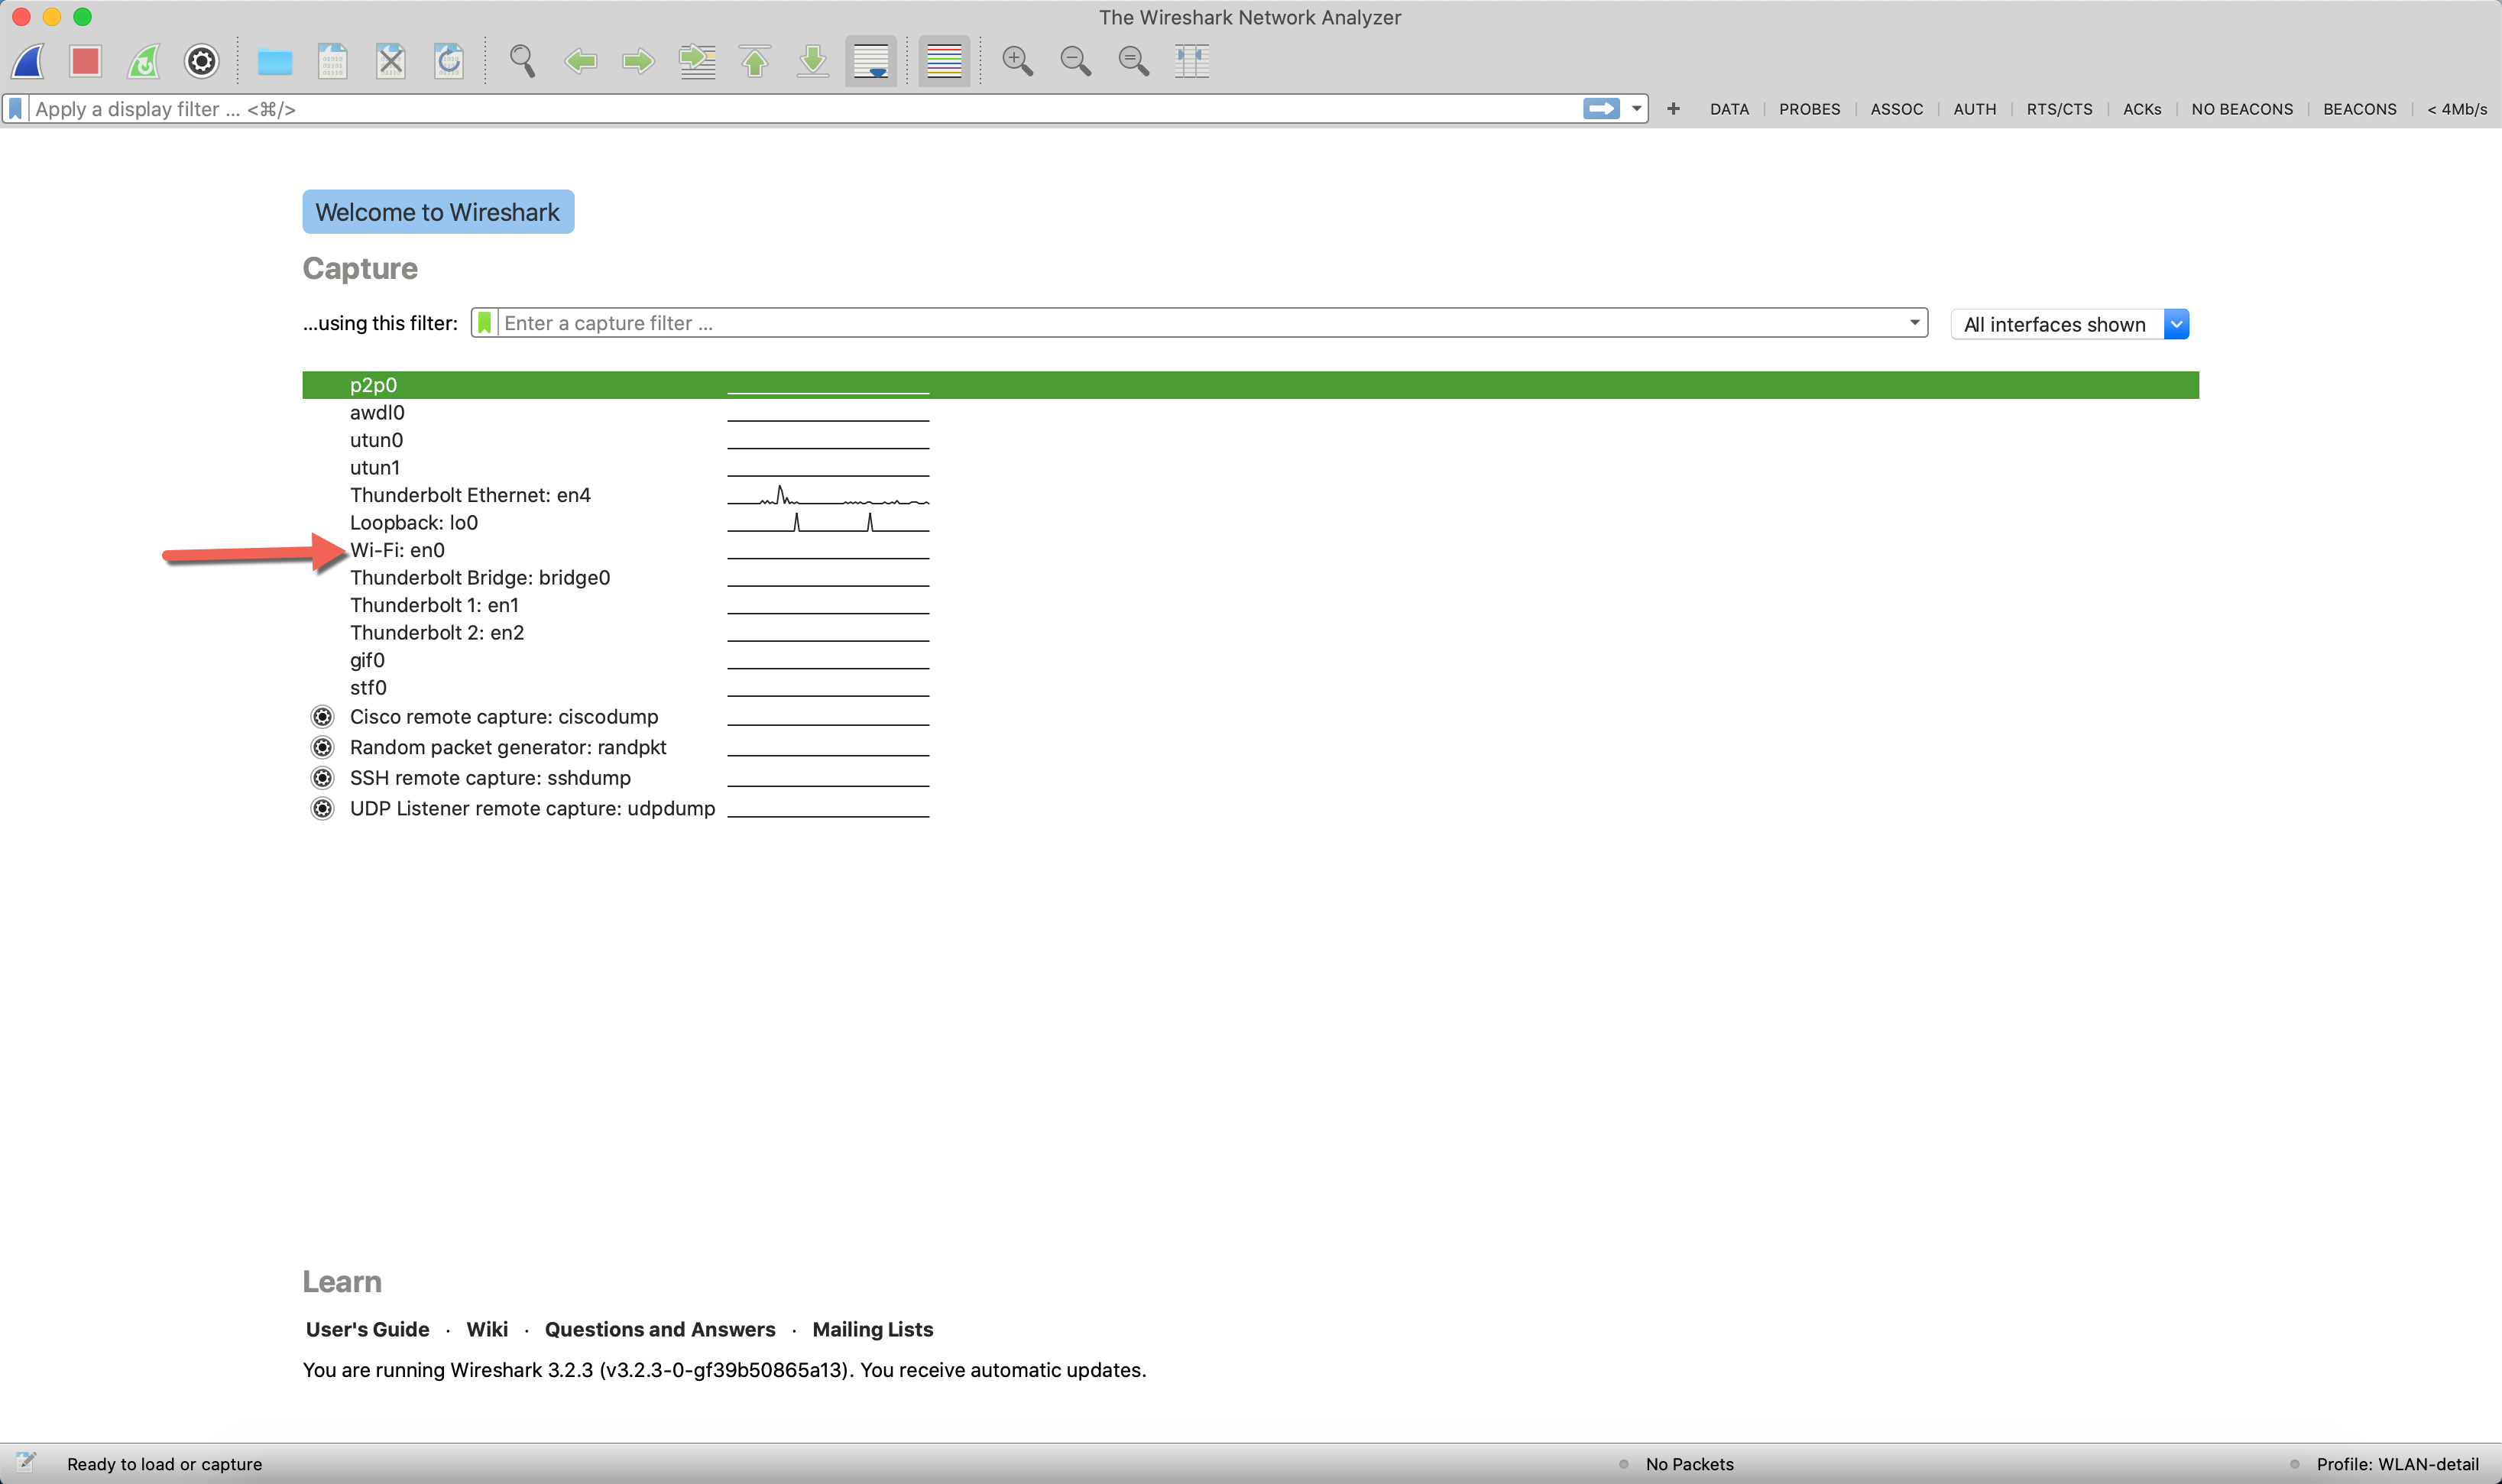
Now, once Wireshark is open, select your Wi-Fi/WLAN Interface (just click on it once so it is highlighted green):
Now on the drop down menu of Wireshark – select Capture> Options (or you can select the Gear button, or you can do a command-K). You will get the following pop up:
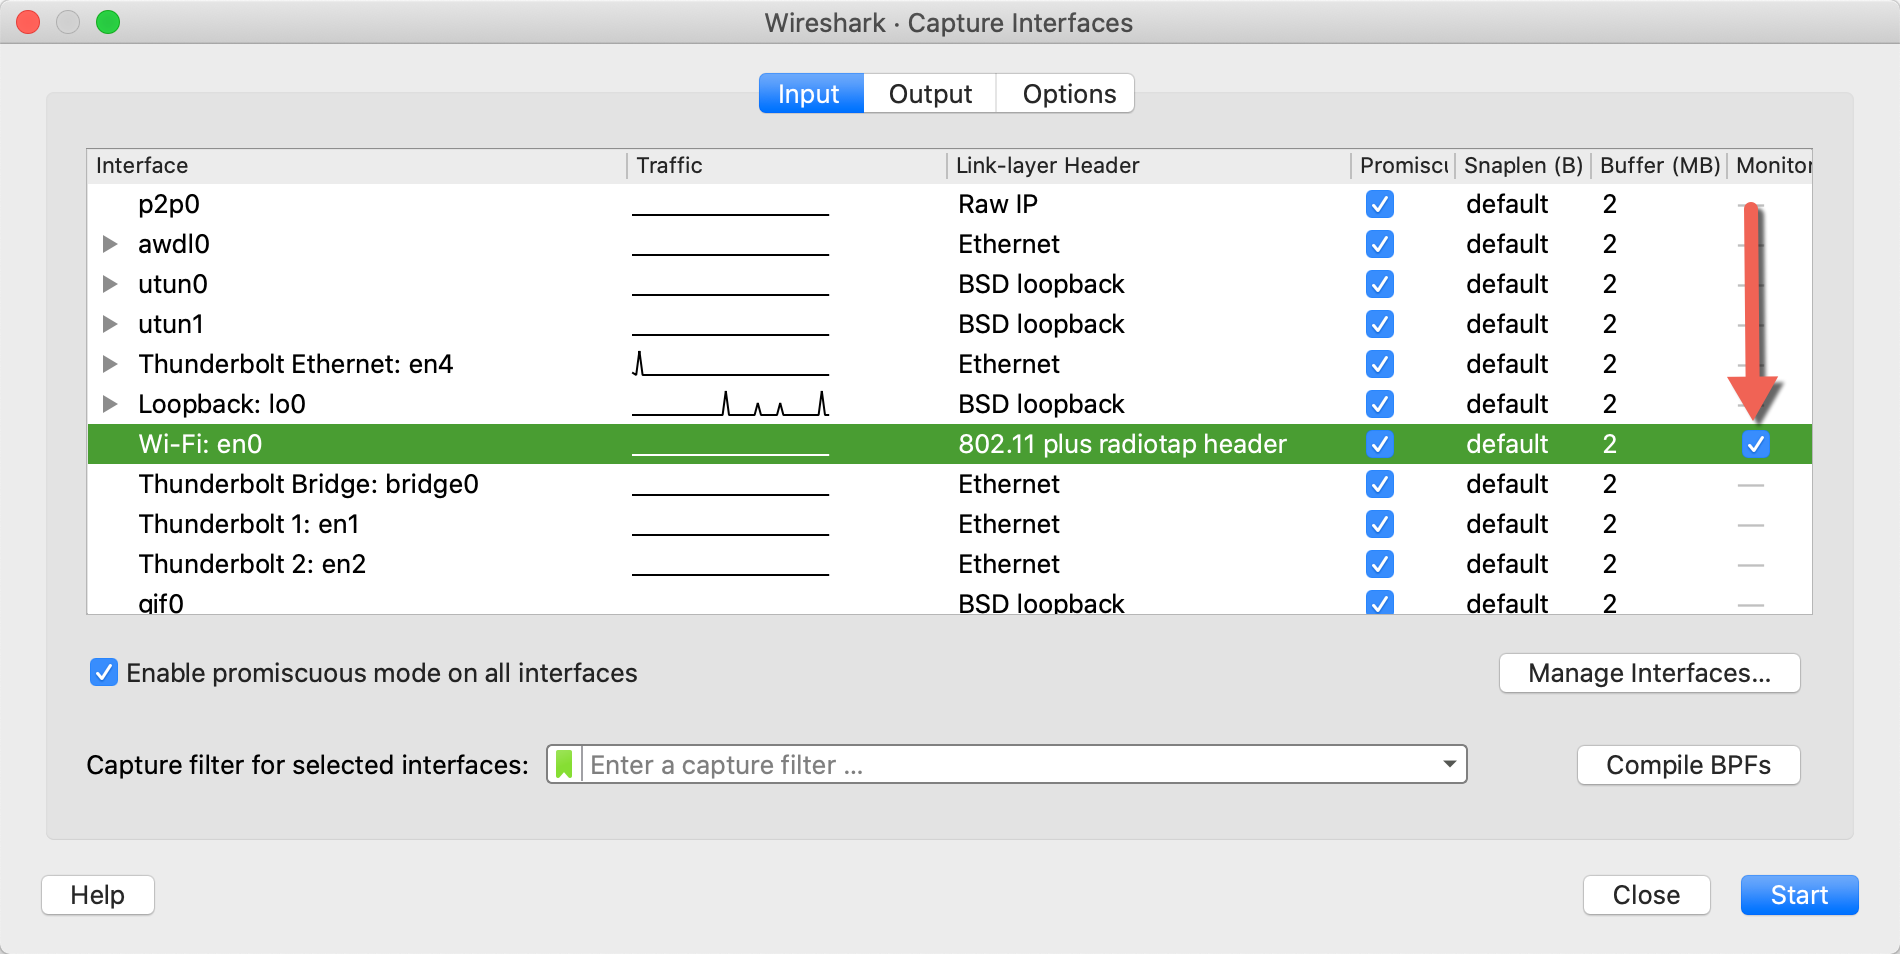
You see my Wi-Fi: en0 interface is highlighted/selected. Over to the right (you can resize the window if necessary, click on the Monitor Mode tick-box (as shown).
Now there is an assumption here, and that is that you are connected to a Wireless Network.
Click the START button.
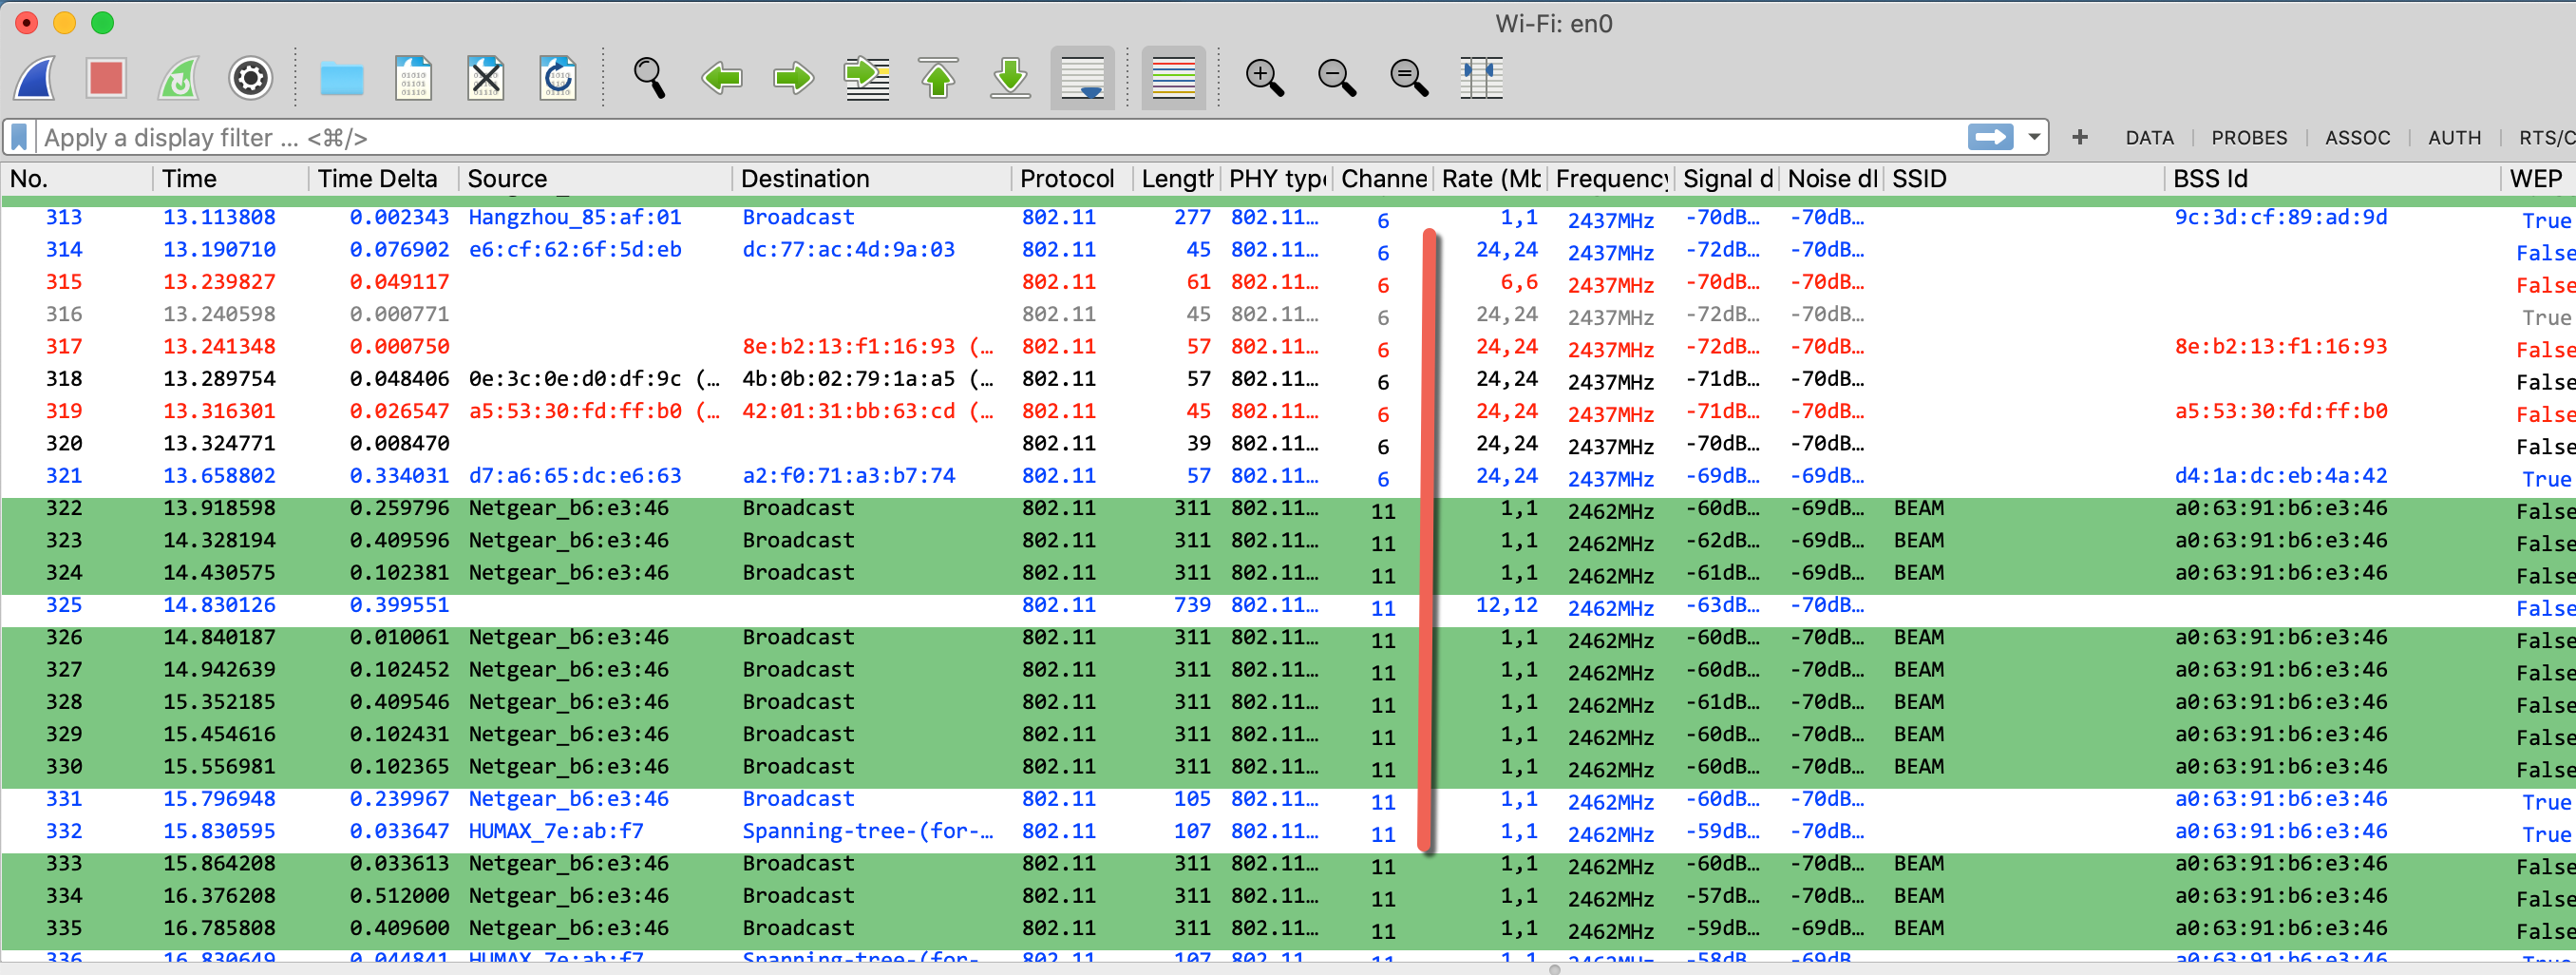
You should start to see all the wireless frames your Mac can hear scrolling:
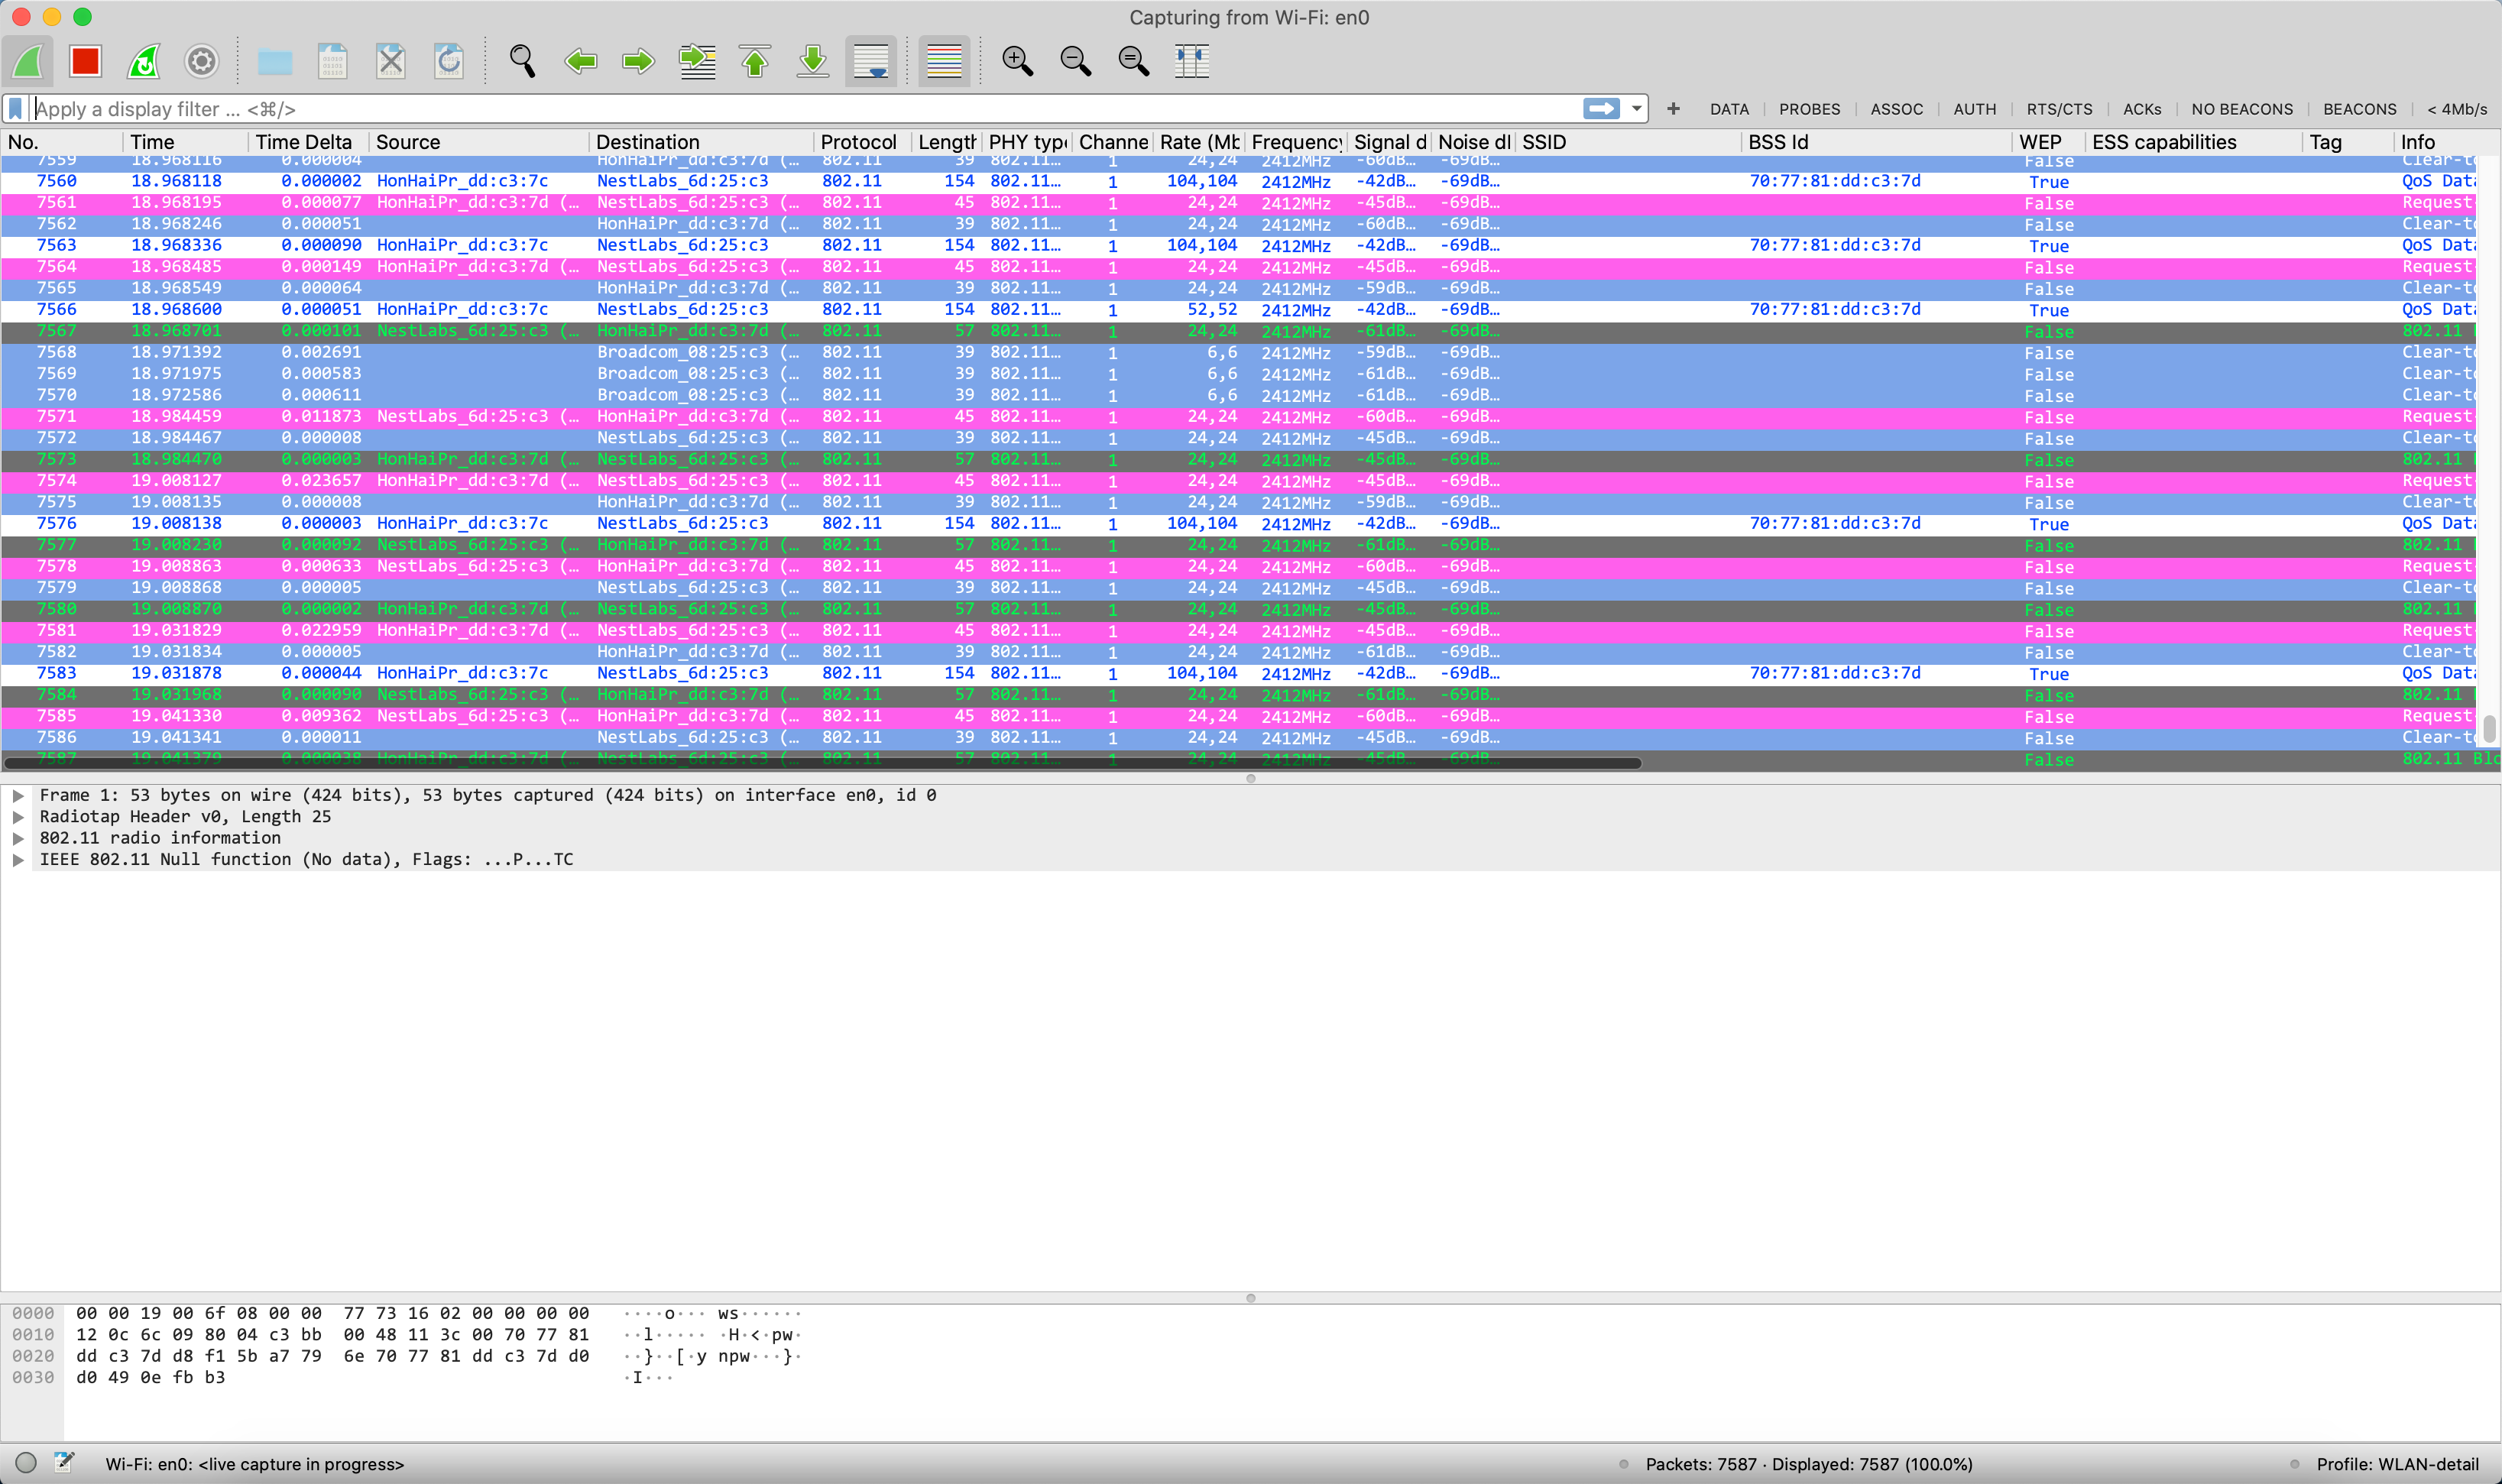
But look closely, you will only be looking at the channel your current connection is operating on – in my case above the Channel column says Channel 1.
That’s fine and may be all you need.
But what if I want to listen/sniff on another 2.4Ghz or 5GHz channel?
Wireshark used to have the Wireless toolbar, but this is gone now (except Windows). So how do you change channels on your Mac?
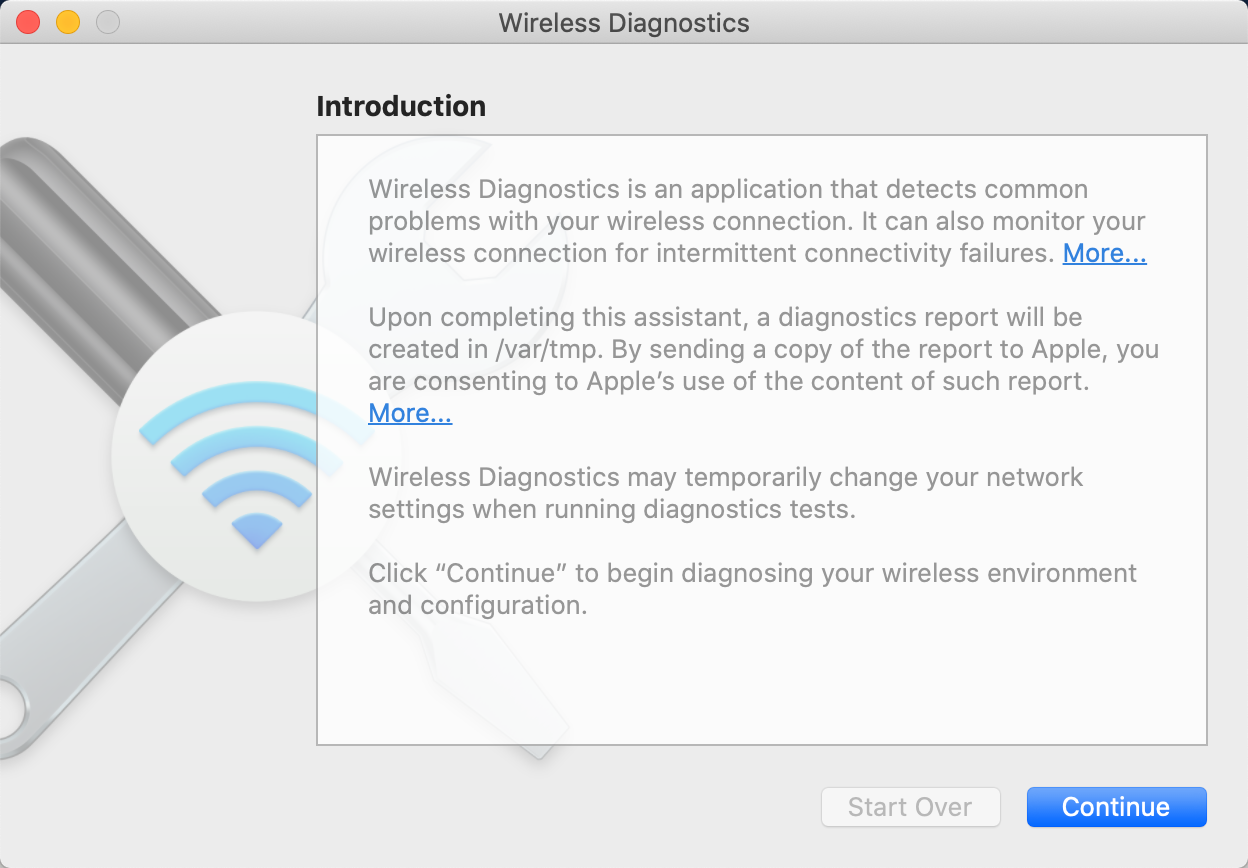
Easy. Open your Spotlight search (command-SPACE) and enter “Wireless Diagnostics”. You should get a screen that looks like this:

Run that Wireless Diagnostis app. Your app will look like this:
Click continue.
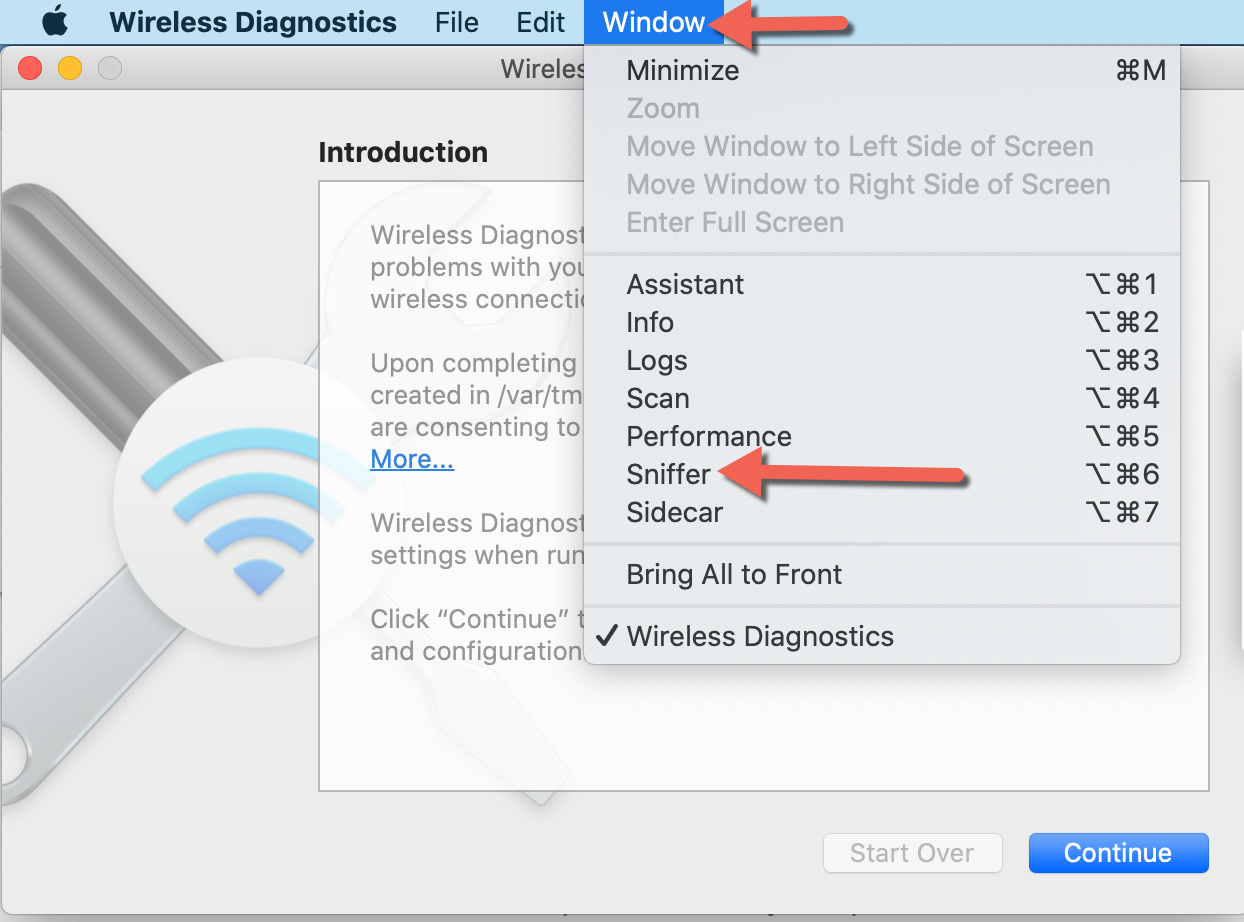
Ignore the next screen. Up on the main menu bar, select Window> Sniffer:
This will bring up the following dialogue:
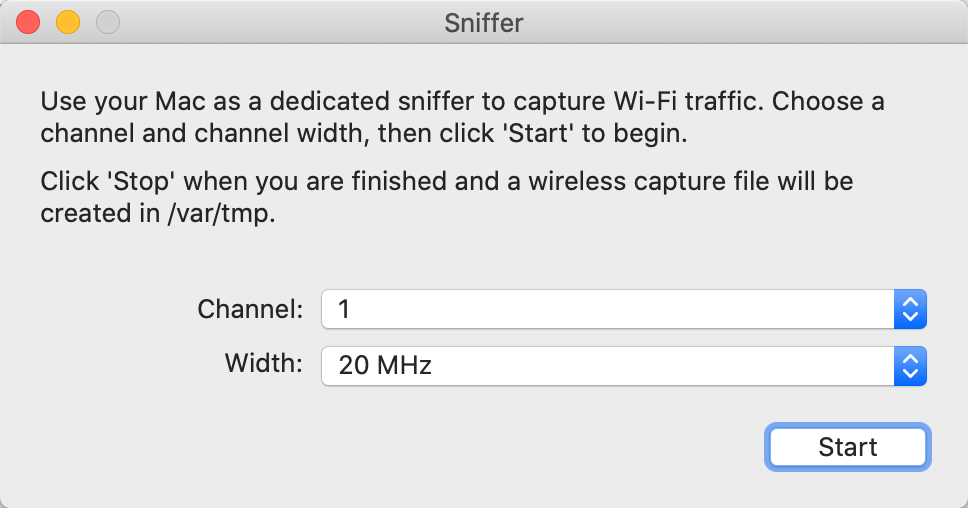
Ah-ha – from here you can pick the channel you want your Wi-Fi/WLAN interface to listen to!
All the 2.4Ghz and 5GHz channels are listed in the drop down. Plus you can adjust the channel width here as well.
Once you pick which channel, you will have to enter your administrative password once to make the change by clicking the Start button. To make further changes click Stop, change the channel, then click start again. You can see in this screen shot, I changed to channel 6 from channel 1, and then changed again to channel 11:
Keep in mind, you will not be able to use the wireless interface during this time.
Also, once everything is closed, you may have to turn off/on your Wi-Fi interface, and/or manually connect to your AP to get it to reconnect.
If you would like to help support the continued development of independent networking, broadband, Wi-Fi, VoIP, and packet analysis content, please consider joining our Patreon community where you will gain access to exclusive technical resources, downloadable labs and PCAPs, bonus course content, troubleshooting guides, and additional member-only material. Comments and technical discussion are always welcomed at our Patreon community or on our Discord server. You can also support our work by simply buying us a coffee — every contribution helps us continue creating practical, real-world network science education for professionals and enthusiasts alike.