
What is Netsh?
Netsh is a Microsoft Windows command-line shell/scripting utility originally introduced in Windows 2000 that allows you to, either locally or remotely, display or modify the network configuration of a computer that is currently running.
Netsh also provides a scripting feature that allows you to run a group of commands in batch mode against a specified computer.
Netsh can also save a configuration script in a text file for archival purposes or to help you configure other servers.
How does it work?
Netsh interacts with other Windows operating system components using dynamic-link library (DLL) files. Each Netsh helper DLL provides an extensive set of features called a context, which is a group of commands specific to a networking component. These contexts extend the functionality of netsh by providing configuration and monitoring support for one or more services, utilities, or protocols. For example, Dhcpmon.dll provides netsh the context and set of commands necessary to configure and manage DHCP servers.
To run a netsh command, you must start netsh from the Cmd.exe prompt and change to the context that contains the command you want to use. The contexts that are available to you depend on which networking components you have installed.
For example, if you type dhcp at the Netsh command prompt, you change to the DHCP context, but if you do not have DHCP installed the following message appears:
The following command was not found: dhcp.
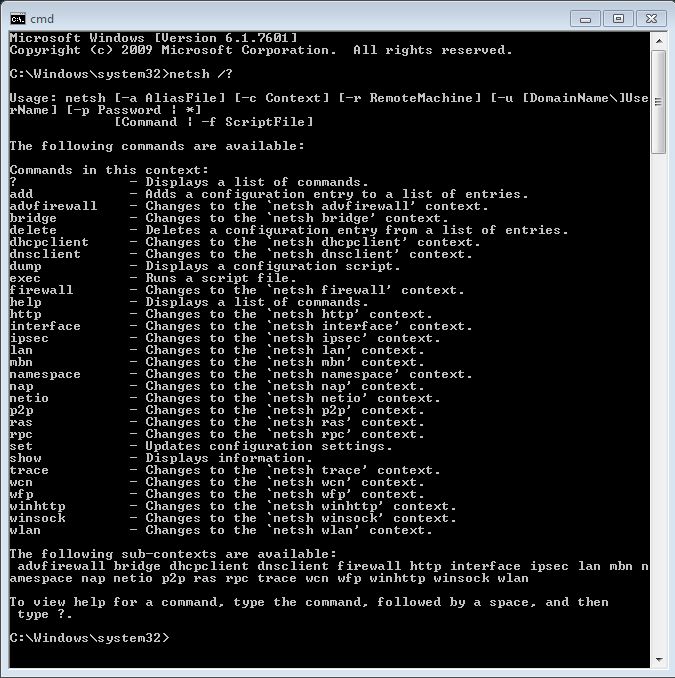
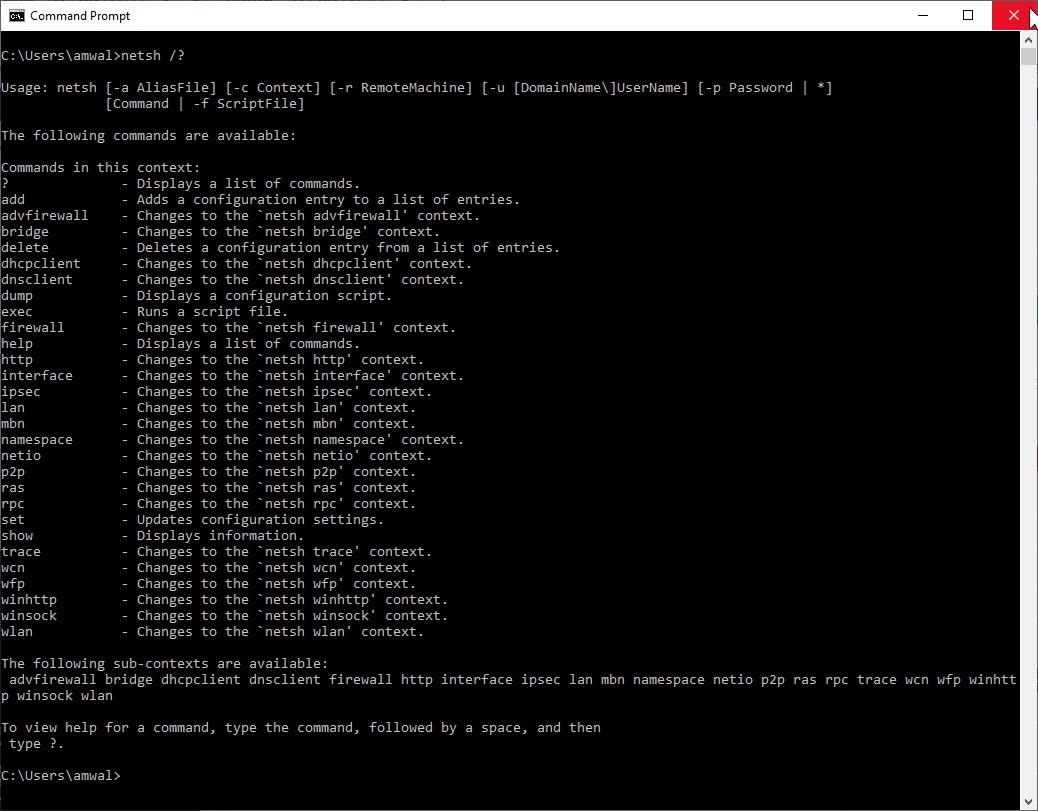
If you run “netsh /?” in your operating system, you will get the different contexts supported by your system. For example, Windows XP has “routing” listed as a context and Windows Server 2008 does not. Here are some of the contexts you might see:
[older version of Windows]
[newer version of Windows]
Some Clever things You Can Do With Netsh:
- Show your computer’s IP address:
netsh interface ip show config - Set an interface to use DHCP for its IP address configuration:
netsh interface ip set address name=”Local Area Connection” source=dhcp - Set an interface to use a static IP address for its IP address configuration:
netsh interface ip set address “Local Area connection” static 10.0.0.2 255.0.0.0 10.0.0.1 1 - Or, add a DNS Server entry:
netsh interface ip add dnsserver “Local Area Connection” 10.0.0.1 - With netsh, you can quickly and easily open a port on your firewall if you know the right command. Here is an example of opening port 445:
netsh firewall set portopening tcp 445 smb enable - With netsh, exporting and importing your IP address configuration is easy – unlike in the GUI interface. To export your configuration just do:
netsh –c interface dump > nettest.txt
Later on this machine or on a different machine, you could import this configuration with:
netsh –f nettest.txt - There are a number of things you can do with netsh to troubleshoot and reset your TCP/IP network interface. Here are some examples:
- Reset all IP protocol stack configurations on your interface and send the output to a log file:
netsh int ipv4 reset myresetlog.txt - Install the TCP/IP protocol:
netsh int ipv4 install - UnInstall the TCP/IP protocol:
netsh int ipv4 uninstall
- Reset all IP protocol stack configurations on your interface and send the output to a log file:
- You can also configure the traditional Windows firewall. Here are some examples:
- Show all firewall rules:
netsh advfirewall firewall show rule name=all - Delete an inbound advanced firewall rule for port 21:
netsh advfirewall firewall delete name rule name=all protocol=tcp localport=21 - Export Windows Advanced Firewall settings:
netsh advfirewall export “c:\myfirewall.wfw” - Perhaps the most common command you might use is the command to enable or disable your Windows firewall, like this:
netsh firewall set opmode disable ornetsh firewall set opmode enable
- Show all firewall rules:
- You can now configure wireless networking context settings using netsh in Windows Server 2008 and Windows Vista/7. Here are some examples:
- Connect to an already defined wireless network:
netsh wlan connect ssid=”mySSID” name=”WLAN-Profil1” - Show your current wireless settings:
netsh wlan show settings - Add an already exported wireless network profile:
netsh wlan add profile filename=”Wireless Network Connection-BOW.xml”
- Connect to an already defined wireless network:
If any of the commands above are successful, you should get a response of “Ok.”
If you would like to see some Netsh command used for IPv6, check out this article.
I hope you find this article and its content helpful.
If you would like to help support the continued development of independent networking, broadband, Wi-Fi, VoIP, and packet analysis content, please consider joining our Patreon community where you will gain access to exclusive technical resources, downloadable labs and PCAPs, bonus course content, troubleshooting guides, and additional member-only material. Comments and technical discussion are always welcomed at our Patreon community or on our Discord server. You can also support our work by simply buying us a coffee — every contribution helps us continue creating practical, real-world network science education for professionals and enthusiasts alike.