

In my prior article on getting started with nmap, I showed you how to get started with this superb network scanner. In that article we did basic scans to locate what hosts were on a given network and display what services were running on those hosts. In this article I am going to dig a little deeper, and scan a little deeper!
Remember you can look at all the nmap options with ‘nmap -help’. We certainly are not going to run through all of the options (there are so many). But in this article I have a look at some fun ones to do a deeper dive.
Before we go any further, let’s see how nmap works. Nmap has host discovery elements built into it. These include:
- ICMP Echo Request or pings – this would work as any normal ping request would work.
- TCP SYN to port 443 – often called a SYN ping – basically sending out a request to start a session without ever completing the request. This works because in order to respond normal requests, systems must be ‘listening’ on this port. They may be configured to ignore pings, but in some cases they cannot ignore this ‘valid’ request.
- TCP ACK to port 80 – often called an ACK scan – this is tricky because it is not normal, and may trick the TCP protocol in the target to send back a TCP Reset.
- ICMP timestamp request – this is also tricky as it is really checking into the ICMP protocol operating in the IP layer.
Now all of those can be done on a local network or on a remote network because they are Layer 3 and above.
If you are on a local network, nmap can further use:
- ARP scan for IPv4 networks
- ICMPv6 Neighbor Solicitation/Discovery for IPv6 networks
When nmap performs a basic scan, it reports whether a port is Open or Closed or Filtered. More advanced scanning may show whether ports are unfiltered and nmap attempts to explore the port statuses. But I am getting ahead of myself.
*** A WORD OF CAUTION ***
I said this in the prior article, and it is worth repeating. Scanning is considered by many as a malicious activity. Always make sure you have permission to scan a network and the devices on that network. There are therefore two types of scans:
- Those on your Local Network – for this you give yourself permission
- Those on a Remote Network – this is a danger zone. The good people at nmap have provided a site called scanme.nmap.org which they encourage us while learning nmap to use. So let’s do that. We will start with what nmap calls a normal and basic ‘ping scan’:
nmap -sn scanme.nmap.org
- -sn means Ping Scan
Now let’s do a quick scan:
nmap -T3 -F scanme.nmap.org
- -T is a timing template (0-5) where 0 is slow and 5 is fast, we chose 3 which is medium speed
- -F is fast mode for the port scan, it basically does not scan every port to speed things up
Now let’s do a quick scan:
nmap -sV -T4 --O F --version-light scanme.nmap.org
I hope you had some fun with that.
Great – but I suggest you start on our local network (remember if you do not have permission, skip to where we scan the site mentioned.
Sounds like a blast, so let’s get started. First a little video:
You can use nmap to get a nice report of what interfaces you have running on your system:
nmap --iflist
This will show interfaces, their addresses, the type of interface, status, MTU, and MAC. You will also get a report of any routes available. So nice.
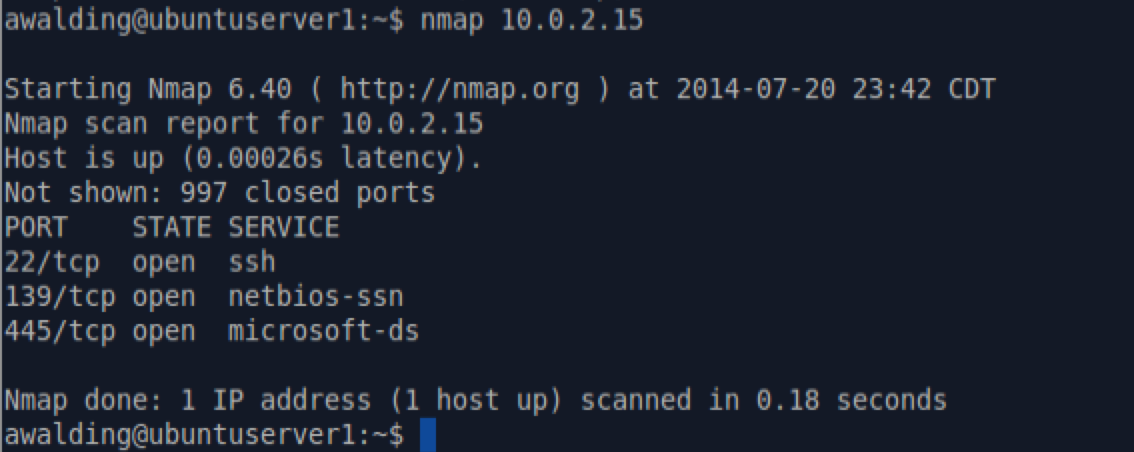
Moving on. In my case I have a system at the following IP: 10.0.2.15. Let’s do a normal scan first:
Now let’s do an AGGRESSIVE scan!! This is done with the ‘-A’ command:

Wow!
Look at all the information we learned via nmap: the operating system, the computer name, even the source SSH key, and much more.
Let me explain. The -A command stands for aggressive scan, and it combines several other specific scan options:
- -O [this is operating system detection]
- -sC [for speed and verbosity]
- -traceroute [performs a traceroute to the host]
Depending on the device being scanned you may get more or less fingerprint and factual information.
As we discussed in the first tip, nmap starts by using Ping and ICMP to discover and scan devices on the network. If some devices are filtering ICMP you may not see them, and so a cool way to bypass the ICMP filters is to use a TCP scan. TCP or Transmission Control Protocol uses a three way handshake (SYN, SYN-ACK, ACK) to establish a session. So what nmap does is it fakes this out the host by sending a SYN packet to the IP address and see if it responds! Clever. To do this use the -PS option. Simply type:
nmap -PS 192.168.1.0/24
The default here is to use port 80. But if you want to change that let’s say to ports 21,22, and 80, you can change the command as follows:
nmap -PS21,22,80 192.168.1.0/24
You are not going to get much difference in output, but you may discover some additional hosts on the network.
If you want to not use SYN packets but ACK packets, just change the command to use a -PA instead:
nmap -PA 192.168.1.0/24
There are lots of options with different discovery options in nmap and the -P command. Check out the man page for deeper information.
One of my favorite protocols to use for discovery is ARP (Address Resolutioon Protocol). Since this protocol MUST be supported in Ethernets we can leverage it to discover systems. To do this you will have to be root, so the command is preceded with ‘sudo’, and you will be prompted for your password:
sudo nmap -PR 192.168.1.0/24
You can thee that the ‘-PR’ (R is the ARP protocol) has been used. The output will be all the systems on the Ethernet that answer to that IP address range. You cannot use thisthis to scan hosts that are not on your local network. This one is one of my favorites.
A slightly different scan approach uses the ‘-s’ command instead of the ‘-P’ command. With the ‘-s’ you may need root privileges so just in case I show them with the sudo command. Here are a few I like:
- sudo nmap -sS {IP address} [this is for a TCP SYN scan]
- sudo nmap -sA {IP address} [this is for a TCP ACK scan]
- sudo nmap -sF {IP address} [this is for a TCP FIN scan]
- sudo nmap -sT {IP address} [this is for a TCP connect scan, less stealthy]
- sudo nmap -n {Ip address} [this is for a TCP null scan]
- sudo nmap -sU {IP address} [this is for a UDP scan]
- sudo nmap -sX {IP address} [this is for a Xmas with Urgent, FIN, and PSH bits set!]
Another cool one is to look at the Layer 3 IP and scan those protocols using the ‘-sO’ (not zero):
sudo nmap -sO {IP address} [this is for a IP scan and will check icmp, igmp, etc.]
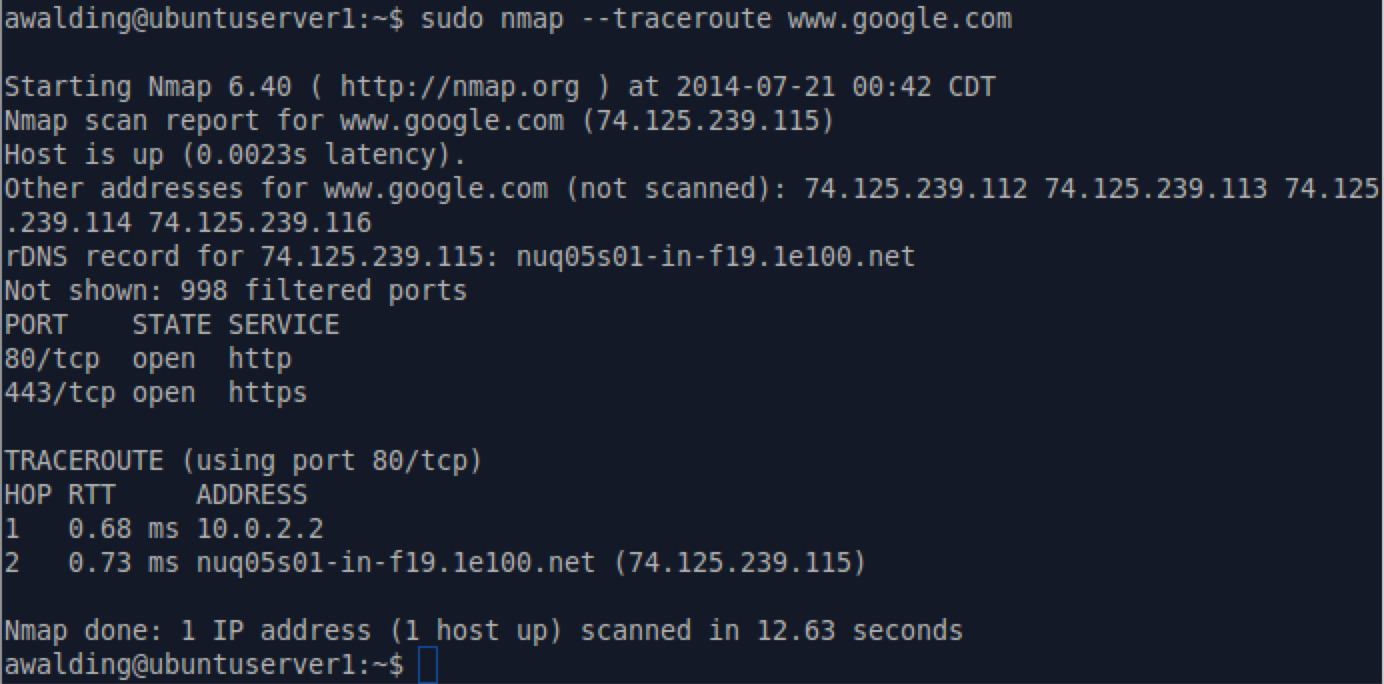
You can also use nmap to do detailed traceroutes with the ‘-traceroute’ option:
sudo nmap --traceroute {ip adress or URL}
Here is an example (sorry Google):
OK – what if you want to get a complete, quick and dirty scan of a network? My favorite is this command:
nmap -sL 192.168.1.0/24
It will list out every address scanned and what, if any, devices it found on that network! And it does this very quickly. Try it. You may have to add sudo in front, but I usually do not.
You can control how often the the scan occurs with the -T command. The example below is going to scan every 5 seconds:
nmap -T10 192.168.1.0/24
What if ytou do not want to reveal what source address is doing the scan? The answer is to use the -D command – the decoy command. The address after the -D (there can be more than one) is the source that will be used:
nmap -sO 192.168.1.0/24 -D 192.168.1.254 192.168.1.253
If you want verbose out put, use the -v command:
nmap -v 192.168.1.0/24
What about IPv6? Well start here assuming IPv6 is working on the machine ytou are running nmap on:
nmap -6 2001:db8::/64
I would always encourage you to do these scans on a network that you control or have permission to do these scans, and to use Wireshark to watch these processes so you can observe the behavior of nmap and the network devices being scanned.
As I said, there are many more options. We hope this helps.
I hope you find this article and its content helpful.
If you would like to help support the continued development of independent networking, broadband, Wi-Fi, VoIP, and packet analysis content, please consider joining our Patreon community where you will gain access to exclusive technical resources, downloadable labs and PCAPs, bonus course content, troubleshooting guides, and additional member-only material. Comments and technical discussion are always welcomed at our Patreon community or on our Discord server. You can also support our work by simply buying us a coffee — every contribution helps us continue creating practical, real-world network science education for professionals and enthusiasts alike.