
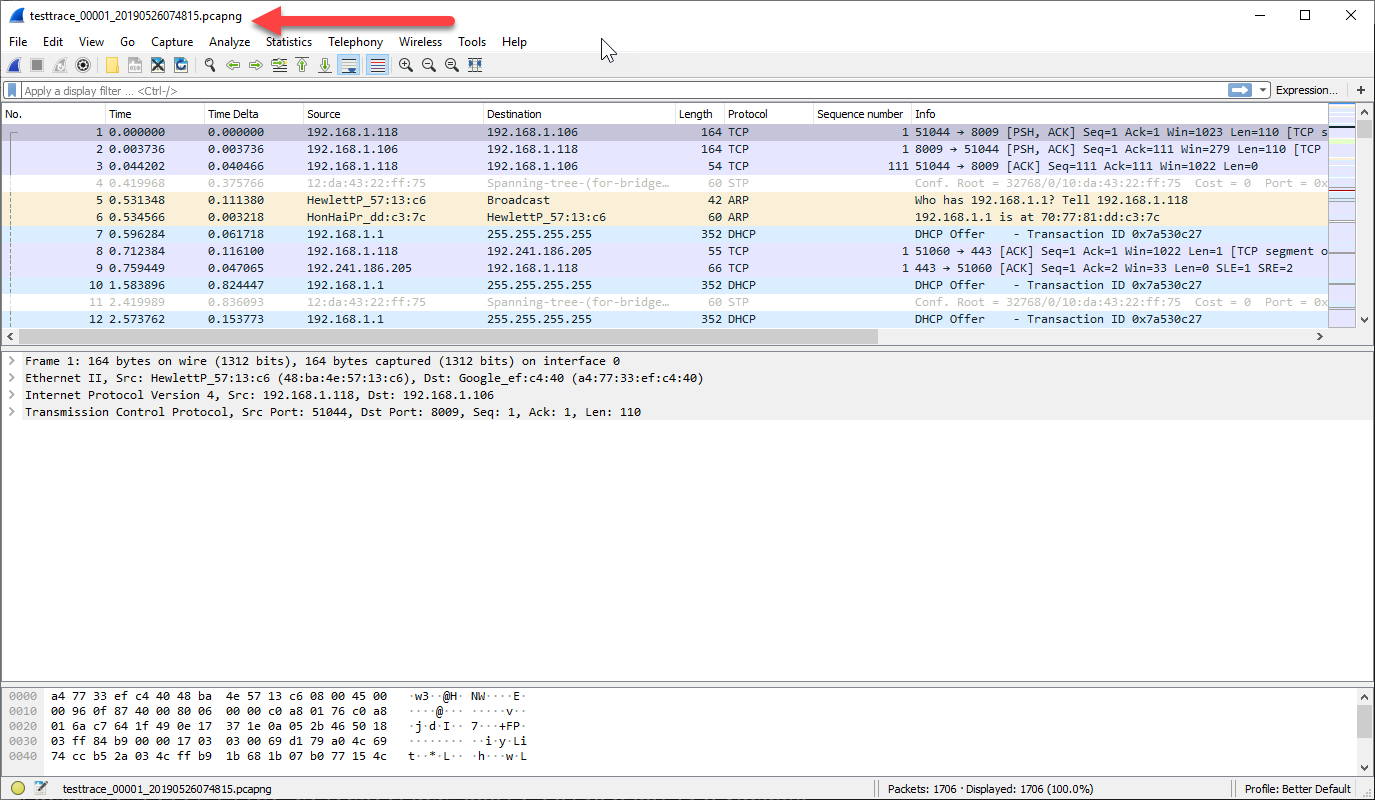
Most users of Wireshark and T-Shark are completely unaware that neither of these programs alone actually captures packets! So wireshark people (and others), let’s dig in.
| Check out these great references as well: |
| Our custom profiles repository for Wireshark |
| Our Udemy course on Wireshark |
| Our Udemy course on Wireless Packet capture |
Both programs use a third program that is distributed with Wireshark and was installed on your (Linux, MAC or Windows) system called ‘dumpcap’ to do the packet capturing.
Since dumpcap is a program itself, you can use it natively to capture packets and “dump” them into a file. The dumpcap program is updated along with Wireshark updates.
Why would you use dumpcap? Here is an example. Some folks have experienced problems with memory issues during large captures on fast interfaces. Using dumpcap natively may be a way around that problem. So some people simply always use dumpcap! (I have noticed that many of those who do are prior tcpdump users!)
I thought I would provide a brief dumpcap usage article so that you could use the tool natively on your machine.
There are two steps to using dumpcap natively:
- Select the network interface you wish to capture
- Specify the filename you wish to use for the capture
Selecting the Network Interface
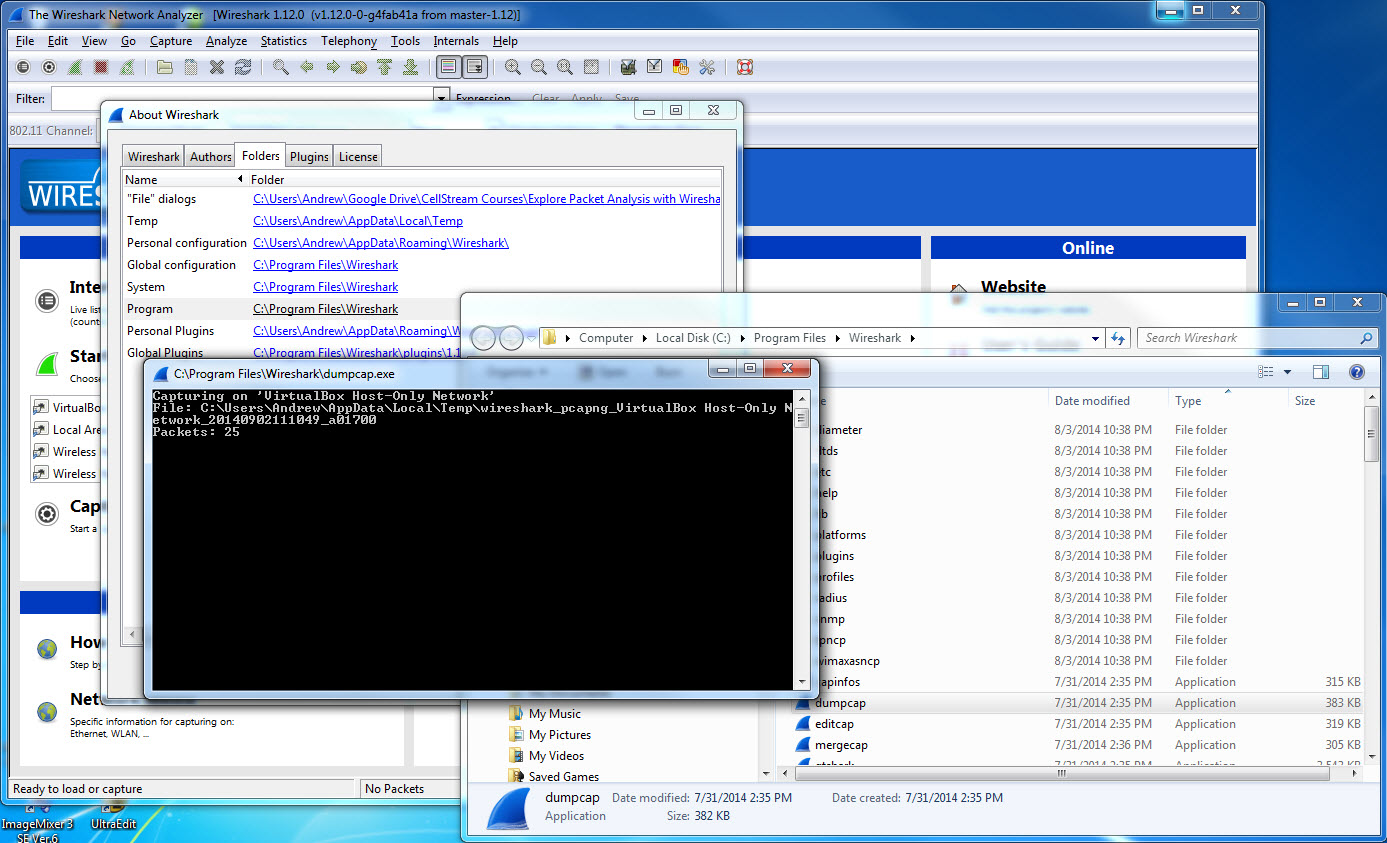
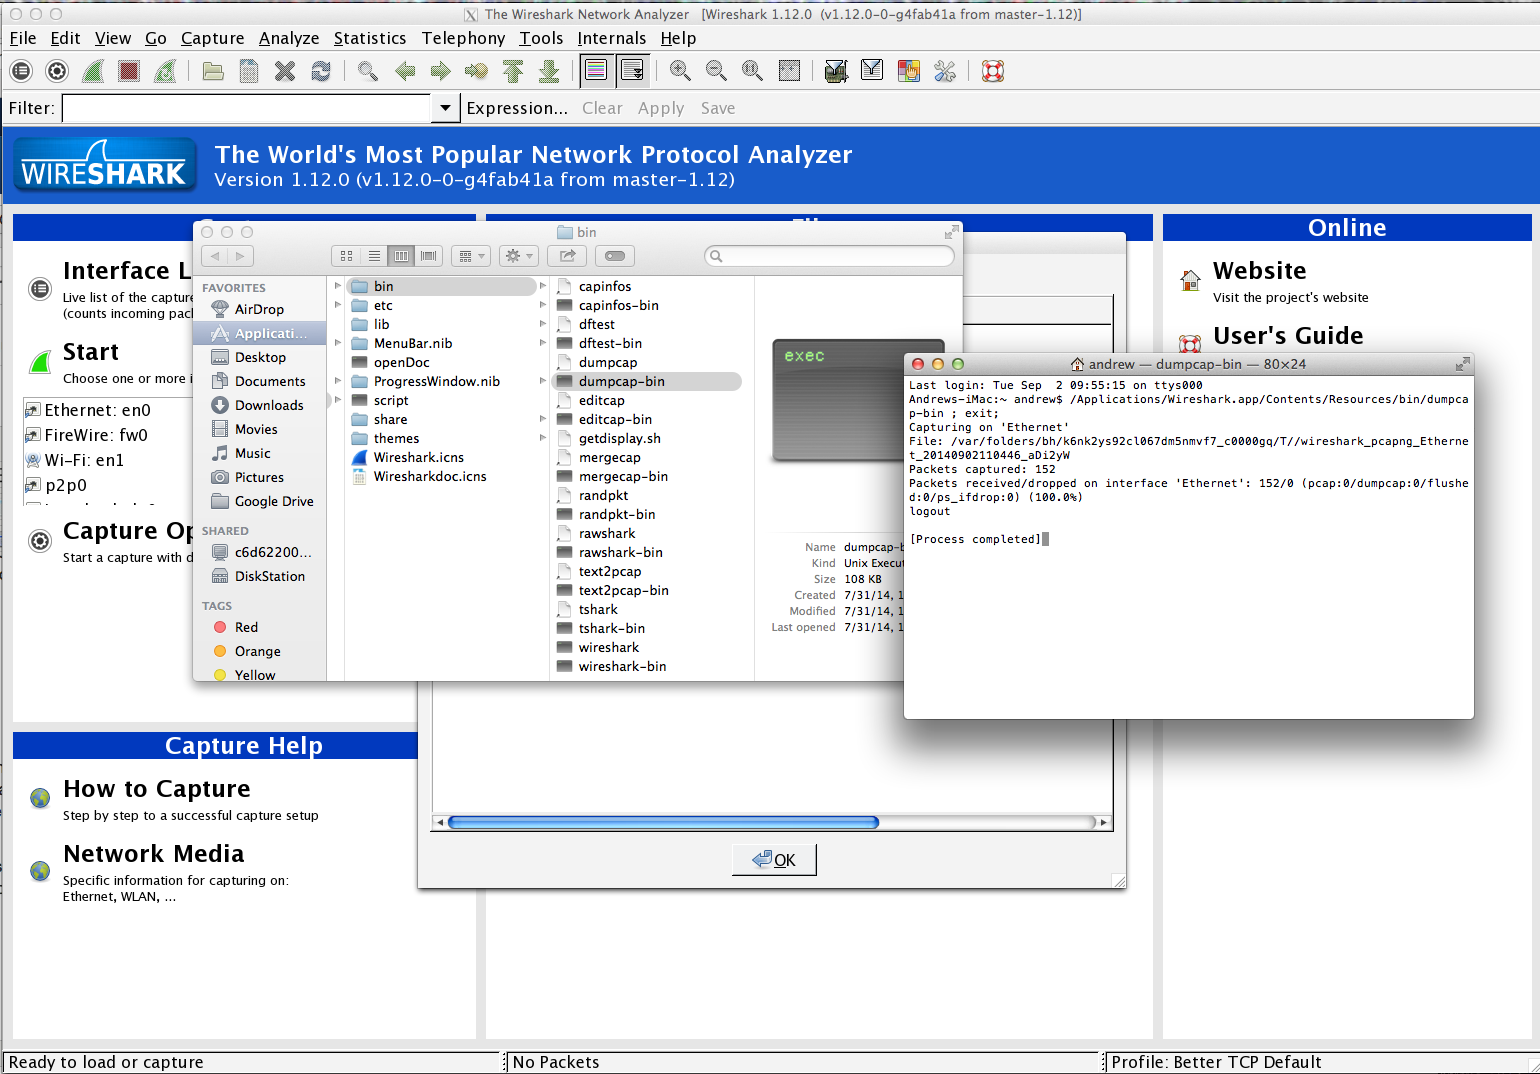
The hard way: You can begin by opening a terminal window, depending on what OS you run. On Windows: Start> Run> cmd. On a MAC: Launchpad> Other> Terminal. At this point you will most likely you will have to navigate to the directory where the Wireshark executables were installed. To get the directory path on your machine regardless of whether it is a MAC or Windows or Linux, open Wireshark, select Help> About Wireshark> then select the Folders Tab. From there you will see the path in the Programs item. Once in the proper directory, in Windows run dumpcap. On a MAC run the dumpcap.bin.
The easy way: Open Wireshark, select Help> About Wireshark> then select the Folders Tab. From there you will see the path in the Programs item. Double click the directory path to open up your file navigator and then click on dumpcap if you are Windows, or dumpcap-bin if you are a MAC.
Here is the (now old) Windows version:
Here is the (now old) MAC version:
Here is the latest version on Windows:

In either case, notice that in both versions, the capture started immediately. To stop capturing packets, simply type <control-C>.
Great! But, we have a couple of problems. What if dumpcap did not start capturing on the appropriate interface? Also, where can we specify the filename we want dumpcap to use?
So let’s see how we can select the network interface. In a terminal window, enter the following command:
dumpcap -D
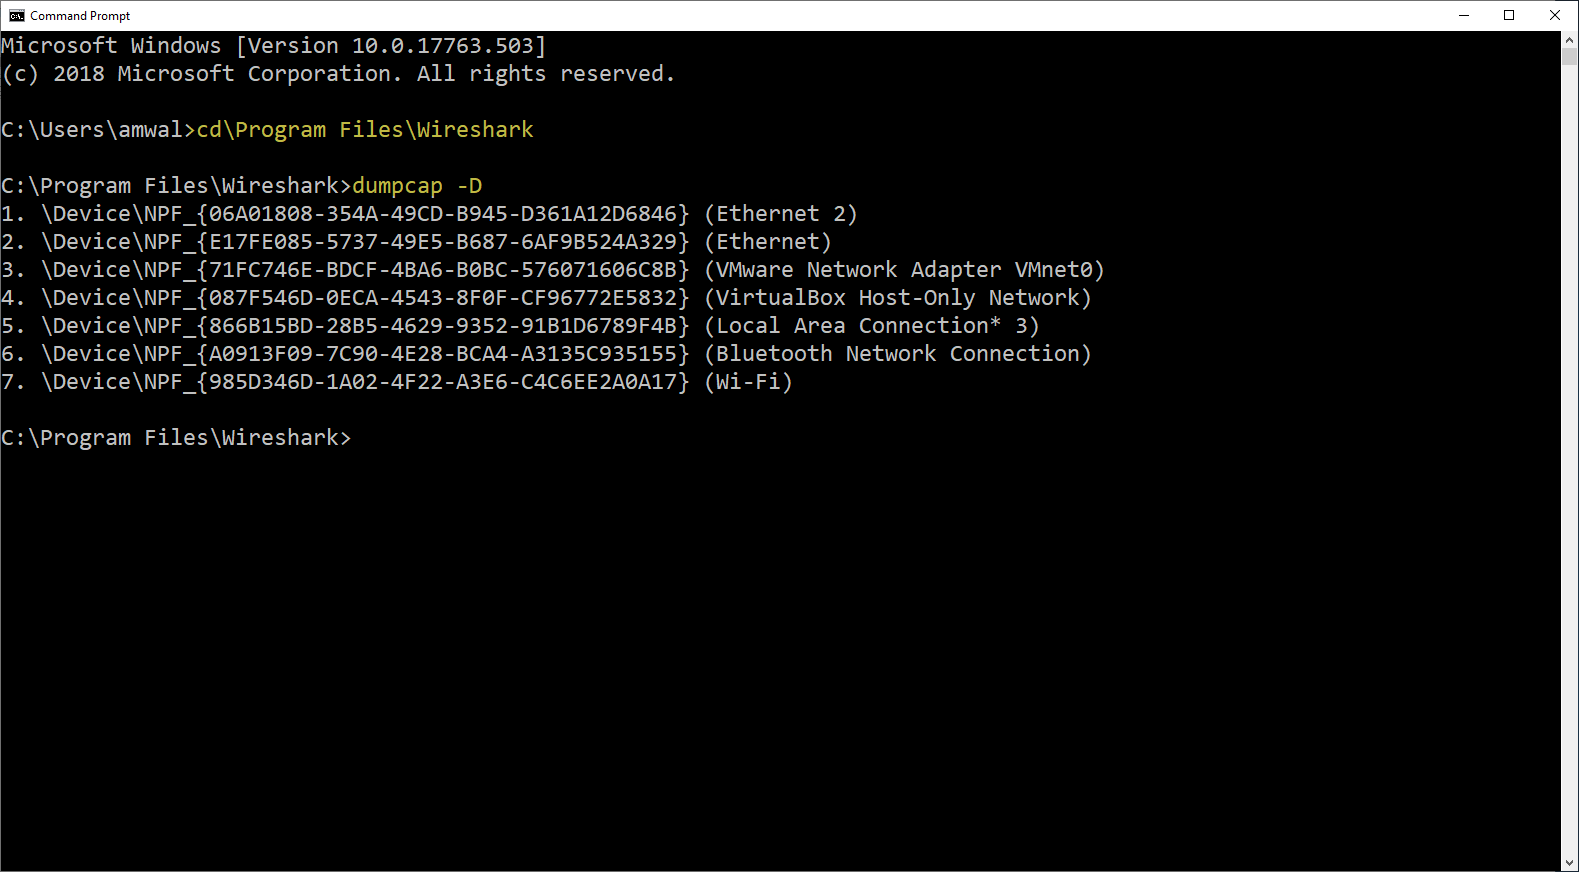
You can see that there are 7 interfaces on my system. Usually the default is to select the first interface in the list. So if I wanted to capture on my Wi-Fi Network connection I would enter the following command:
dumpcap -i 7
This means capture on interface #7 in the list:
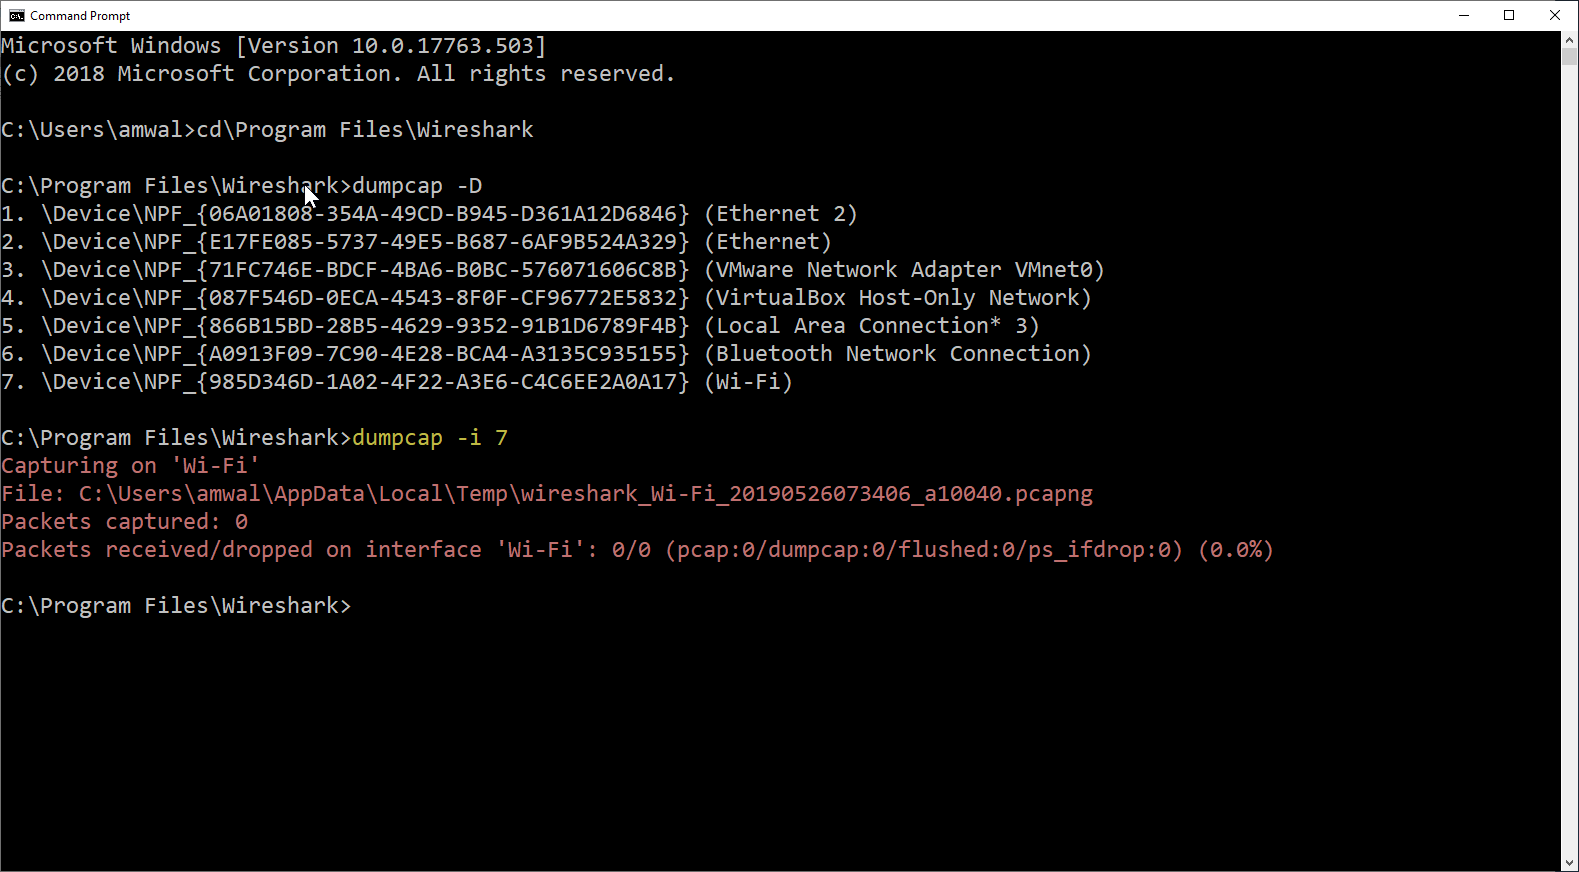
Note: My Wi-Fi was not connected, so I received no packets.
Great!
Specifying the File to Save the Capture To
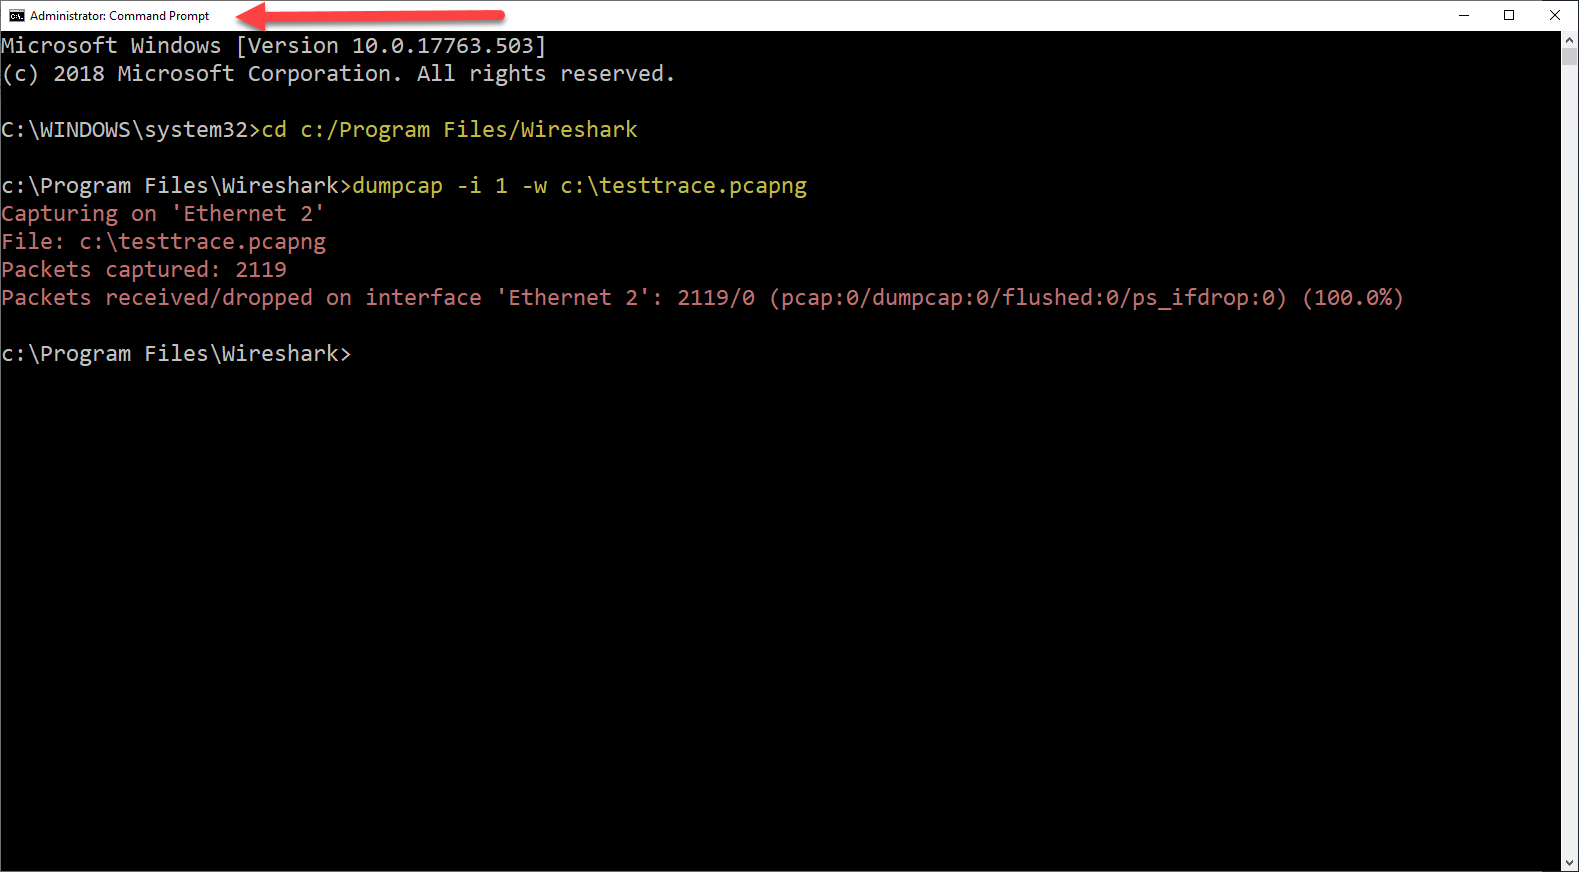
The next thing we need to know how to do is to specify exactly what file dumpcap will use to store the captured data. To do this we will use the ‘-w’ command and specify the path and file name we want dumpcap to write the captured data to. Here is an example combining the specification of the interface with the write command:
dumpcap -i 1 -w c:\testtrace.pcapng
This will create a capture file using the latest .pcapng format to the C:\ drive root directory.
Note: If you cannot get the command to execute due to insufficient permission, try running the Windows Command Line as Administrator, or on MAC/Linux use the ‘sudo’ command.
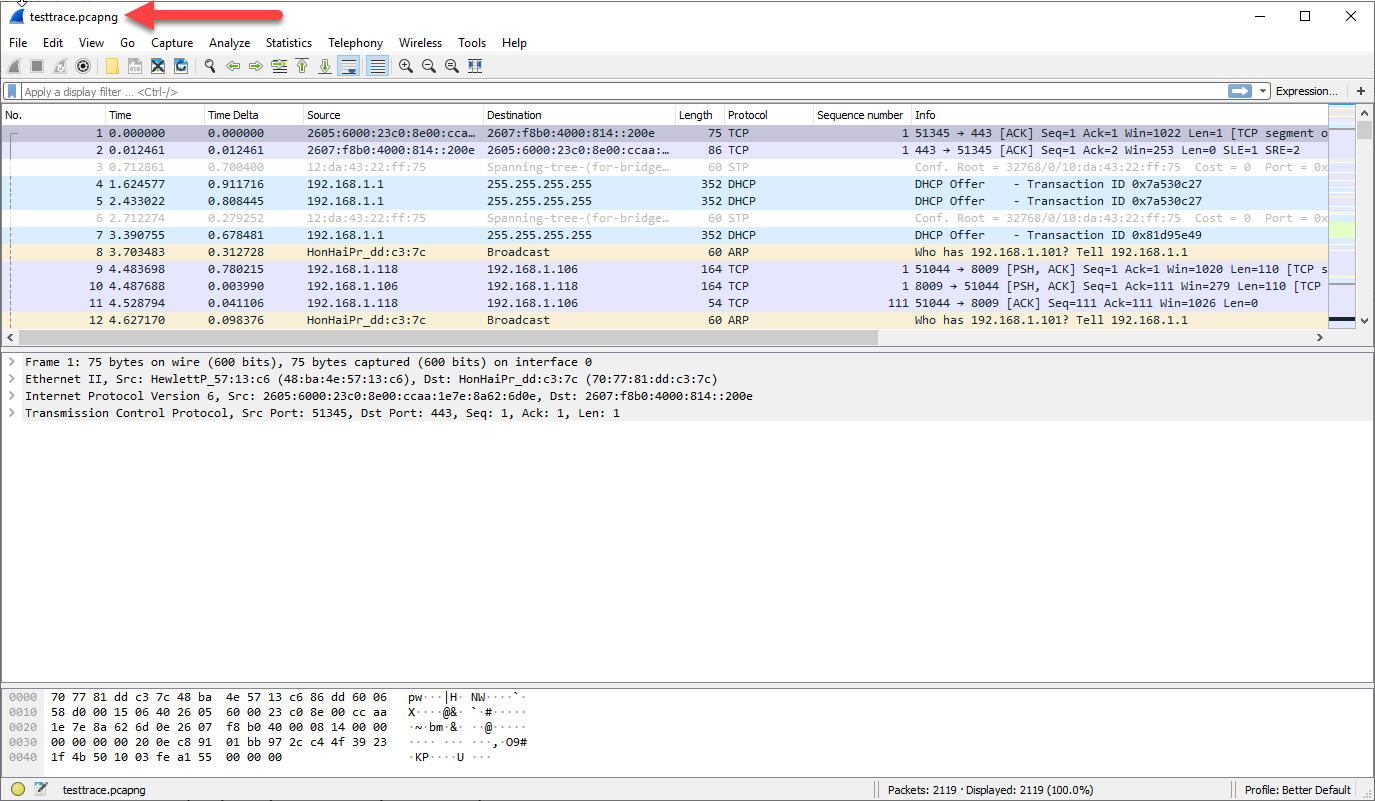
Great. So now if we look at the root directory in my example:

We see the testtrace.pcapng file! This can then be openned in the Wireshark GUI:
Using dumpcap to capture in a “Ring Buffer”
An important option that you may want to consider using when using dumpcap natively is to avoid running out of memory or disk space. This can be added to your dumpcap command using the ‘-b’ parameter:
dumpcap -i 2 -w c:\testtrace.pcapng -b filesize:65535
In this example we are limiting the file to 64Mbits, but you may choose to do 128Mbits as an alternative. What dumpcap will do is limit the size of each file to that size and it will automatically create multiple files appending year, month, day, hour, minumte, and second to the filename, so that each file created is unique.
In this example, I have limited the filesize to 1024 bytes (way to small) to illustrate:
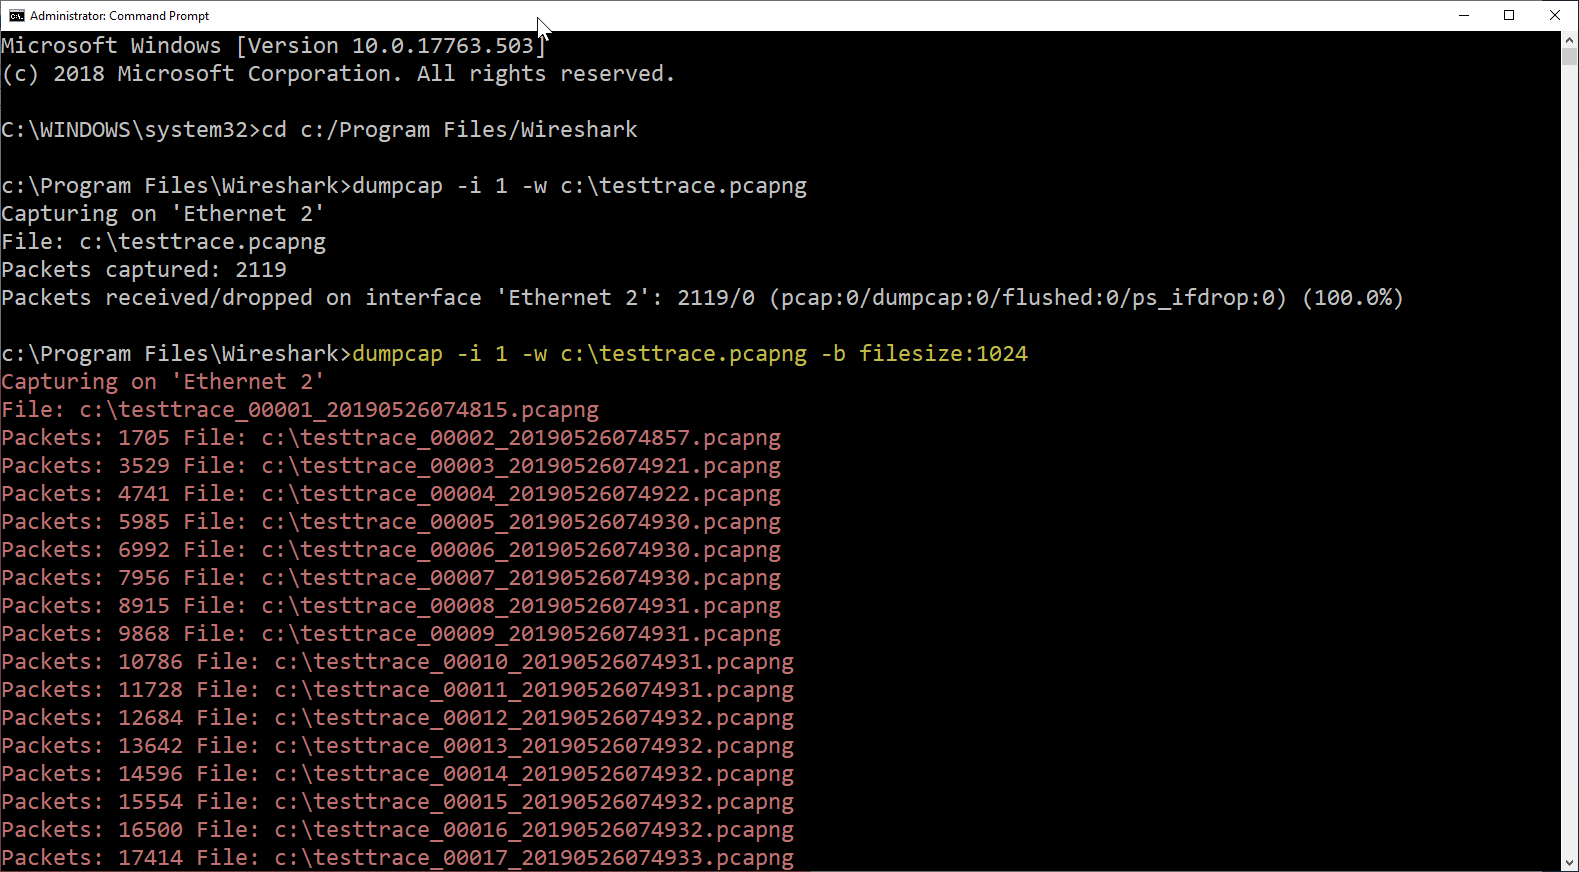
You can see that dumpcap has started to capture into multiple files using ‘testtrace’ as the filename seed.
Now here is another cool thing that Wireshark GUI does. Let’s open one of the testtrace files:
I can now use File> File Set> List Files or Next File to navigate through the multiple files. This makes managing this file list much easier.
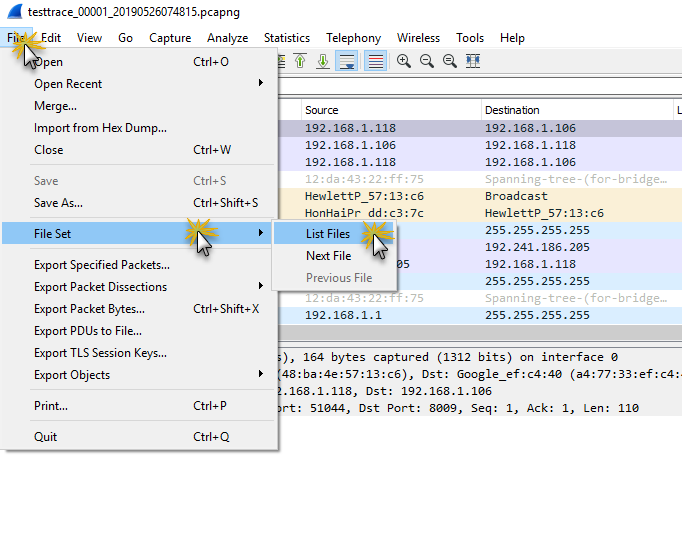
You can then use the merging tools in Wireshark to merge the files back together.
New Stuff in Wireshark 3.x
Since Wireshark 3.x, there have been a couple of enhancements to dumpcap. The -a parameter defines an autostop condition and the -b parameter calls the ring buffer feature. Although dumpcap has always supported these parameters, it didn’t support the packets option. Previously, you could only define autostop or ring buffer conditions based on duration, file size, or number of files. So let’s look at an example:
dumpcap -i 7 -a packets:250 -b packets:50 -w c:\testtrace2.pcapng
The command above is read as:
- -i 7 capture on interface number 7
- -a packets:250 stop after capturing a total of 250 packets
- -b packets:50 capture 50 packets per file in a ring buffer set of files
- -w c:\testtrace2.pcapng write to a file set that begins with testtrace2
Here is what my system did (I preceded the command above with the dumpacp -D command:
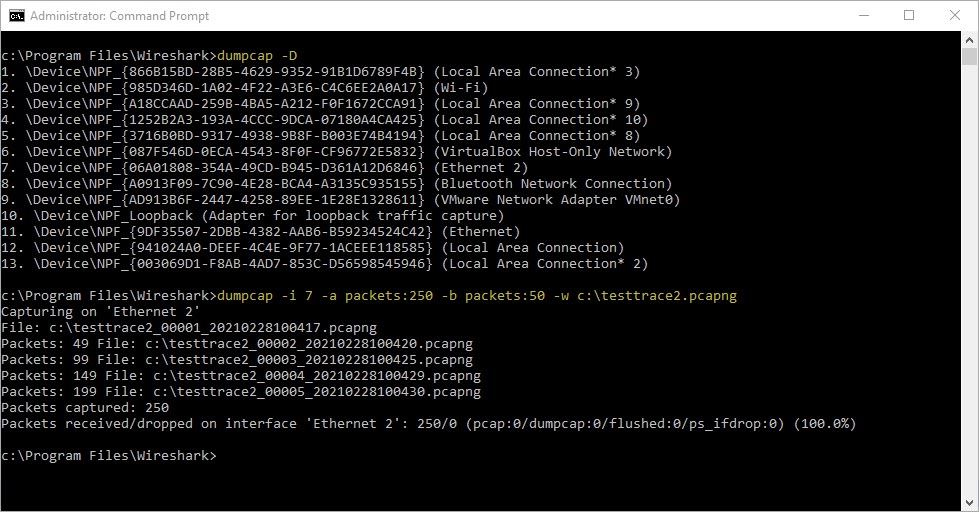
You can see this works just like a ring buffer without all the overhead of running the Wireshark GUI.
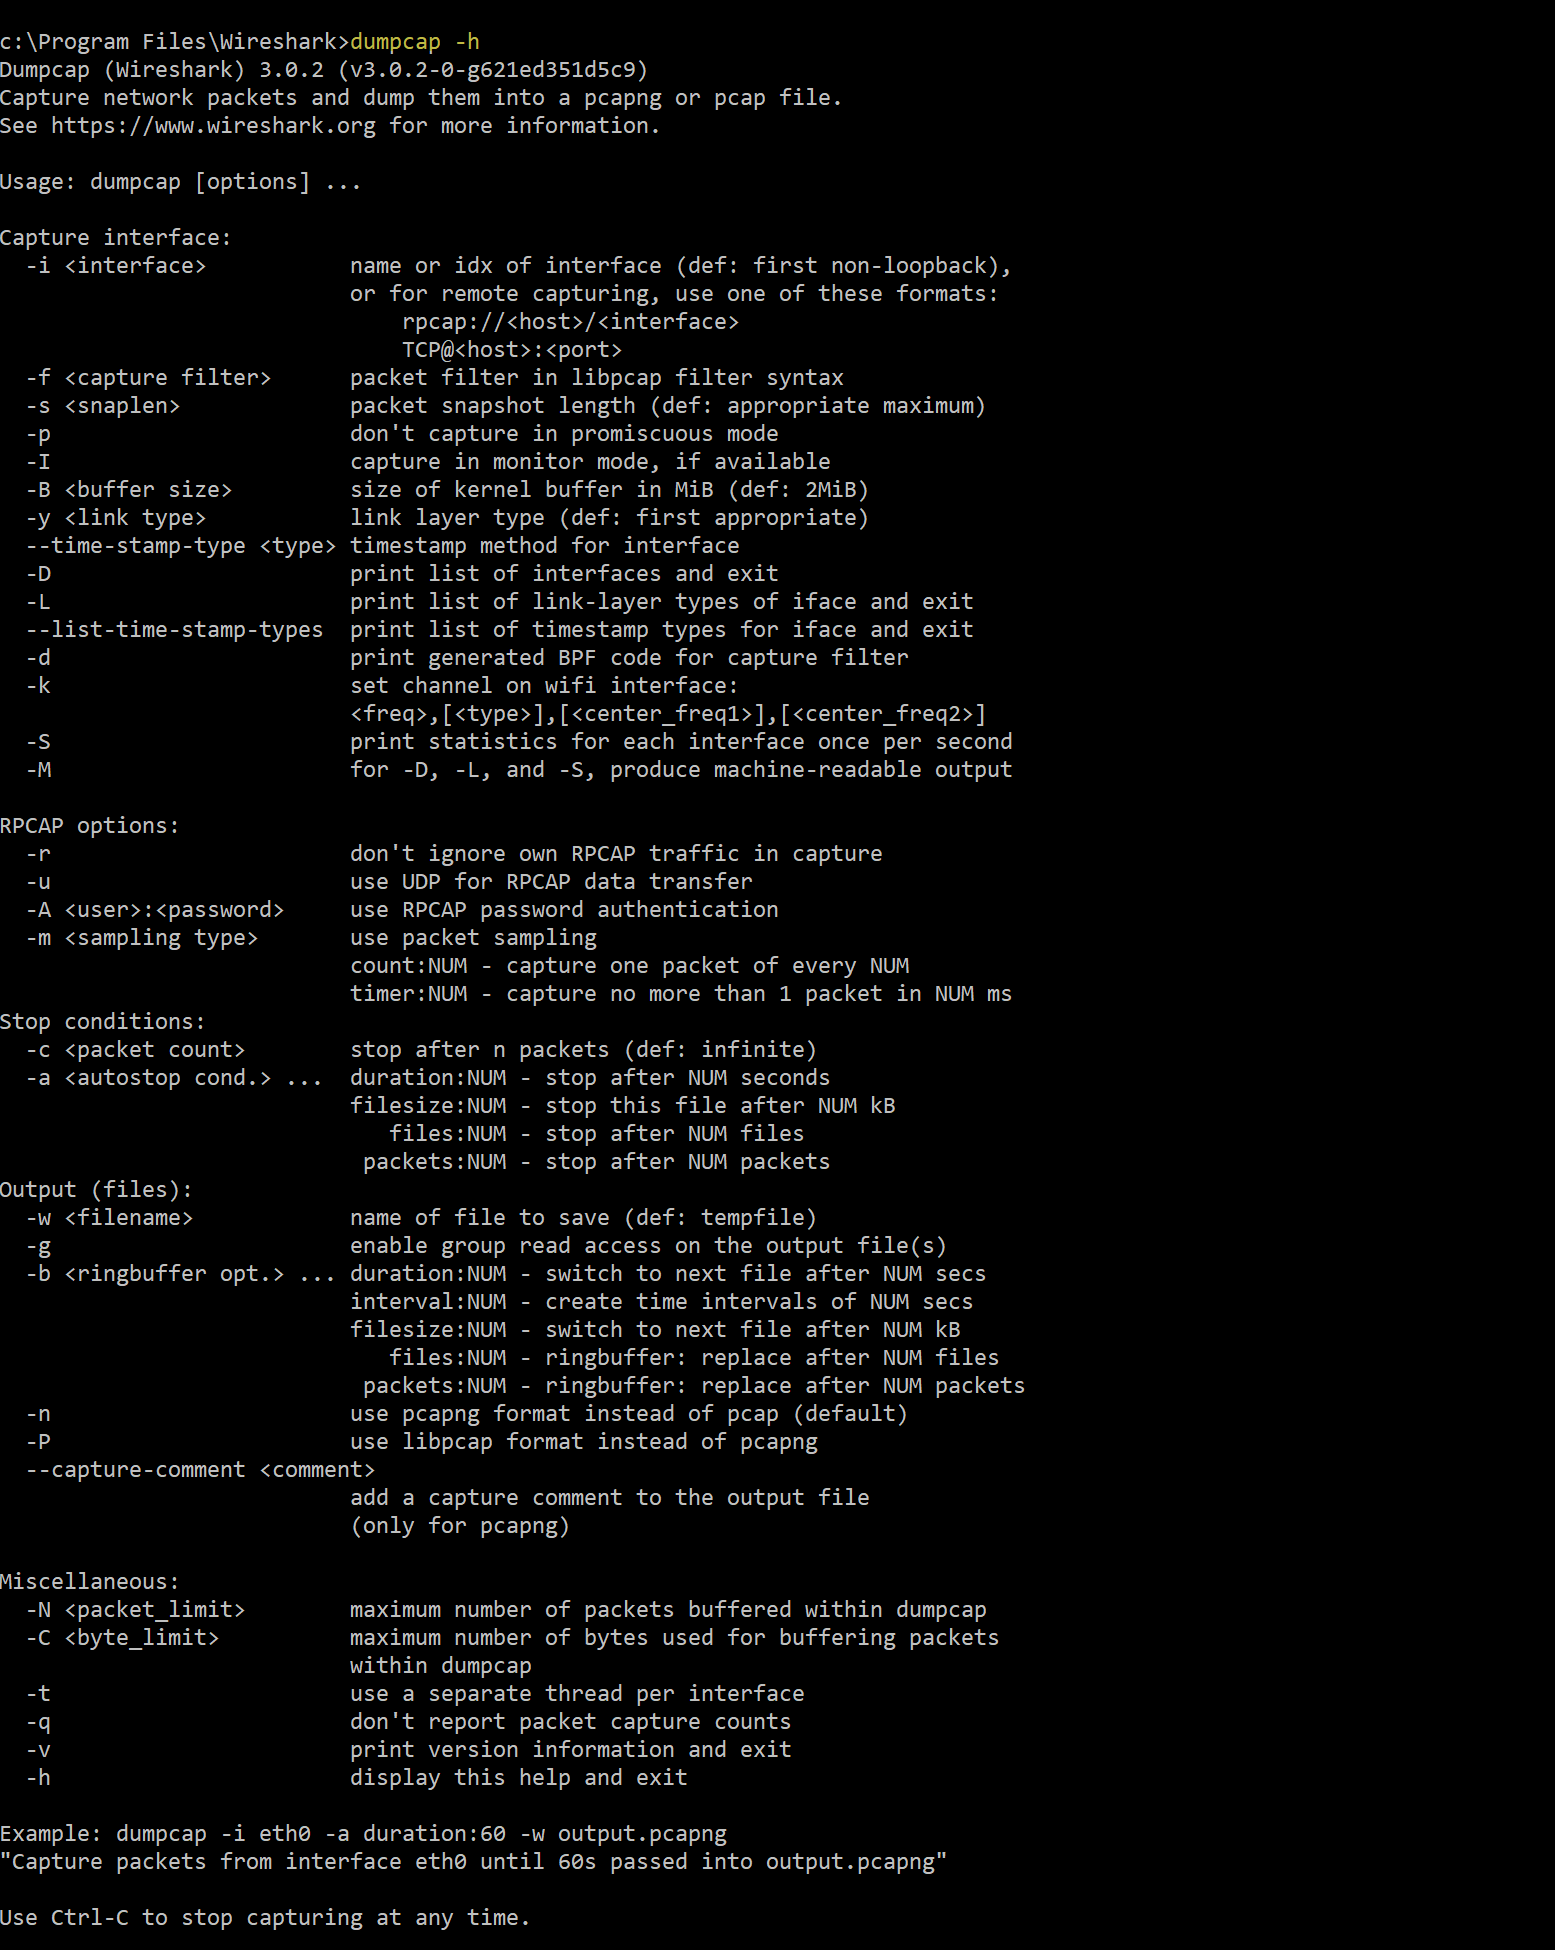
That should be more than enough to get you started with dumpcap natively. Want to play with some of the other commands? Here is the output:
dumpcap -h
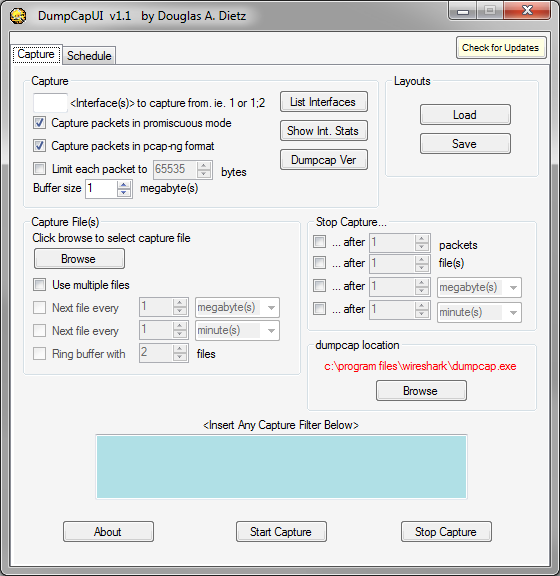
One final tidbit for Windows users. If you click here, you can download a GUI front end for dumpcap! Here is what it looks like:
We hope that helps with understanding dumpcap.
Comments are welcomed below from registered users. You can also leave comments at our Discord server.
If you would like to see more content and articles like this, please support us by clicking the patron link where you will receive free bonus access to courses and more, or simply buying us a cup of coffee!