

Check out these great references as well: |
|---|
| Our custom profiles repository for Wireshark |
| Our Udemy course on Wireshark |
| Our Udemy course on Wireless Packet capture |
As most folks who use Wireshark know, Wireshark comes with a collection of command line or terminal based utilities. Here is a view of those utilities (I got to this by (in Windows) clicking Help> About Wireshark> Folders Tab> and then selecting the hyperlink for the Program Files). My File Manager openned and I see the applications installed:
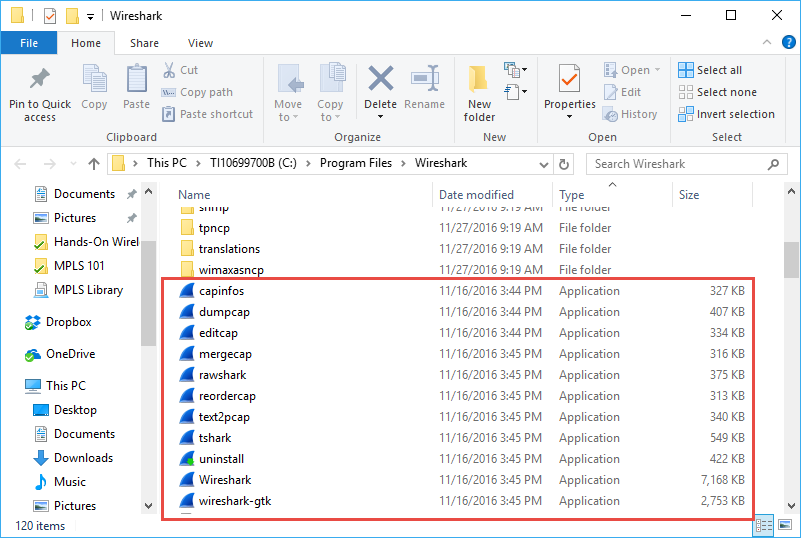
You can see ‘tshark’ is one of those programs.
T-Shark is essentially the terminal or command line version of Wireshark. tshark can do pretty much everything the Wireshark GUI can do, without the GUI of course. For a separate article on some of the the things you can do with tshark, click here.
Running tshark to do some tasks can be less CPU intensive that running the GUI. So if you wanted to perform a capture over an extended amount of time with the Ring Buffer feature, and maximize the chances of not missing packets due to CPU utilization in the GUI, using T-Shark is an excellent option.
Here is an example of using tshark to capture using a ring buffer:
tshark -i 5 -b files:20 -b filesize:60000 -w c:\mycaptures\tsharkring.pcap
Now let’s break this command down so we understand it.
tshark = this is the program name
-i # = the dash or tack i means interface, and then the number after it is the interface you wish to capture on.
-b = Ring Buffer (note you have to put -b in front of each ring buffer setting)
files:# = this is the number of files in your ring buffer.
filesize:# = the maximum size in bytes that you want each of these files to be (the example shown is 60 MBytes.
-w filename = means write the capture results to the file path and name provided.
So let’s try one and see how this works.
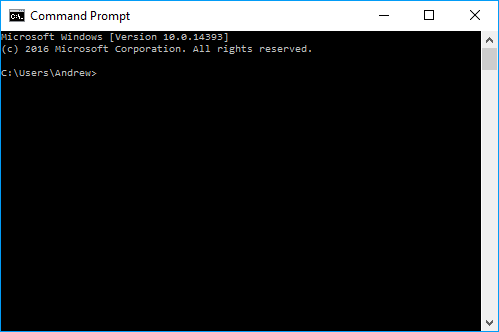
I will start by opening a command line or terminal window: Start> Run> cmd, or Start> then just type cmd!
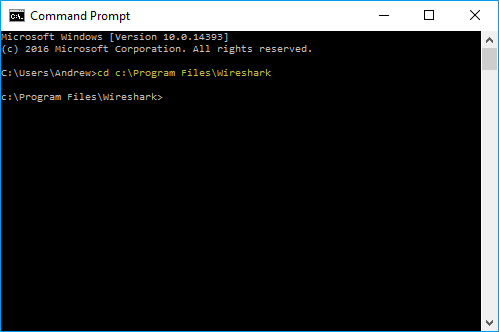
Now change to the Wireshark programs directory with ‘cd c:\Program Files\Wireshark’:
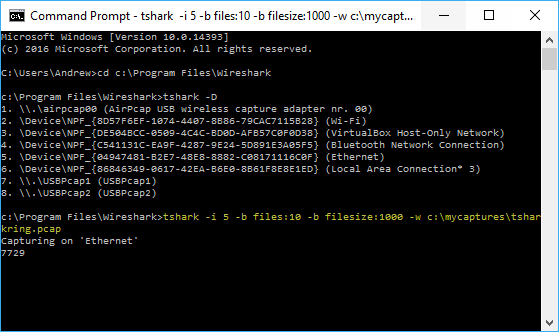
Perfect, now for most of you, you will probably want to know what interfaces exist on your system so you can determine the interface number. Do this with the ‘tshark -D’ command (notice I also made my terminal window a little wider to avoid line wrap):
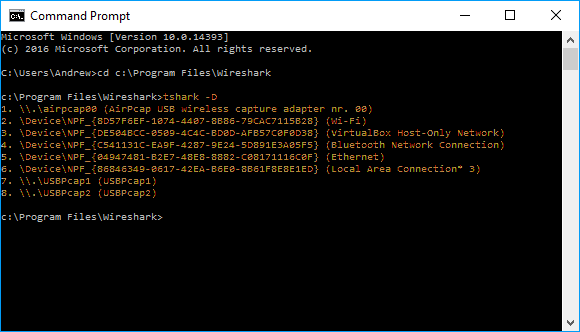
You can see I have several interfaces (as will you also). I am using my Ethernet, so that is interface number 5.
Now I can enter my tshark ring buffer command (notice I used less number of files and smaller sizes for my example):
If you typed the command correctly, you will see the ‘Capturing on’ and then on the next line you will see the packet counter incrementing.
Now, if you look in the directory path that you told tshark you wanted to write the files to, you will see something like this:
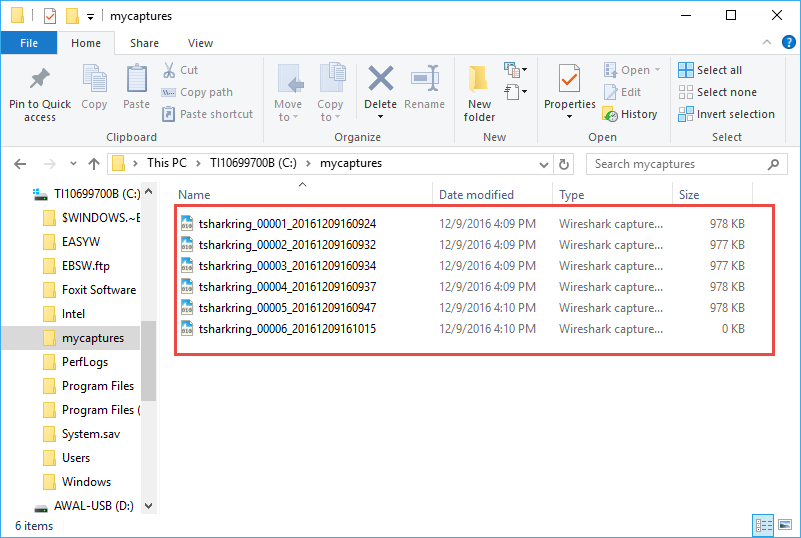
Note that like Wireshark, tshark increments the file name seed you specified and plugs in a timestamp to each file name. Since I asked for a new file every 1000 kilobytes, tshark started a new file around 978 bytes (as there was no more room for a full packet!).
In my example, I stopped the capture by typing CTRL-C in the terminal window:
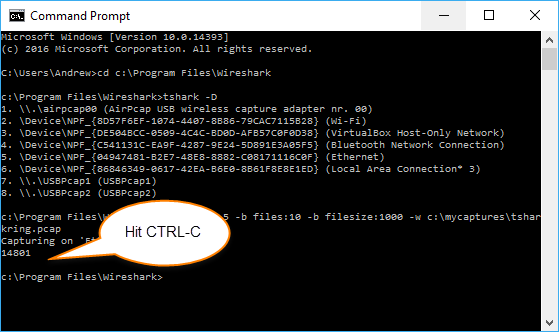
tshark stopped.
Now let’s see what is in the capture directory I specified:
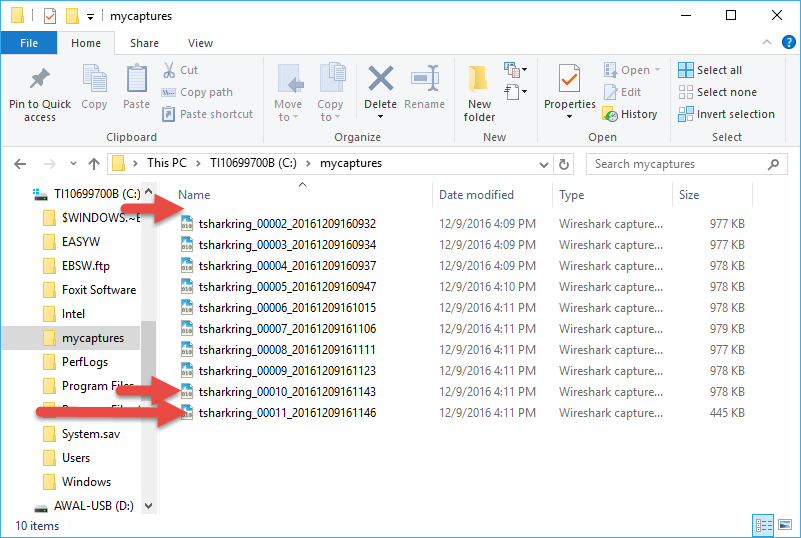
We see several things:
First, recall I wanted 10 files in the ring buffer.
Second, that there are a total of 10 files, which is what I wanted. Note that file #11 has essentially overwritten file #1 which is no longer there. This clearly illustrates the notion of the ring buffer.
I hope this helps you to understand how to use tshark and Ring Buffer functionality.
I should mention you can also use dumpcap as well:
dumpcap -i eth0 -b filesize:100000 -b files:10 -w capture.pcapng
Meaning:
- Capture on
eth0 - Rotate every 100,000 KB (~100 MB)
- Maintain 10 files
- Automatically overwrite oldest
Or a time-based example:
dumpcap -i eth0 -b duration:300 -b files:20 -w capture.pcapng
- New file every 300 seconds (5 minutes)
- Keep 20 files
If I wanted to now analyze these packets I could merge them together into one bigger capture file and then dissect the merged results in the Wireshark GUI. The simplest way to merge is to open the oldest file first, then drag and drop them in order onto the Wireshark GUI screen.
I am often asked, what are the right “settings” for this ring buffer capture. My answer is always to experiment. Depending on the speed on the interfaces you are running and how full those interfaces are, compared to a reasonable “time window” that you can react to the failure and know you have the problem captured will be the tradeoff that you are aiming for. As a reference, the example above was me just web browsing to about four popular news site home pages.
Happy Packet Sniffing!
If you would like to help support the continued development of independent networking, broadband, Wi-Fi, VoIP, and packet analysis content, please consider joining our Patreon community where you will gain access to exclusive technical resources, downloadable labs and PCAPs, bonus course content, troubleshooting guides, and additional member-only material. Comments and technical discussion are always welcomed at our Patreon community or on our Discord server. You can also support our work by simply buying us a coffee — every contribution helps us continue creating practical, real-world network science education for professionals and enthusiasts alike.