

|
Check out these great references as well: |
| Our custom profiles repository for Wireshark |
| Our Udemy course on Wireshark |
| Our Udemy course on Wireless Packet capture |
We all know what a great tool Wireshark is. One of the features added to Wireshark is the ability to temporarily colorize an Ethernet, IP, TCP or UDP conversation. Some folks this this is great stuff, and wanted to know how to use it, so here goes.
You can view my video on this feature below:
OK – here is the process:
In the following screen shot, you can see I have a capture file open:

The default color rules are in place above, you can see that the Default Profile is being used.
If you closely, you will see that the fourth packet in the capture is an HTTP “get” for a Web Page. Let’s say that I am interested in this conversation, and I want to see the packets associated with this TCP conversation. There are several options, but one thing I could do is I could use Wireshark’s ability to apply a display filter to see the conversation.
Right click on the fourth packet, select Conversation Filter, then TCP:

This causes a Display filter: (ip.addr eq 192.168.6.19 and ip.addr eq 66.147.244.147) and (tcp.port eq 2714 and tcp.port eq 80) to be used, and the following display:
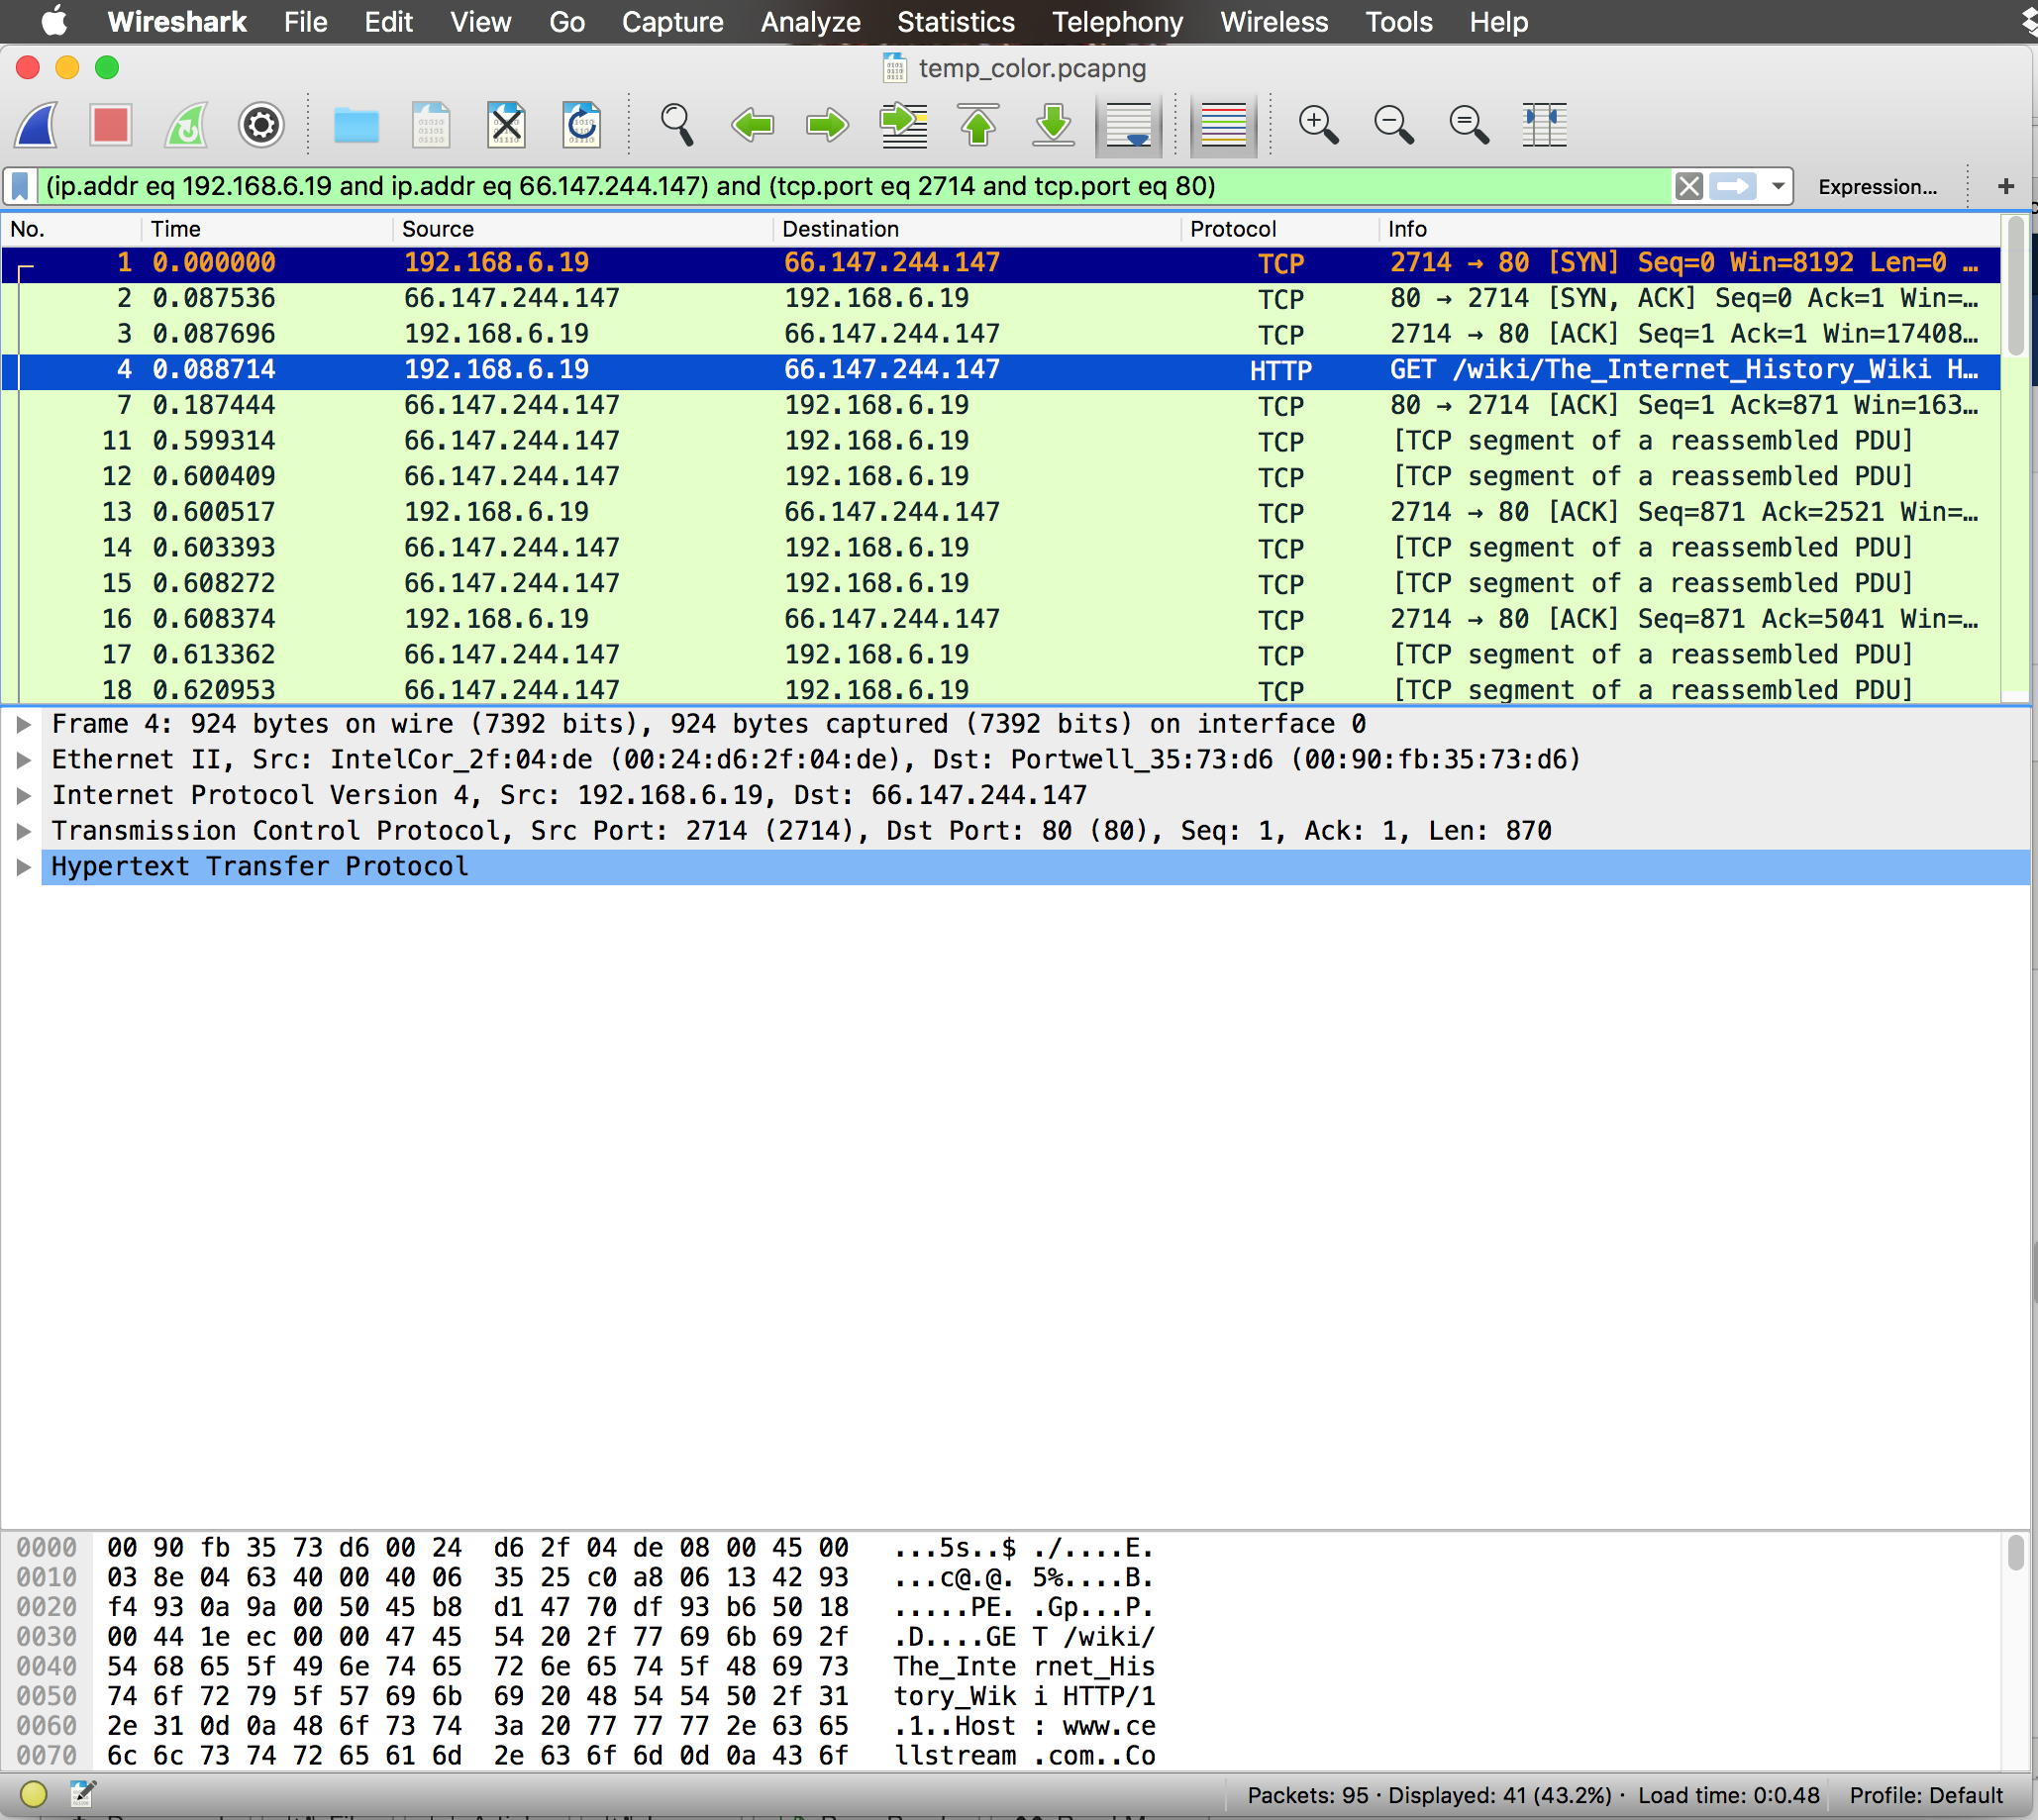
The problem with this approach, is that the filter really removes the other traffic from the display that was hapenning while this conversation was occuring. We all know that it might be nice to see this.
So the way to do this is use Temporary Colorization.
To see how this works, I first remove the display filter, the reselect the fourth packet with a right click. This time I select Colorize Conversation, TCP, and I picked Color 4:

Keep in mind this is only temporary and does not affect the Color rules you may be using. Check out the results:
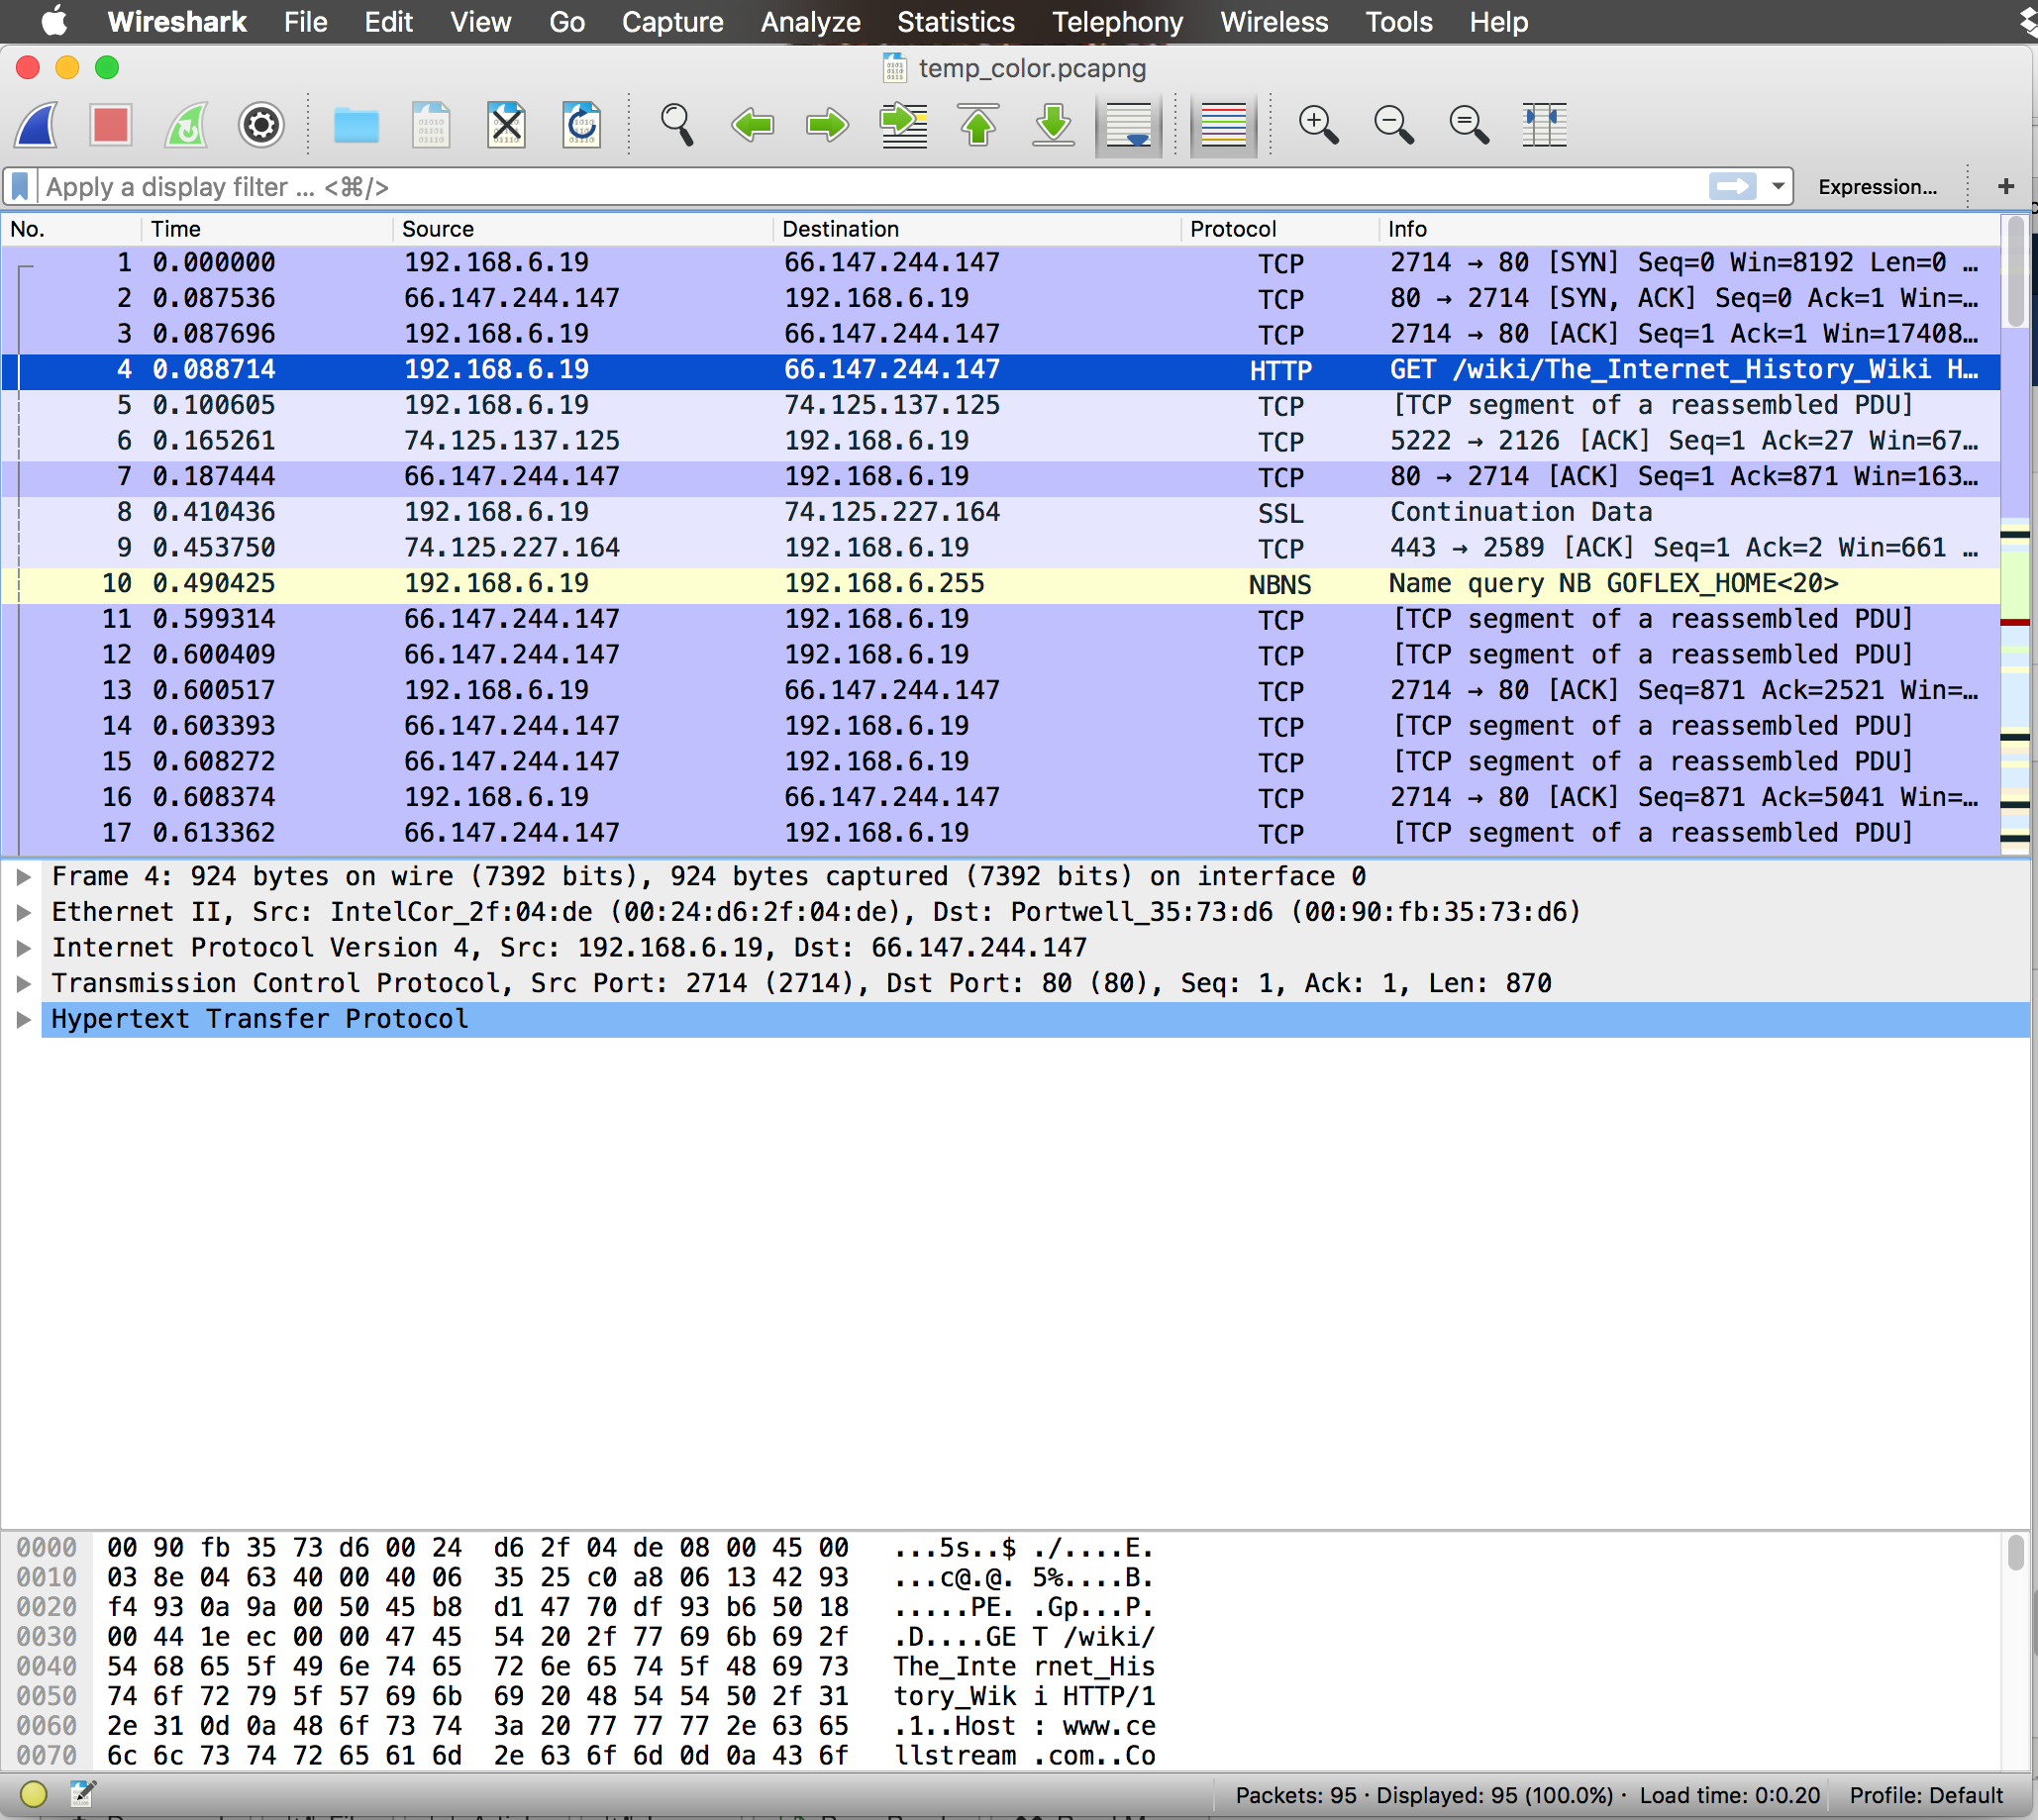
Now this TCP conversation is colorized in purple so it stands out and together, but I have not lost the context of this conversation along with other packets in the capture.
Awesome.
So how do you remove this temporary colorization? Simple: hit CTRL-Space, or select the option from the view menu:

Poof! The temporary colors are removed and you are back to the Profile Color rules that are in place prior to this exercise. Temporary and useful. We like it!
I hope you find this article and its content helpful.