

In this article I am going to lead you through the steps to perform simple reconnaissance on the WLAN/Wi-Fi networks. This is helpful to determine the MAC addresses or wireless devices.
There are several requirements. One is that you are running Linux – in my case below I am running Kali Linux. If you run Linux as a virtual machine, which is an option, make sure you have a wireless adapter assigned to the virtual machine (not the primary Wi-Fi interface of the host machine). If you are not running Kali Linux, then you will have to install the tools used.
Important Information
We will only be listening here. There is no risk associated with this activity and it is entirely passive, meaning no one will even know you are listening.
Nonetheless, you should only do this for positive purposes, and with permission as necessary.
Step 1.
We will begin by examining the configuration of the Linux system.
Keep in mind you may see slightly different results than shown below as every system is slightly different.
That said – open up a [Tilix] Terminal window. I like Tilix and if you haven’t used it, try it.
sudo apt install tilix
The window will look like this:

Step 2:
There are two ways in Linux to examine the wireless interfaces. Either with the ‘ifconfig’ command or with the ‘iwconfig’ command.
If you are new to Linux, all command line programs have “help” information, usually available by the ‘-h’ or ‘–help’ command line command.
Let’s take a moment to look at these help options.
For reference, here is the ‘ifconfig -h’ help information (note I have expanded the size of the Tilix window):
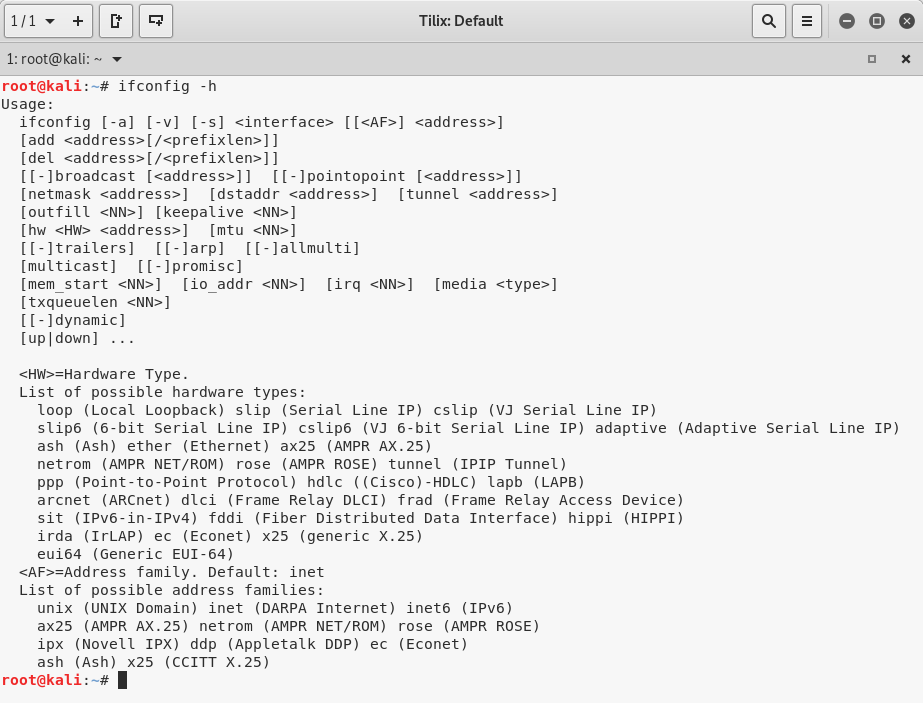
Some help file output tells you what each command does. In this case, the -h output is not very verbose.
So another option for just about every Linux command is to look at what is called the “man pages” – which stands for manual pages for the command.
In this case we would type ‘man ifconfig’ and we would then see something like the following:

You can scroll through the manual on this command if you want.
These basic help and manual commands are available on just about every application in Linux. We will not repeat this information in future, and we count on you doing this as you need to.
Just hit “q” to quit looking at the man page.
OK – back to the lab steps….
Let’s first type ‘ifconfig’ into the terminal window:
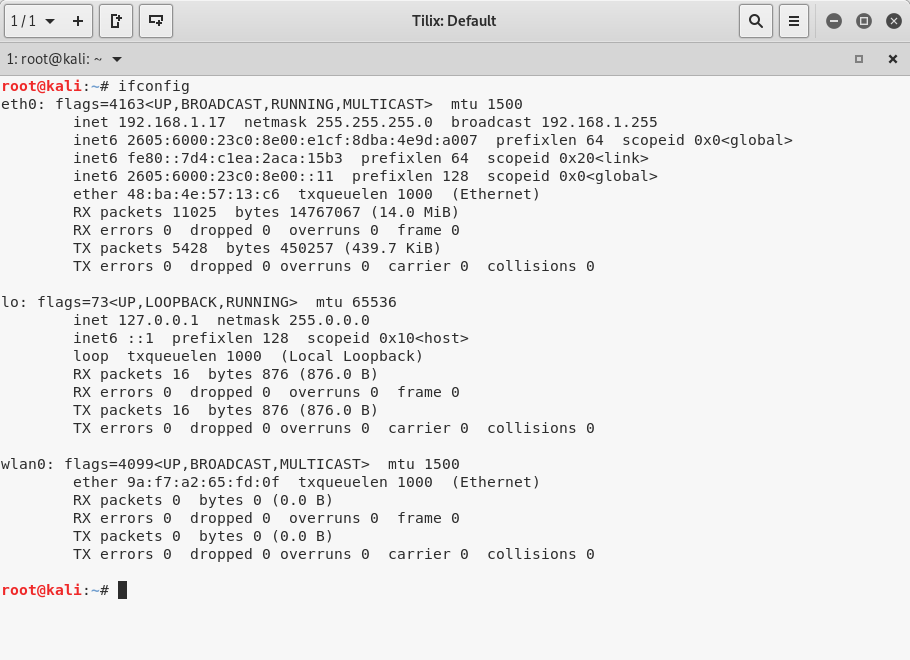
What we see above is each network interface listed.
In my example above, eth0 is Ethernet 0 – my wired Ethernet port. You can see it is connected, and that it has both IPv4 and IPv6 addresses. We also see the MAC address shown after the word “ether”. Then there are some interface statistics like number of packets, bytes, errors, and so forth.
You will likely not have anything connected to your wired ethernet interface.
This output is repeated for the other interfaces. “lo” is the loopback interface, and wlan0 is the Wi-Fi interface.
In the case of the Wi-Fi interface, I am not connected to any network, so I do not have IP addresses, and only have an Ethernet MAC. All the counters are at zero.
You will likely be connected to a wireless network, and the wlan0 interface will have IP addresses and show that you are in managed mode.
Step 3.
Next we will use the alternative command – iwconfig.
Iwconfig is similar to ifconfig, but is dedicated interfaces with wireless extensions.
It is used to set the parameters of the network interface which are specific to the wireless operation (for example : the frequency). Iwconfig may also be used to display those parameters, and the wireless statistics (extracted from /proc/net/wireless).
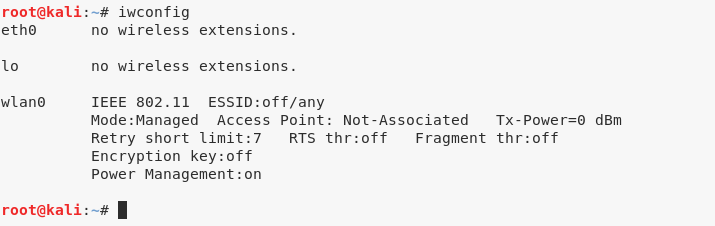
Now type ‘clear’ to clear the screen, and then enter ‘iwconfig’:
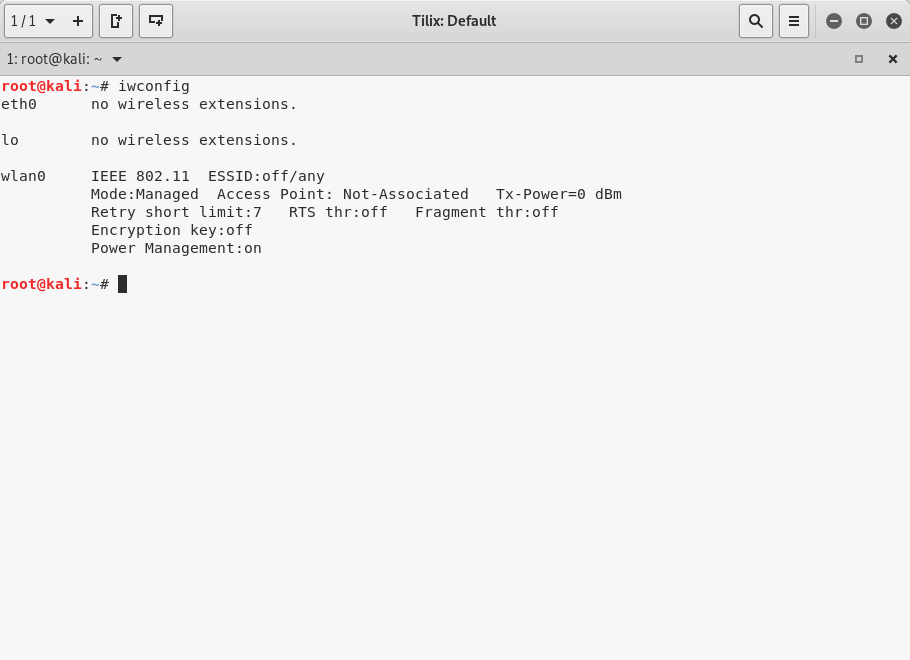
You can see that the output per interface is similar to the prior step with less detail.
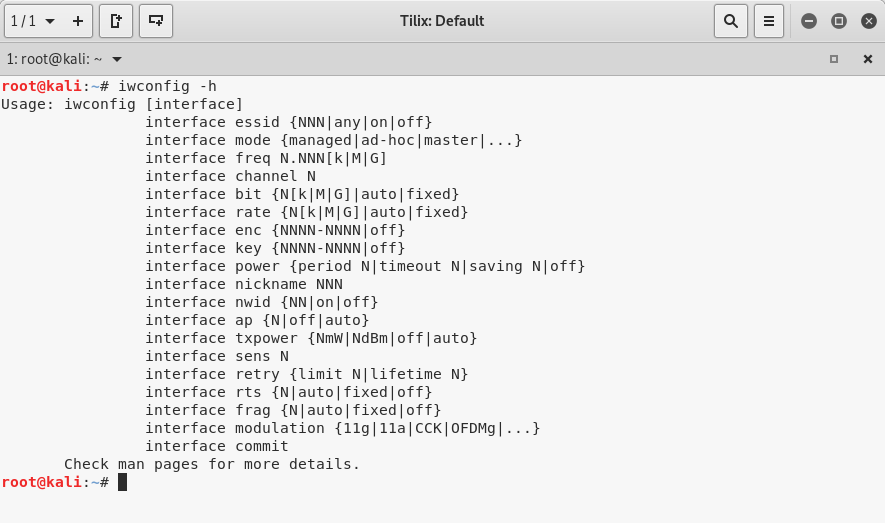
Here is the ‘iwconfig -h’ output for reference (it is interesting to note that you can change many settings here):
Step 4.
Next, we will put the wireless interface wlan0 into monitor mode.
To do this, clear the screen and enter:
airmon-ng start wlan0
It will look like this:
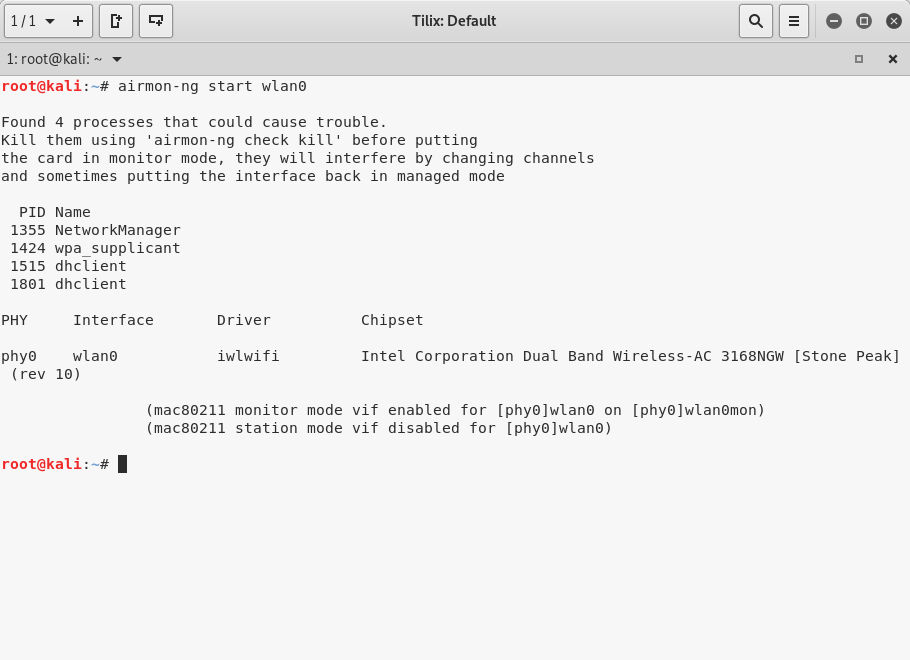
This is telling us that wlan0 is now in monitor mode and that interface is called ‘wlan0mon’.
We have seen this work 99% of the time. It is possible that you will not get a wlan0mon interface (caused by your system having possibly older drivers that Linux does not recognize). If this happens, you may want to try updating drivers on your system.
Step 5.
Next, we will start the airodump-ng program to start using the interface that is in monitor mode to listen for Access Points and Stations on all 2.4GHz channels (by default). It does this by scanning each channel, so as the program runs longer you will see more information.
You may want to make your window a bit larger for this step.
Also, your results will not have the same contents as shown in the screen capture below, but the format will be the same.
Begin by clearing the screen with the ‘clear’ command, and then enter:
airodump-ng wlan0mon
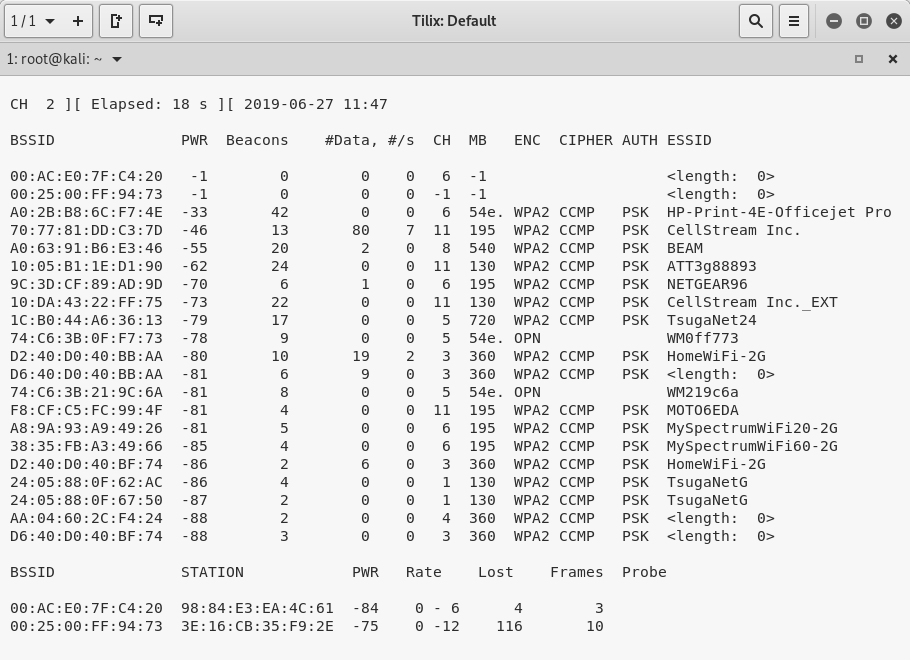
Your output will differ of course, but what we see here at the top is a list of Access Points – their MAC addresses, the channel they are on, their security and their SSID. The longer this runs the more that will be heard.
At the bottom is a list of Stations – their MAC addresses and what BSSID they belong to. You may also see devices that are not attached to any Wi-Fi network.
I hope you find this as fascinating as I do.
Step 6.
To stop the scanning, hit CTRL-C.
Now let’s put the interface back into managed mode, out of monitor mode with the following command:
airmon-ng stop wlan0mon
Example:

And lastly, lets verify this with the ‘iwconfig’ command:
Congratulations!
You have successfully used Linux to passively perform reconnaissance on the local WLANs that you can hear.
For those of you new to Linux, you have also begun to learn how to use Linux!
If you would like to help support the continued development of independent networking, broadband, Wi-Fi, VoIP, and packet analysis content, please consider joining our Patreon community where you will gain access to exclusive technical resources, downloadable labs and PCAPs, bonus course content, troubleshooting guides, and additional member-only material. Comments and technical discussion are always welcomed at our Patreon community or on our Discord server. You can also support our work by simply buying us a coffee — every contribution helps us continue creating practical, real-world network science education for professionals and enthusiasts alike.