

| Check out these additional IPv6 Resources |
|---|
| Our IPv6 overview course at Udemy |
| Our IPv6 Custom Profiles for Wireshark |
| Our IPv6 classes at the Online School |
OK folks, based on some feedback from Reddit, I decided to update this post from 2013. Modern Linux distributions have largely deprecated the legacy net-tools suite (which included ifconfig, route, arp, and netstat) in favor of the iproute2 and ethtool utilities. These newer tools are allegedly more consistent, extensible, and aware of modern kernel networking features such as namespaces, policy routing, and advanced link types.
As always, I urge readers to practice these commands and use Wireshark with IPv6 specific profiles to examine exactly what is happening on the network (packets do not lie). See link above.
The following is a list of Linux command line entries you can make to examine and configure IPv6. All recent versions of Linux support IPv6 and IPv4 concurrently. This is known as dual stack. So you should have IPv6 running. The issue is, ofcourse, does the network you are connected to support IPv6. If it does not, you will only see FE80:: (Link Local) and ::1 (IPv6 Loopback) addresses in commands that display IPv6 information as those addresses are generated locally by your operating system on boot.
Fundamental IPv6 Queries
Let’s start with some simple commands that will display IPv6 information. I am running Linux on an older but perfectly good MacBook Pro BTW:
ip -6 addr show
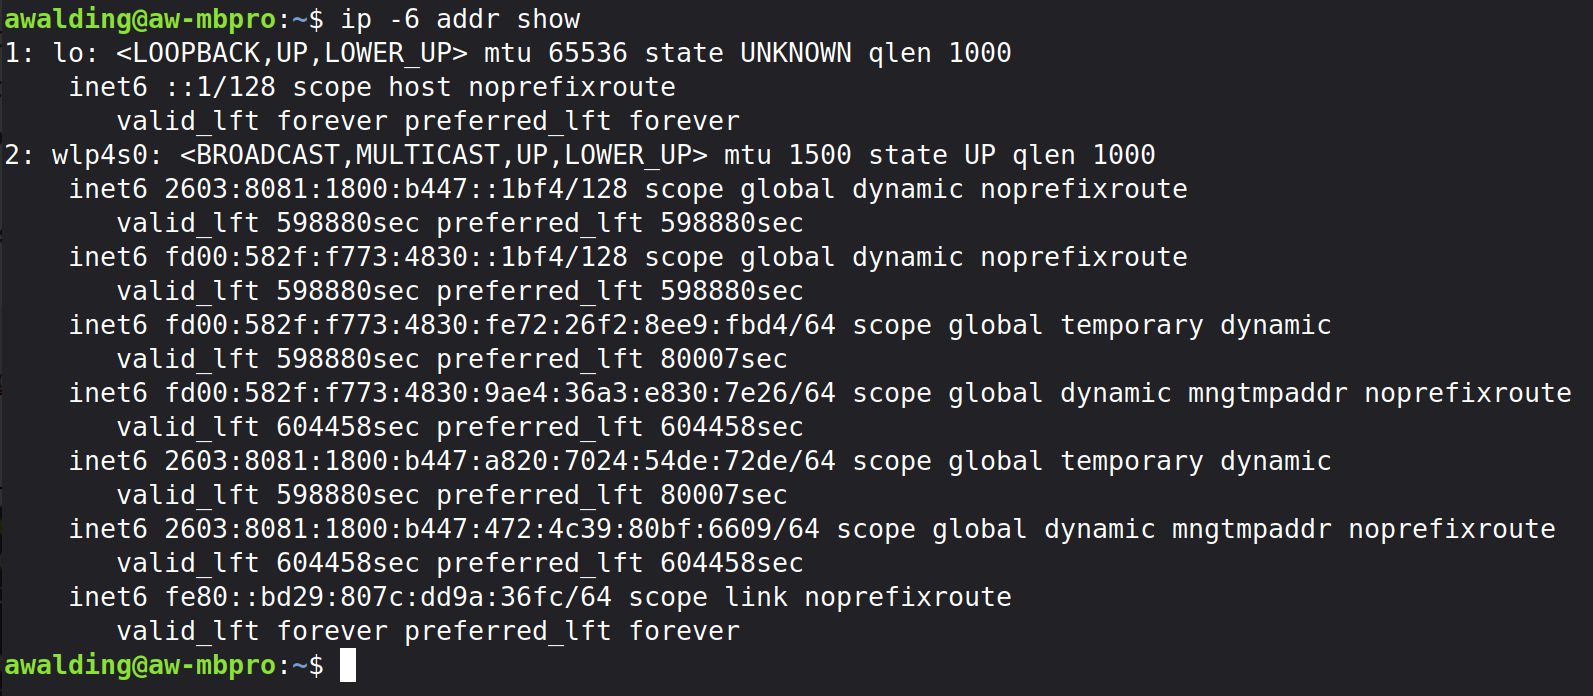
What we see in the above is the ::1 address which is the IPv6 loopback address. We also see the wlp4s0 interface (the Wi-Fi interface) and in this output we see multiple IPv6 addresses, the fe80:: link local address (bottom), and then fd:: global addresses, and the 2603:8081:1800:b447/64 global addresses. Some of these are temporary addresses. So each interface in IPv6 can have multiple IP addresses assigned. This is very different that IPv4. We will not explain IPv6 in this article.
The following command displays the routing table in your Linux computer:
ip -6 route show
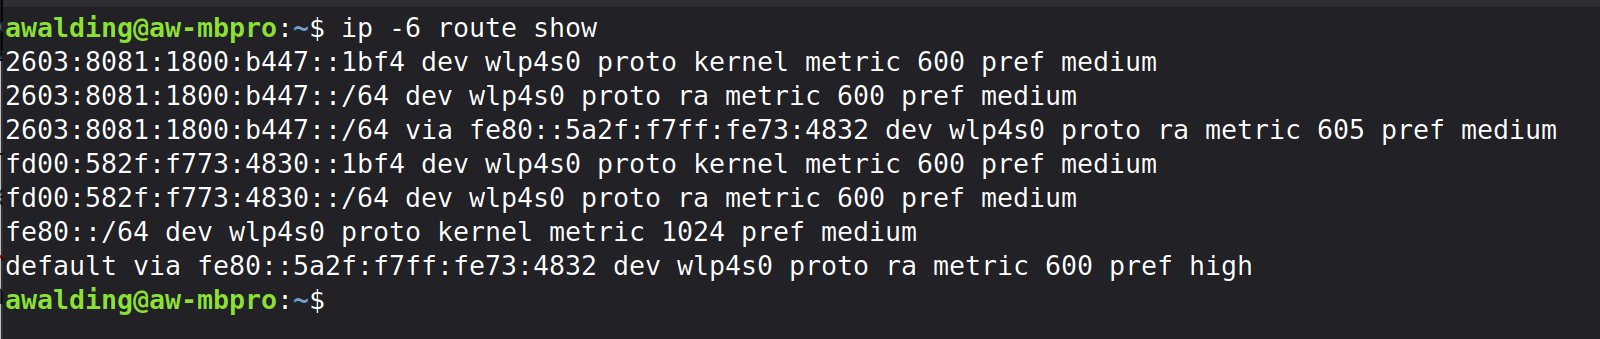
In my computer’s case we see that 2603:8081:1800:b447:: /64 prefix and that is was learned link local address fe80::5a2f:f7ff:fe73:4832 (we also see this is the default route) so this must be the interface address of my default gateway. We can see that the fd00:: prefix was learned from a router advertisement. The fe80::/64 prefix is, of course, from the Linux kernel.
Most IPv6 folks know that ARP was replaced by neighbor discovery. So there is no point is displaying an ARP table as it does not exist in IPv6. However, the way to see the Neighbor Discovery table is as follows:
ip -6 neigh show

On my system it currently shows two entries in the cache, both are reachable.
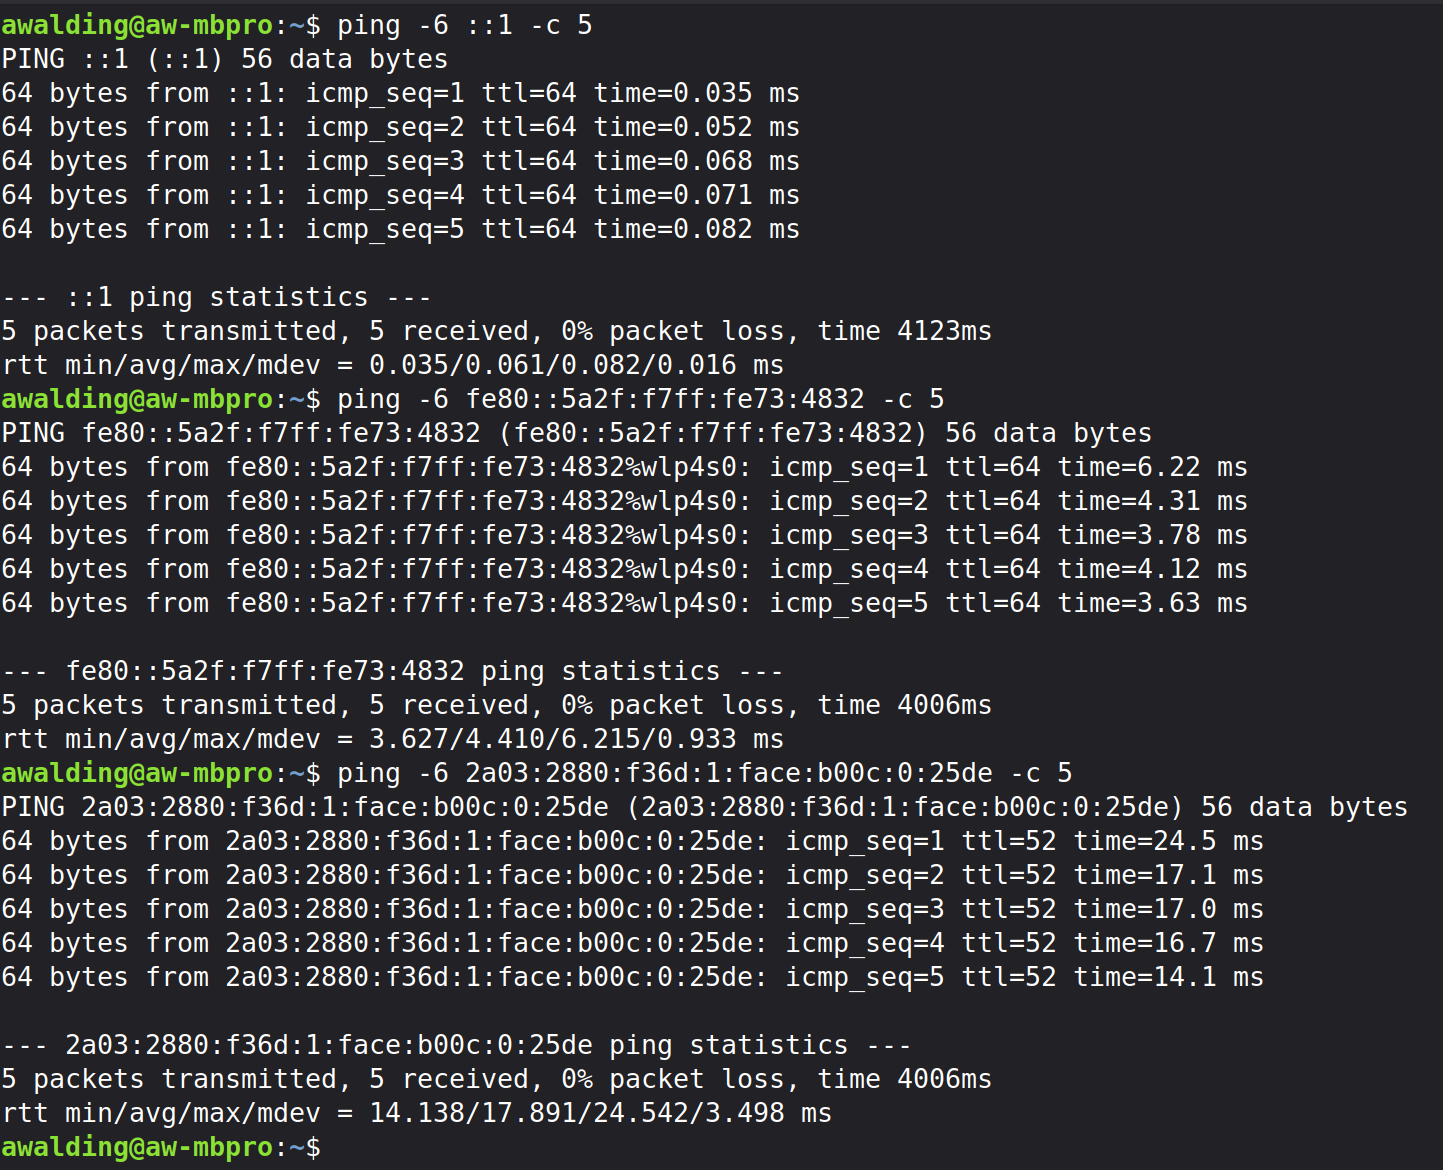
Great – what about a ping test? When troubleshooting we generally ping the local loopback, then the default gateway, and then something in the Internet. When you ping in Linux, they continue to repeat until you stop the pings with a Ctrl-C. I will limit each of the pings below to 5 pings with the -c option. The IPv6 ping commands to do these three things are:
ping -6 ::1 -c 5
ping -6 [interface ipv6 address] -c 5
ping -6 [ipv6 address in the internet] -c 5
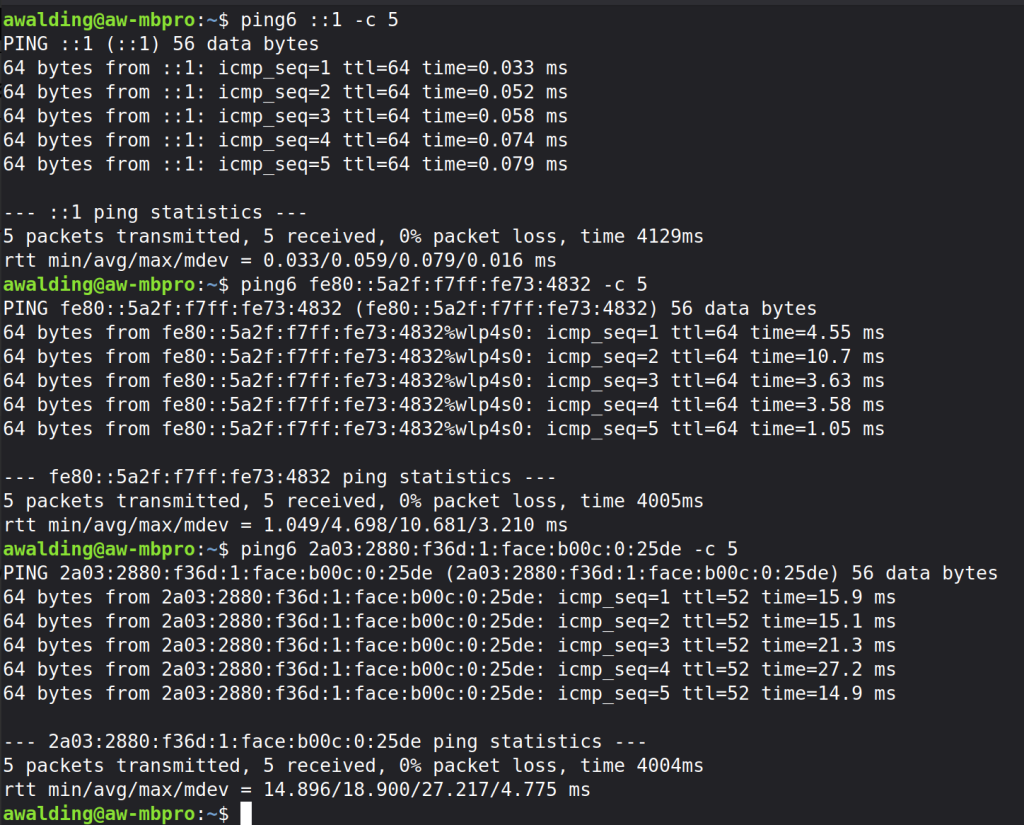
I believe you can also use the ‘ping6’ command:
ping6 ::1 - 5
ping6 [interface ipv6 address] -c 5
ping6 [ipv6 address in the internet] -c 5
Above I pinged the loopback address of my system, followed by the fe80:: address of my default gateway I learned above, followed by the address of Facebook that I looked up and will explain below.
You can also specify an interface and other options to these commands:
- [-c count]
- [-iinterval]
- [-w deadline]
- [-p pattern]
- [-s packetsize]
- [-t ttl]
- [-I interface]
Tracing the Path to an IPv6 network or Host
OK, let’s move on now to tracing the route to a given destination. Here is the Traceroute command for IPv6. You may have to install traceroute depending on which flavor of Linux you are using:
traceroute6 or traceroute -6
traceroute6 is the IPv6-specific version of the traceroute utility. It is used to discover the network path and hop-by-hop latency that IPv6 packets take from a source host to an IPv6 destination. traceroute6 maps the route to an IPv6 destination by sending packets with incrementally increasing Hop Limits (the IPv6 equivalent of IPv4 TTL). Each router that decrements the Hop Limit to zero returns an ICMPv6 Time Exceeded message, allowing the tool to identify:
- Each intermediate router (hop)
- The round-trip time (RTT) to each hop
- Where delay, filtering, or packet loss may be occurring
The process continues until the destination responds or the maximum hop limit is reached.
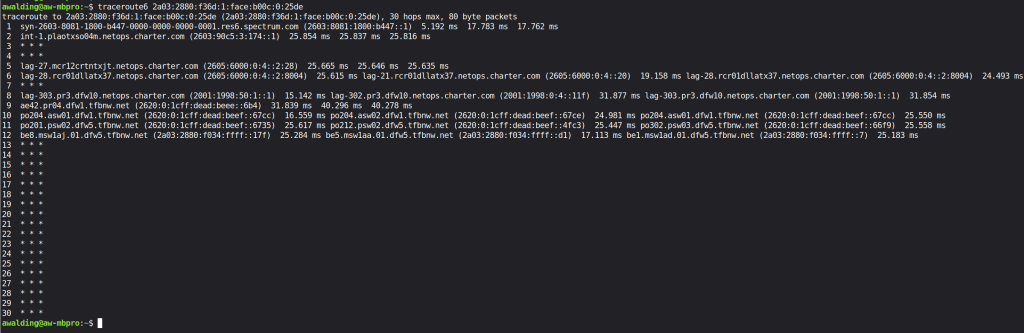
In y example above we see that it gave up after 30 hops which may or may not be accurate. Sometimes you have to try various options to get traceroute6 to be effective. if you use the “man traceroute6” command, you will get a full set of options and instructions as with any command. Here are the main ones:
   traceroute [-46dFITUnreAV] [-f first_ttl] [-g gate,...]
           [-i device] [-m max_ttl] [-p port] [-s src_addr]
           [-q nqueries] [-N squeries] [-t tos]
           [-l flow_label] [-w waittimes] [-z sendwait] [-UL] [-D]
           [-P proto] [--sport=port] [-M method] [-O mod_options]
           [--mtu] [--back]
           host [packet_len]
   traceroute6  [options]
   tcptraceroute  [options]
   lft  [options]
Similar to traceroute is the following command: tracepath -6 which is a Linux-specific IPv6 path discovery and Path MTU (PMTU) diagnostic tool. While it appears similar to traceroute, it is designed to be lightweight, non-privileged, and tightly integrated with IPv6’s mandatory ICMPv6 behavior. tracepath -6 discovers the hop-by-hop path to an IPv6 destination and simultaneously determines the Path MTU by interpreting ICMPv6 responses generated along the route. If you want to read up more on PMTU look here.
tracepath -6 [some IPv6 address]
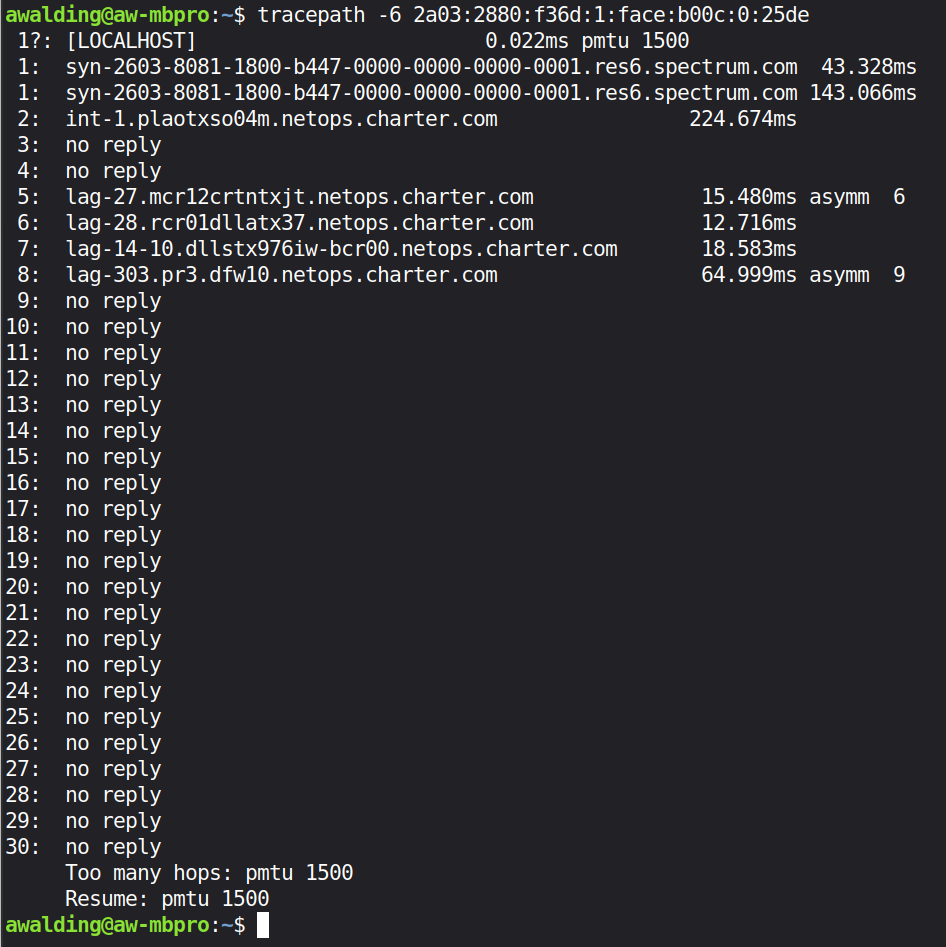
I am not sure why these prior two commands were stuck not getting a correct answer.
Be aware of a program called My traceroute. You may have to install it of course, but it is awesome and does IPv6. Here is an example output:

IPv6 Network/Router Discovery
If a host on your network appears to be missing you can use IPv6 network discovery with ndisc6. Now to do this you may have to install it with ‘sudo apt install ndisc6’. ndisc6 is a Linux IPv6 Neighbor Discovery diagnostic tool used to query and resolve IPv6 neighbors on the local link, similar in purpose to arp in IPv4 networks. It sends ICMPv6 Neighbor Solicitation messages to a specified IPv6 address and displays the corresponding Neighbor Advertisement, revealing the target’s link-layer (MAC) address, reachability state, and related parameters. ndisc6 is commonly used to verify IPv6 local connectivity, troubleshoot neighbor cache issues, and confirm that ICMPv6 Neighbor Discovery is functioning correctly on a given interface.
ndisc6 fe80::5a2f:f7ff:fe73:4832 wlp4s0

Note that I used the fe80:: link local address of my gateway and my Wi-Fi interface. The response was the MAC address of the router interface.
What about router advertisements? That is done with the following command (this will be installed if you installed ndisc6 above):
rdisc6 wlp4s0
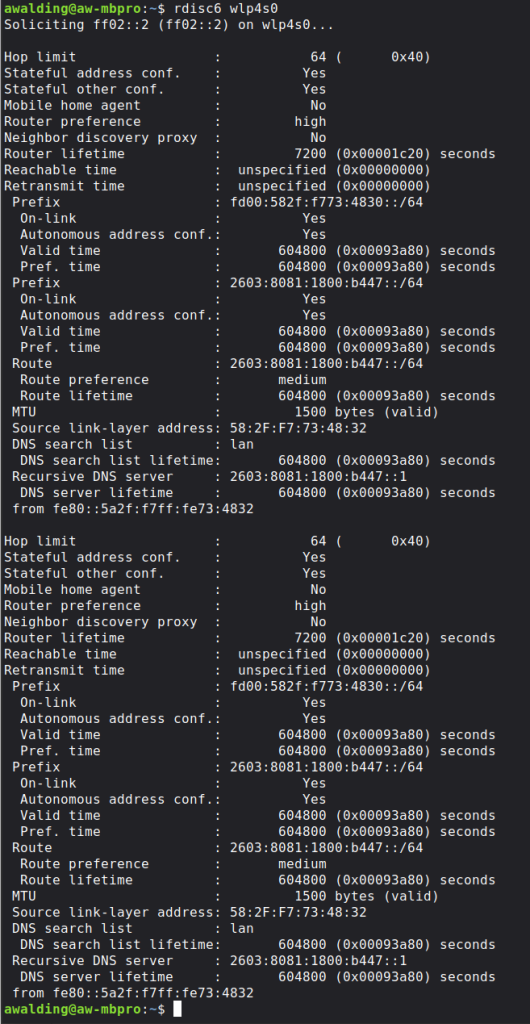
rdisc6 is an IPv6 Router Discovery diagnostic tool used to send Router Solicitation (RS) messages and display Router Advertisement (RA) responses from IPv6 routers on a local network. In practical terms, it lets you see exactly what IPv6 routers are advertising—including prefixes, default gateways, DNS information, and network parameters—making it highly valuable for troubleshooting IPv6 auto-configuration.
I’ll make mention here that there is a command rdnssd. rdnssd is a Linux daemon that implements IPv6 Recursive DNS Server (RDNSS) support by listening for ICMPv6 Router Advertisements that contain DNS server information and automatically configuring the system’s DNS resolver accordingly. It allows IPv6 hosts using SLAAC (without DHCPv6) to learn DNS server addresses advertised by routers and dynamically populate resolver configuration (typically via integration with resolvconf or systemd-resolved). rdnssd is commonly used on IPv6 networks where DNS is delivered through Router Advertisements rather than DHCPv6, ensuring name resolution works correctly in standards-compliant IPv6 environments.
Since I brought up DNS, because your system is dual stack, your DNS “cache” will have both IPv4 and IPv6. You can use the command sudo resolvectl show-cache to view this. sudo resolvectl flush-caches will clear entries. Further, dig and nslookup are IPv6 capable. You can read more about dig here. You can read more about nslookup here. Both these posts have IPv6 specific examples.
Socket and Service Inspection
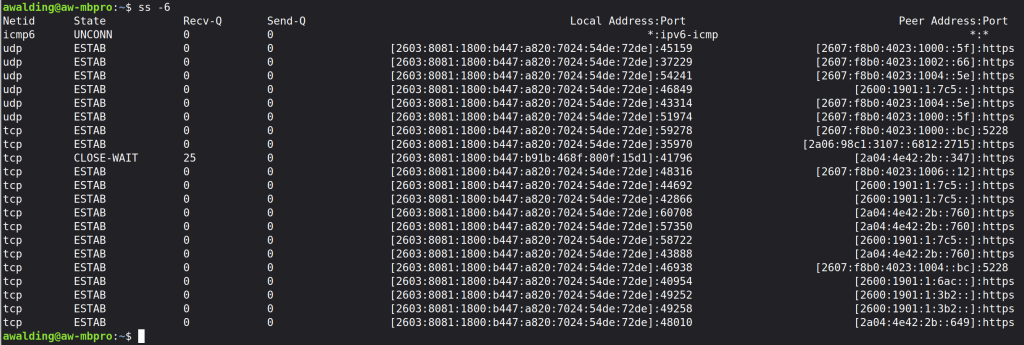
ss -6 is a Linux socket inspection command that displays IPv6-only network socket statistics, providing a modern replacement for netstat when analyzing active connections, listening services, and protocol states. It queries the kernel directly (via Netlink), making it faster and more accurate than legacy tools, and reports details such as local and remote IPv6 addresses, ports, socket state (e.g., LISTEN, ESTABLISHED, TIME-WAIT), queue depths, and the owning process when run with appropriate privileges. Administrators commonly use ss -6 to troubleshoot IPv6 connectivity issues, verify which services are bound to IPv6 addresses, detect unexpected listeners, and analyze TCP/UDP behavior on dual-stack systems. Common extensions include ss -6 -l (listening IPv6 sockets), ss -6 -t (TCP only), ss -6 -u (UDP only), and ss -6 -p (show process ownership).
ss -6
We hope this helps you get started on IPv6 on your local Linux machine.
If you would like to help support the continued development of independent networking, broadband, Wi-Fi, VoIP, and packet analysis content, please consider joining our Patreon community where you will gain access to exclusive technical resources, downloadable labs and PCAPs, bonus course content, troubleshooting guides, and additional member-only material. Comments and technical discussion are always welcomed at our Patreon community or on our Discord server. You can also support our work by simply buying us a coffee — every contribution helps us continue creating practical, real-world network science education for professionals and enthusiasts alike.