

Check out these great references as well: |
|---|
| Our Wireless custom profile for Wireshark |
| Our Udemy course on Wireless Packet capture |
| Our other Wi-Fi related articles |
As many of my clients and students know, I have always been astonished at how hard it is to capture the Wi-Fi traffic in Windows. This article will explain the challenges and the solutions to capturing all Wi-Fi traffic including WLAN control and management frames using a Windows system without paying anyone any money for expensive interfaces or software.
THIS IS ONLY ABOUT ALSO CAPTURING THE Wi-Fi CONTROL AND MANAGEMENT FRAMES – for example if you wanted to capture IP or TCP (in other works Layer 3 and up) traffic between your system and another system, to Wi-Fi this is considered Data traffic. Wireshark allows capture of normal Wi-Fi data traffic with your Wi-Fi NIC in managed mode – however it just looks like Ethernet traffic (even though it isn’t). Watch this example:
In the video above, I capture on my Wi-Fi interface, and after stopping the capture so we can examine the packets, we see that they are labelled by Wireshark as Ethernet, not Wi-Fi. Then if I do a display filter for WLAN traffic, we see nothing shows up, because this is not perceived as Wi-Fi traffic. In a sense, Wireshark is lying, but it is not Wireshark’s fault.
If that is good, you can stop reading here.
If, on the other hand, you want to put the NIC into monitor mode to listen to EVERYTHING – control and management frames, beacons, Clear to Send, Request to Send, Association, Disassociations, etc. AND you have Microsoft Windows, then this article is for you.
The problem comes down to our friends at Microsoft, at least historically. Windows, by definition, does not allow users to put their interface into “Monitor Mode”. So if you use a great packet dissector like Wireshark, you can’t really see the WLAN packets. You have 4 options:
- Buy the now old Riverbed Airpcap tool and drivers which is ridiculously expensive ($700 plus – you might find them cheaper on E-Bay) but works perfectly. In the old days – we had no other choice.
- Use Acrylic Wi-Fi solutions to essentially install drivers that may or may not work. I have not had any success with this, but some say it works for them.
- Run Linux as a dual boot, USB boot, or VM. There are some complications to the VM part. I have written separate articles on these VM options here.
- Want to stay with Windows only? There are two possibilities:
- Use Microsoft Network Monitor as described below which is free and works 100% of the time
- Use the Npcap driver that now is a preferred option at install of Wireshark and used to come with nmap. If you use the npcap driver and can get it to work, it is better than Winpcap because it has been updated and Winpcap is no longer being updated. The problem is that for many – upgrading from Winpcap to Npcap has been troublesome and after installing Npcap they cannot see any interfaces in Wireshark. The folks at Nmap are working on this. I have had mixed success with it. Npcap requires that you get rid of Winpcap and vice versa. If Npcap works, then you can run Wiresahrk in “Administrator Mode” and actually put the Wireless interface into monitor mode from the Wireshark Capture> Options screen. If this could be made stable, it would be a great solution. If you can get Npcap working, you do not need to read any further.
Option 1: Using Microsoft Network Monitor
First go to this link and download/install Microsoft Network Monitor v3.4. This is ancient software (actually in Microsoft’s archives) but works on all older and newer versions of windows (I am using Windows 10 and it is perfect). That said, you will see in the comments that some folks find they cannot get their newer generation USB Wi-FI NICs into monitor mode. If that is you, then option 3 above is your best path. Let’s continue:
Run the installation process. It takes about 5 minutes.
You will need to reboot. You will also need to have Administrator privileges.
Once rebooted – run the program. It will look something like this:
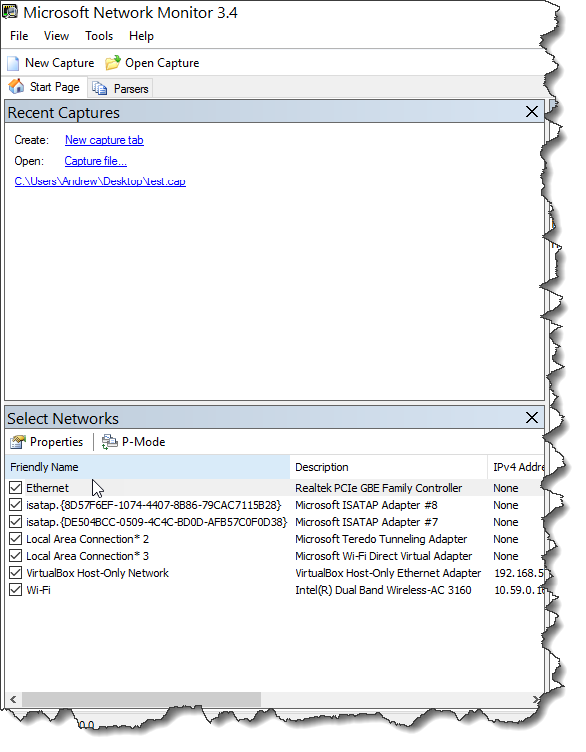
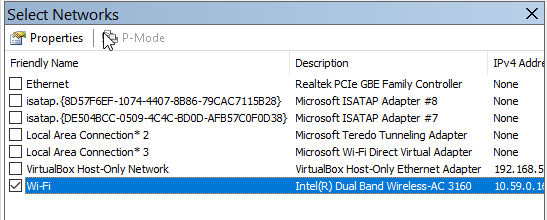
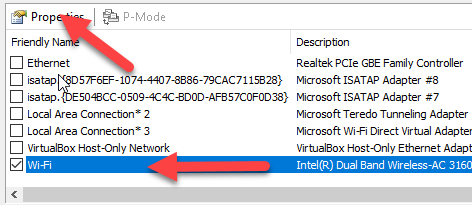
You will note that all the interfaces (bottom left) are selected by default. To capture Wi-Fi packets, deselect all except the Wi-Fi interface of your computer:
Next, select ‘New Capture’:
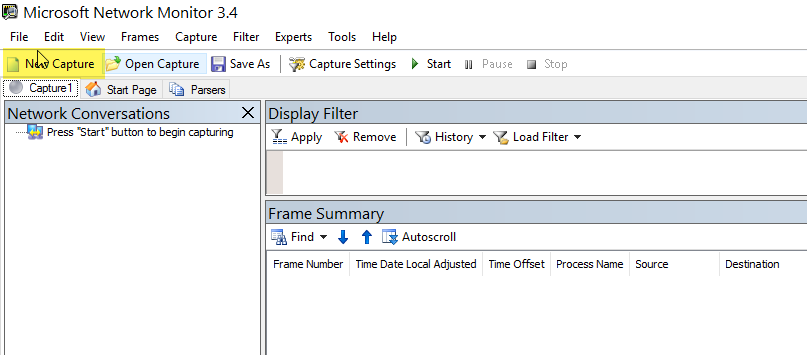
The screen will change as shown:
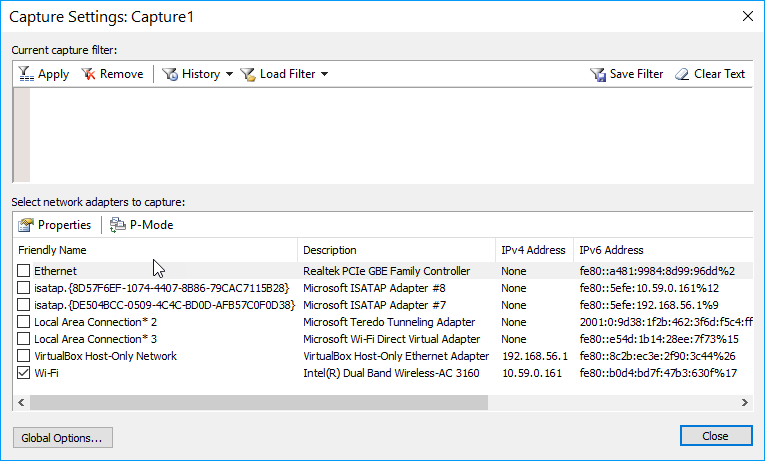
You will see the Wi-Fi interface selected, but you need to adjust the properties (the first time). So select the interface so it is highlighted, then click the properties button:
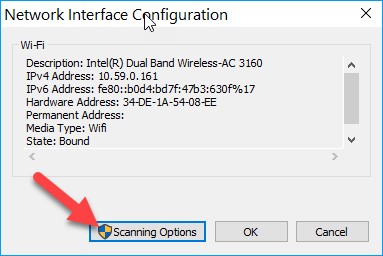
You will get a Network Interface Configuration pop-up, and you will select the Scanning Options button:
When you do this you may get a permissions warning…of course, say yes to this.
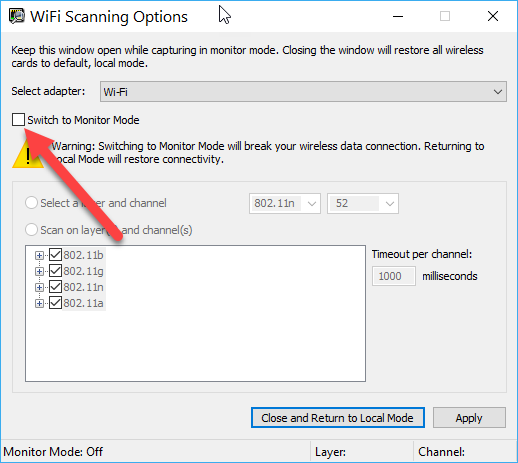
You will then be presented with the Wi-Fi Scanning Options dialogue, and it is in this next screen that you must select Switch to Monitor Mode:
The bottom list of 802.11 options will now not be greyed out:
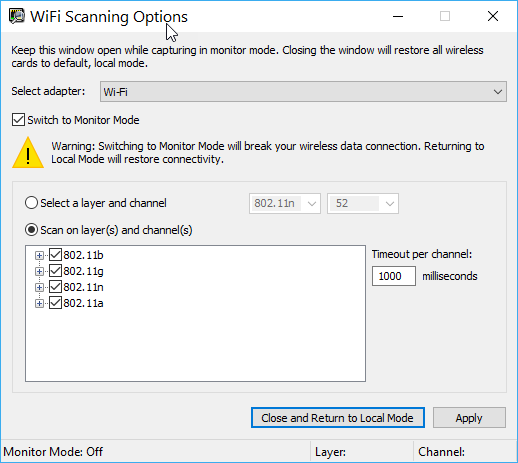
I suggest you leave them all selected. Now the next step is tricky. Even though the “Close and Return to Local Mode” button is highlighted, you will want to click on Apply. Then close the dialogue with the “X” on top right.
We are now ready to capture!!
Click the “Start” button on the top menu:
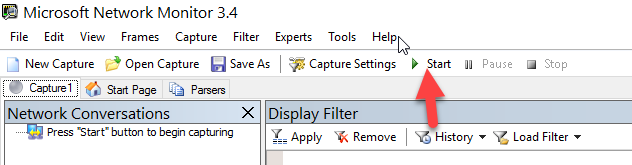
And *POOF* you are capturing WLAN packets!!!
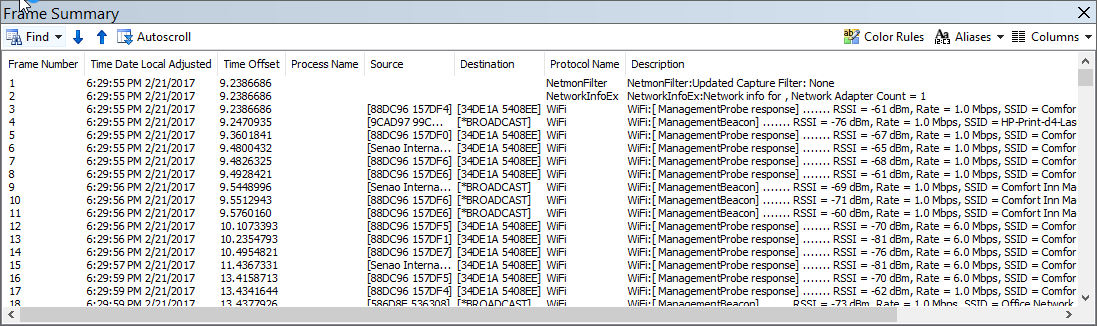
When you are ready to stop, click on the Stop button, and save the file (Save As something like test.cap to your desktop).
Now you can open that .cap file in Wireshark:
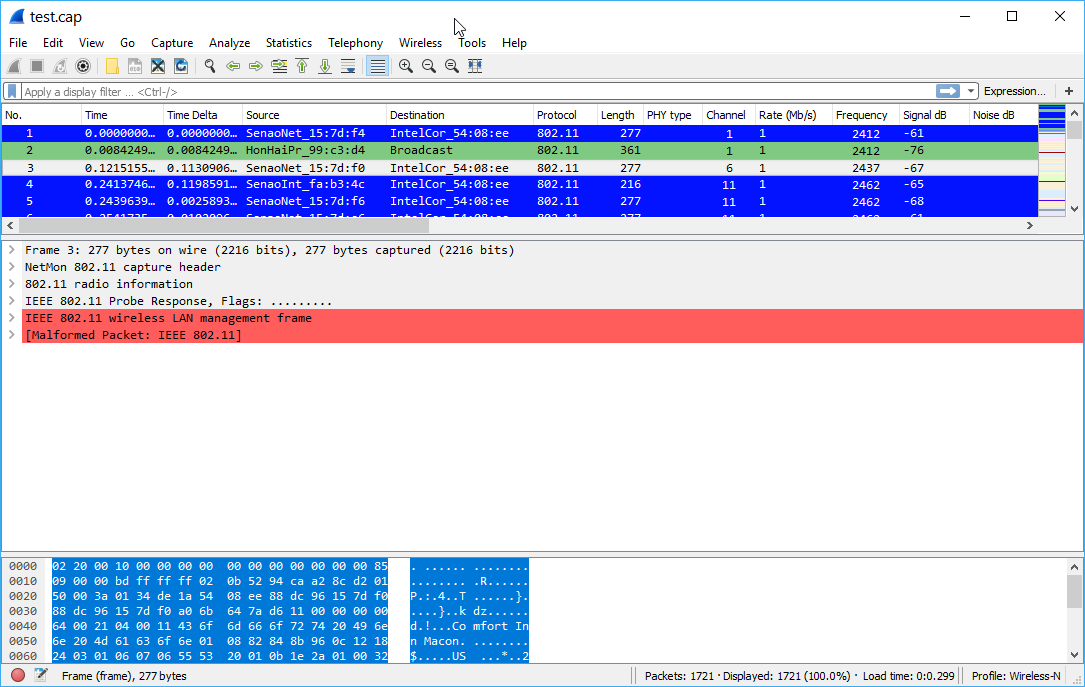
There are a couple of differences you might notice.
First instead of Radiotap headers, you will see Netmon headers. They are almost identical, and you can still retrieve important WLAN information like speeds, signal, and noise levels.
Also, Wireshark may report Malformed packet errors, that can be ignored.
How cool is that!
Sorry Riverbed, and sorry to all those who say it can’t be done without $$$.
Option 2: Trying to use the Npcap Driver
There are a couple of requirements here. First – you need to make sure you have a Wireless NIC that supports Monitor Mode, and is supported by npcap. You can check to see if the NIC supports monitor mode by looking here: https://secwiki.org/w/Npcap/WiFi_adapters
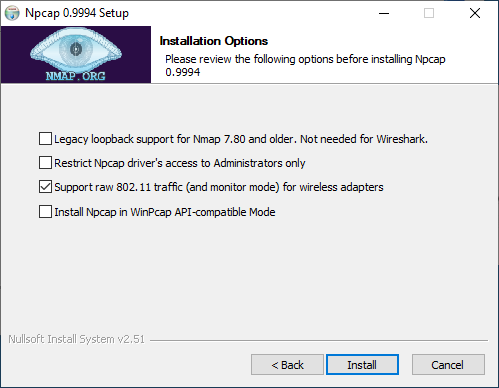
Second, if you have WInpcap installed from older Wireshark installations, Npcap will not work properly. So I suggest shutting down Wireshark, manually removing Winpcap, and then installing the newest version of Wireshark. During that install process, make sure you select to install Npcap, and furthermore, make sure you tick the “Support raw 802.11 traffic (and monitor mode) for wireless adapters’ box:
OK with that done, run Wireshark. Go to Capture> Options or use CTRL-K and make sure you have the Input tab selected. Slide out to the right until you see the Monitor Mode column, try to select the tick box (you will see in the video clip, I don’t get one):
This may or may not work. If it works, you can now capture Wi-Fi traffic!! You are done!
I personally have had nothing but challenges to make this work on my Windows 10 system (HP Pavillion laptop).
So if it did not work for you (like me), read on.
Some say that the way around this problem is to run Wireshark in Administrator mode. I have had no luck with that either! Plus it is a bad idea to do this in the long run because this opens a vulnerability door in Wireshark for malicious packets to cause issues on your system. We do not want that.
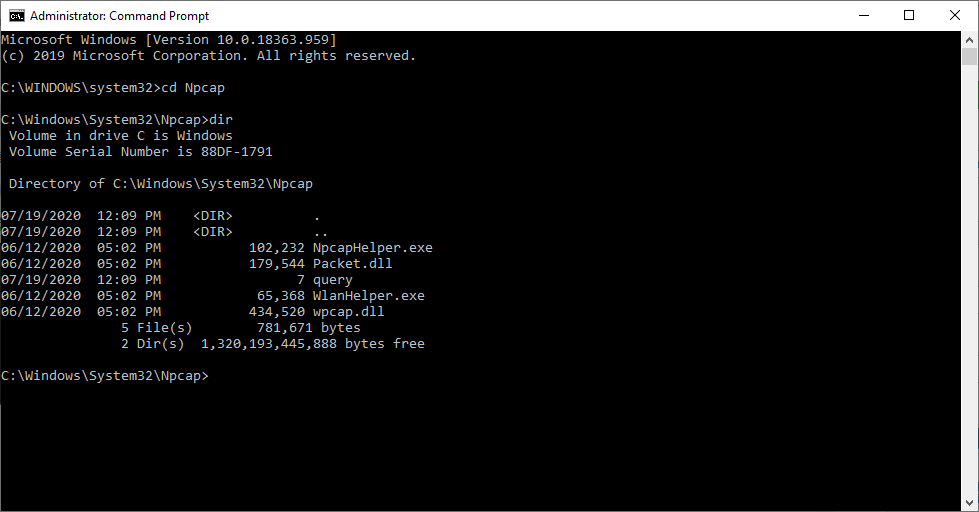
Luckily, the great folks at Npcap have included a tool called WLANHELPER. This executable is is the following directory: C:\Windows\System32\Npcap\, and if you open a CMD window in Administrator mode, you should be pointed to the C:\Windows\System32 directory:
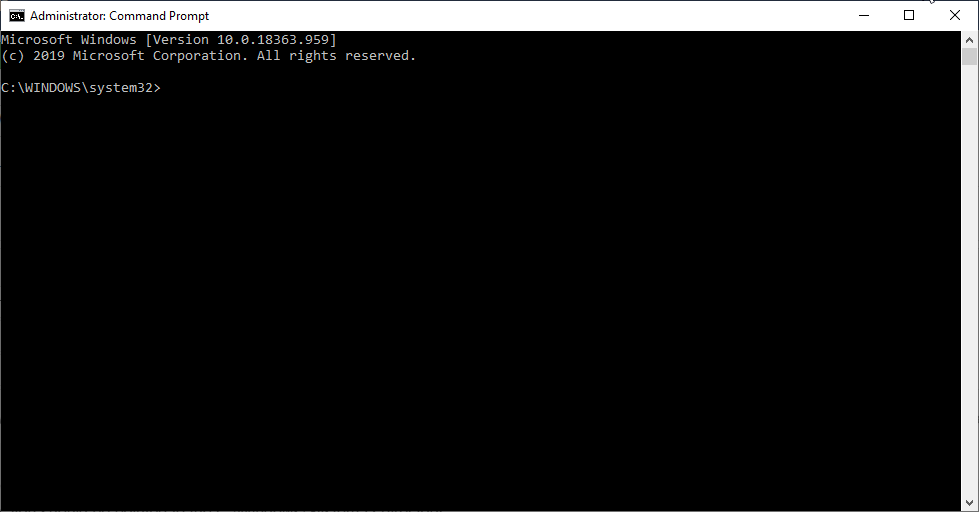
Now change directory to the Npcap directory and list the directory contents:
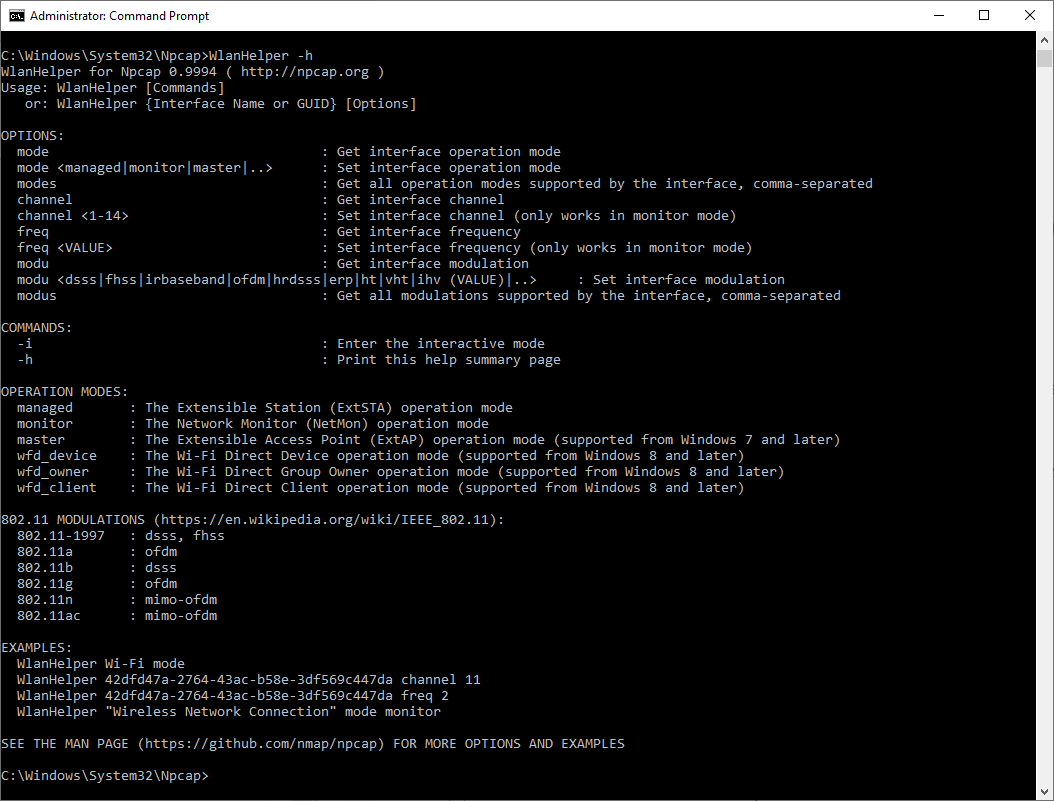
Here is how you use the tool. According to the Npcap web site, WlanHelper is used to set/get the operation mode (like “Monitor Mode”) for a wireless adapter on Windows. WlanHelper tries to follow the grammar of iwconfig, a wireless management tool for Linux. So if you rename WlanHelper.exe to iwconfig.exe, your command lines for WlanHelper will be exactly the same with the iwconfig tool. You must use this in Administrator mode.
Below I have requested the WlanHelper help:
So the command we would need is (where the name of the interface is “Wi-Fi”):
WlanHelper Wi-Fi mode monitor
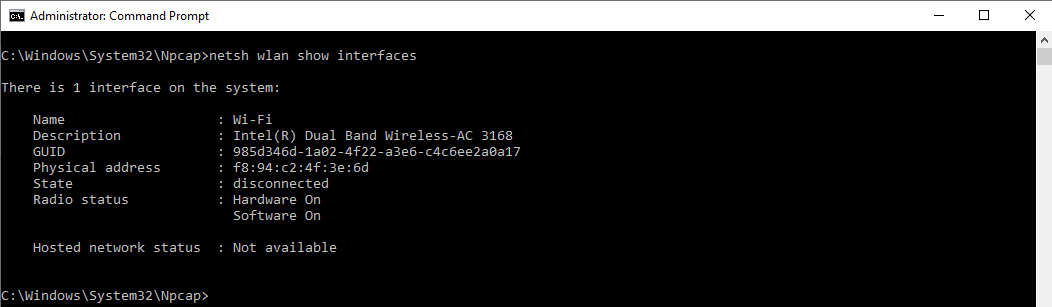
You can find out the name of your interface using the following command:
netsh wlan show interfaces
Here is what my system responded:
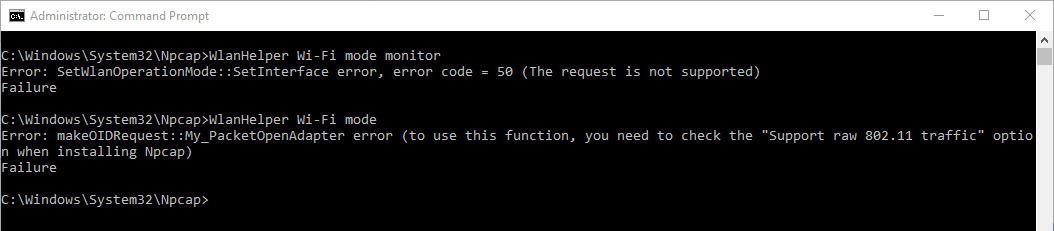
So the WlanHelper command should work for me:

You can see – again complete failure for me.
If you get “Success” – you are good, and can now open Wireshark and capture from your Wi-Fi interface in monitor mode. Once done, you need to come back to the CMD window to return the interface to Managed Mode and enter:
WlanHelper Wi-Fi mode managed
So I tried simply to check the mode:
WlanHelper Wi-Fi mode
I got the following:
I know I did this:
Nonetheless, I went back, uninstalled Wireshark and Npcap, rebooted, then reinstalled.
Went through the process again, with same results.
Have you suffered the same? Have you solved it? If anyone knows how to overcome this – please make comments below.
[Note: If you cannot get this to work, I suggest you read this article as well.]
[MAC users check out an article for you: https://www.cellstream.com/reference-reading/tipsandtricks/442-capturing-wi-fi-wlan-packets-in-wireshark-on-macosx]
If you would like to help support the continued development of independent networking, broadband, Wi-Fi, VoIP, and packet analysis content, please consider joining our Patreon community where you will gain access to exclusive technical resources, downloadable labs and PCAPs, bonus course content, troubleshooting guides, and additional member-only material. Comments and technical discussion are always welcomed at our Patreon community or on our Discord server. You can also support our work by simply buying us a coffee — every contribution helps us continue creating practical, real-world network science education for professionals and enthusiasts alike.