
Here is a quick and clever technique in Wireshark.
Let’s say you want to present, testify, or teach about a packet capture in Wireshark, but you want to redact information that is not important, perhaps hiding an error that was made, or some information that is private, or some other reason.
Redaction is often done with black ink or opaque colored ink markers on documents sometimes to the point of making the document unreadable.
In Wireshark there is a capability to ‘mark’ packets by selecting a packet and then using right click or simply hitting CTRL-M on the keyboard.
Now when you do this marking, Wireshark is set to change the status of the packet to “marked”, and it changes the colorization of the packet to white foreground, with black background. You can mark multiple packets and they need not be contiguous in the packet capture.
So what if we modified this process to change the color of the marked packets to black foreground and black background? Technically you could do this with any color (like blue or red).
The result would be an unreadbale – redacted – view of the packet!
So here is where and how I suggest you do this.
First, with your packet capture open, select whatever profile you wish to use. In my example I am using my Better Default profile (you can get our profiles right here):

Now, I suggest you do not modify this profile, but rather that you create a copy of the profile with redaction. We want to do this before actually making any changes.
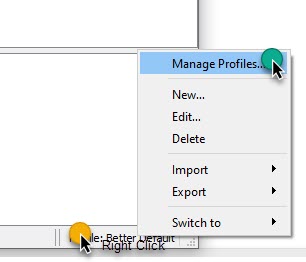
Right click on the Profiles srea in the lower right corner of your Wireshark GUI screen, and select Manage Profiles:
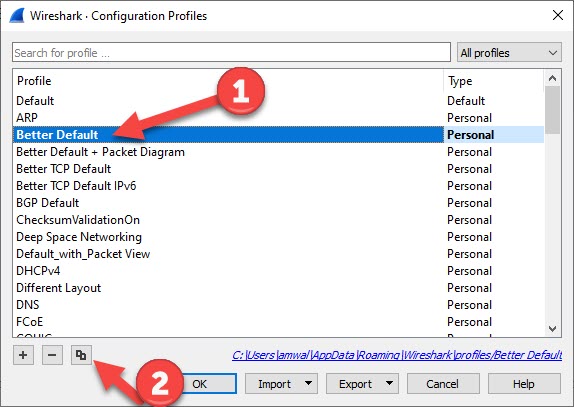
You will get a pop up with the profile selected/highlighted (mine was Better Default). Select the profile you wish to duplicate, then select the duplocate tool:
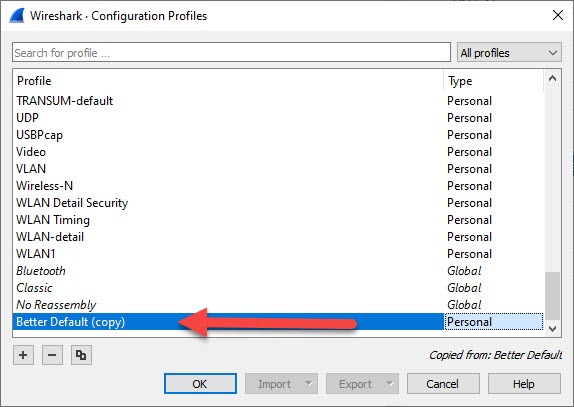
You will get an update to this pop up that contains a new profile with the word (copy) added:
You can edit this by simply clicking on the profile name – I selected to call if Better Default with redaction. Then click OK. That profile is now the active profile.
Perfect. Now we need to modify the profile with the redaction.
So lets go to Edit> Preferences and you will get the preferences dialogue pop up. In that dialogue, select Font and Colors. You will see the marked packet configuration:

Click on the white box (which is the foreground color selection for the marked packet) to the left. You will get the color palette selector. Select black and click OK:
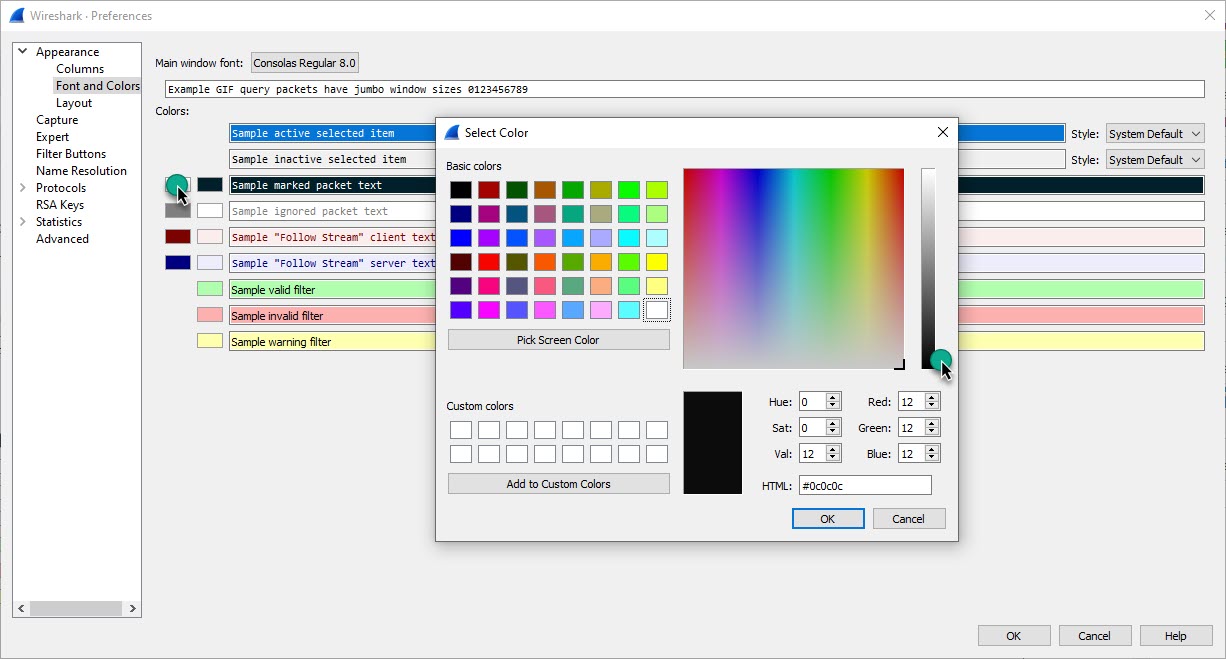
Some sharp-eyed readers may notice that I did not choose black-black (HTML #000000) – because you may also notice that the black foreground that Wireshark uses is not black-black. So if you want to make sure the data is not visible, actually change both to black-black.
Now click OK on the Preferences dialogue.
You should be back at your Wireshark screen.
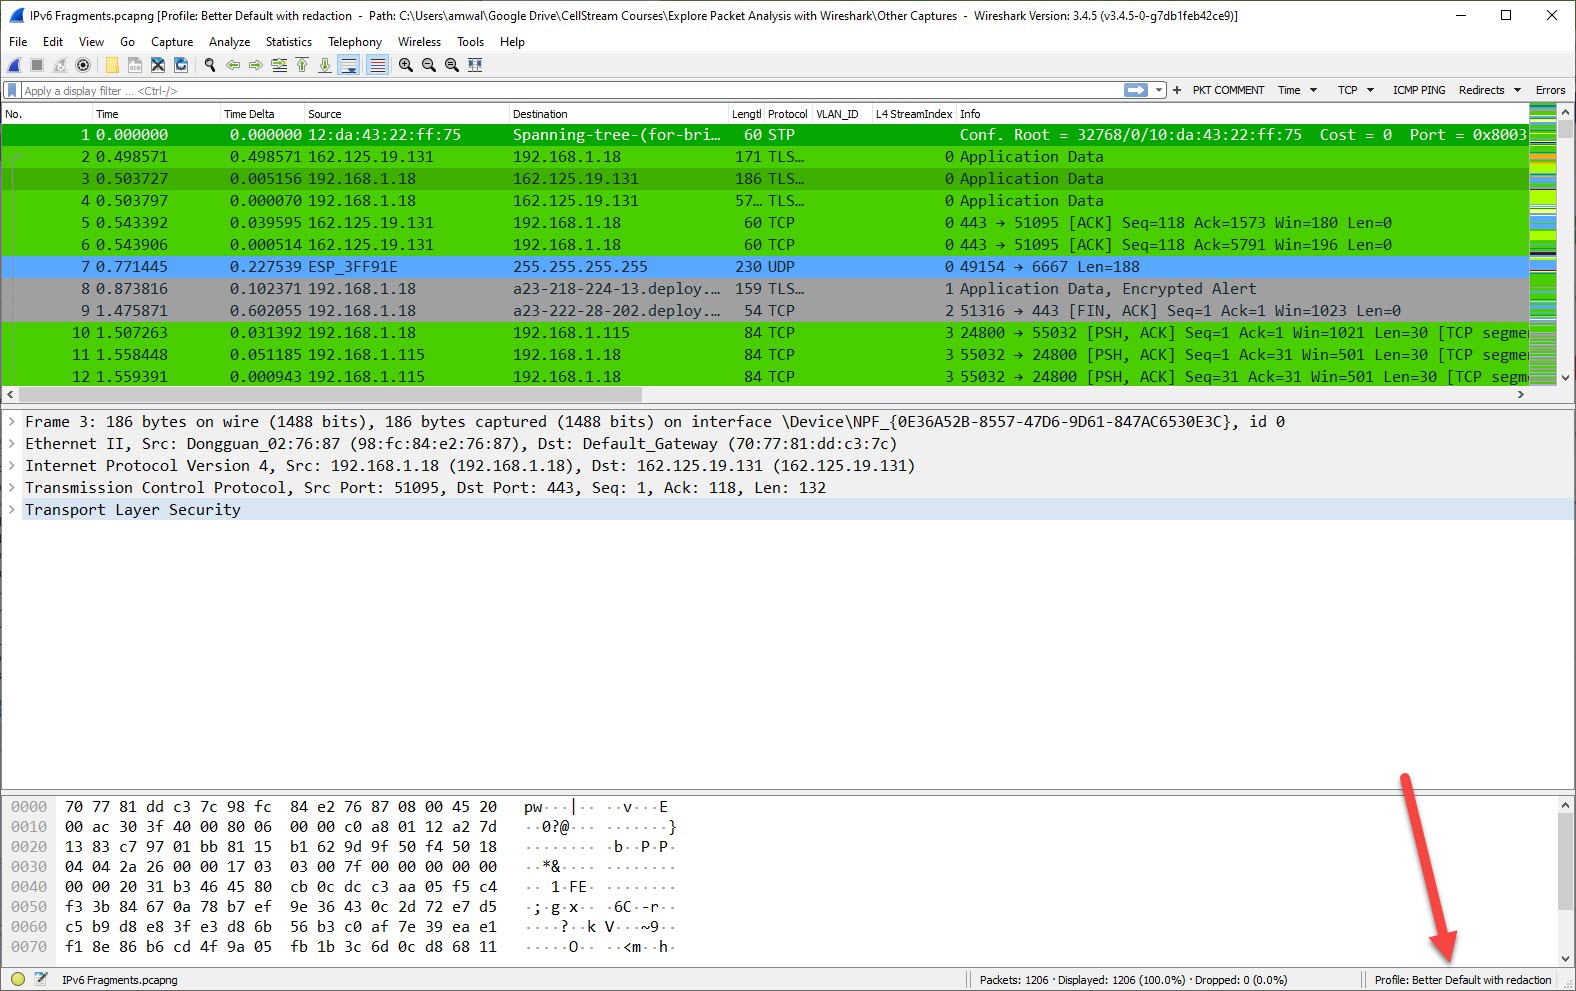
Just select the packets you wish to redact, and hit CTRL-M. These packets will be redacted from your packet list display:
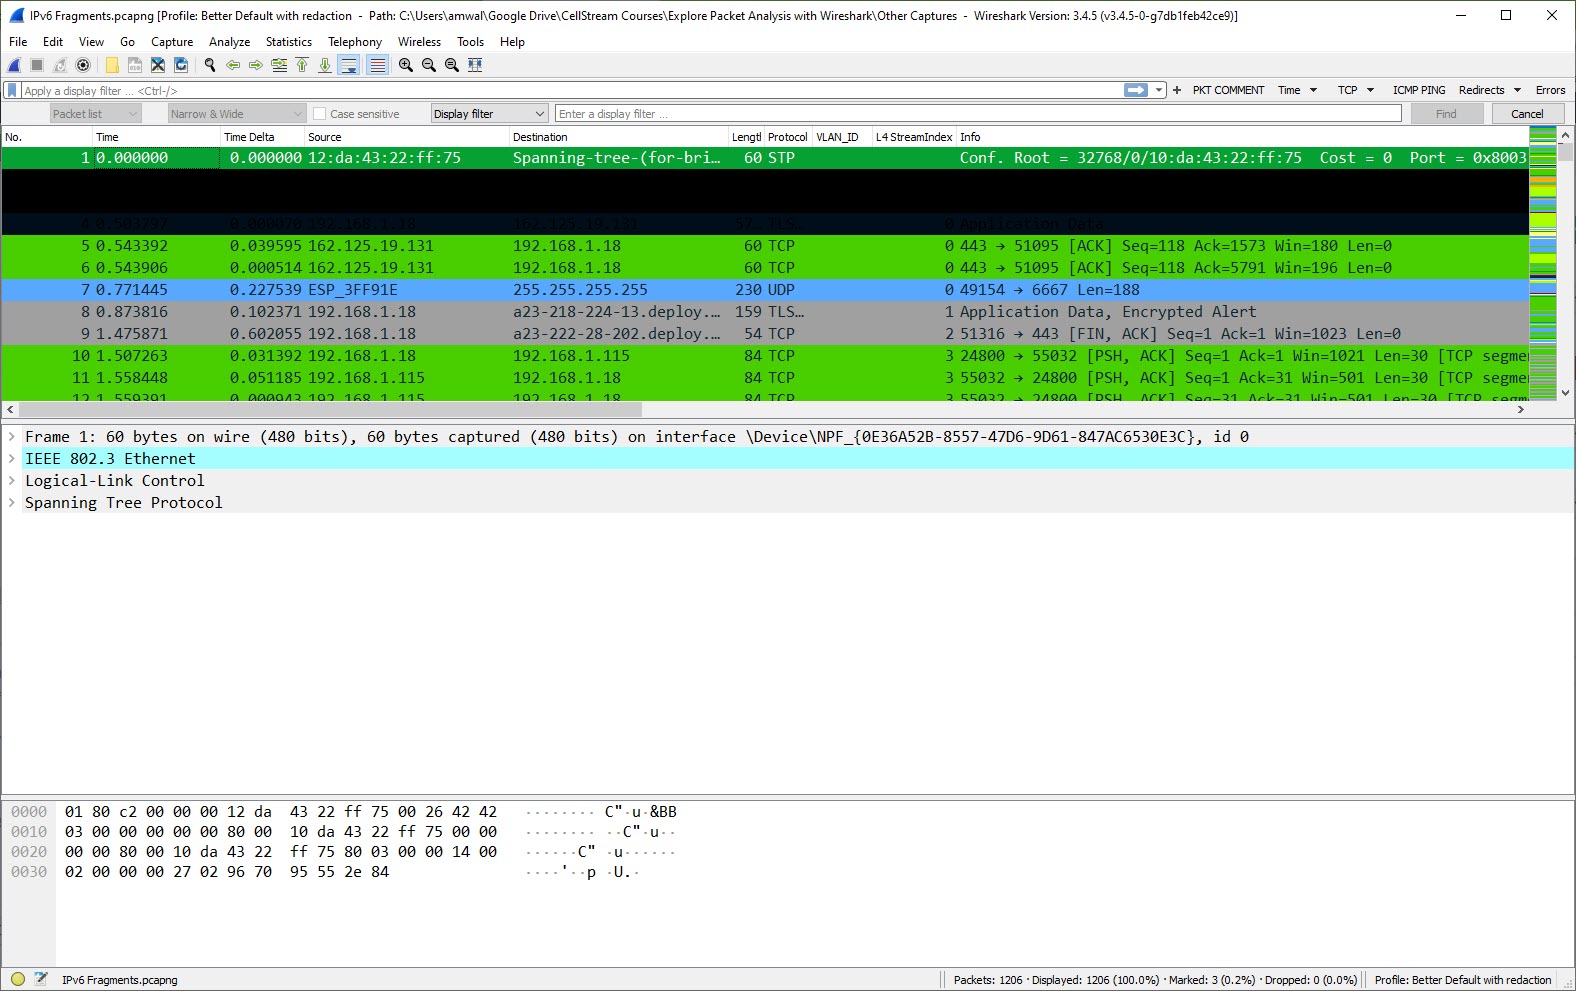
But – keep in mind they are not rected from the packet details.
Now optionally you could do the same thing with the “Ignore” function – the problem there is that this can cause other error in the packet analysis.