
Using a loopback adapter (also called a local loopback interface) for packet capture in Wireshark allows you to capture traffic that stays within your own computer — for example, packets exchanged between local applications via localhost or 127.0.0.1. Normally, this traffic never reaches a physical network interface, so a loopback capture is needed to see it. Here’s how to do it depending on your operating system:
On Windows
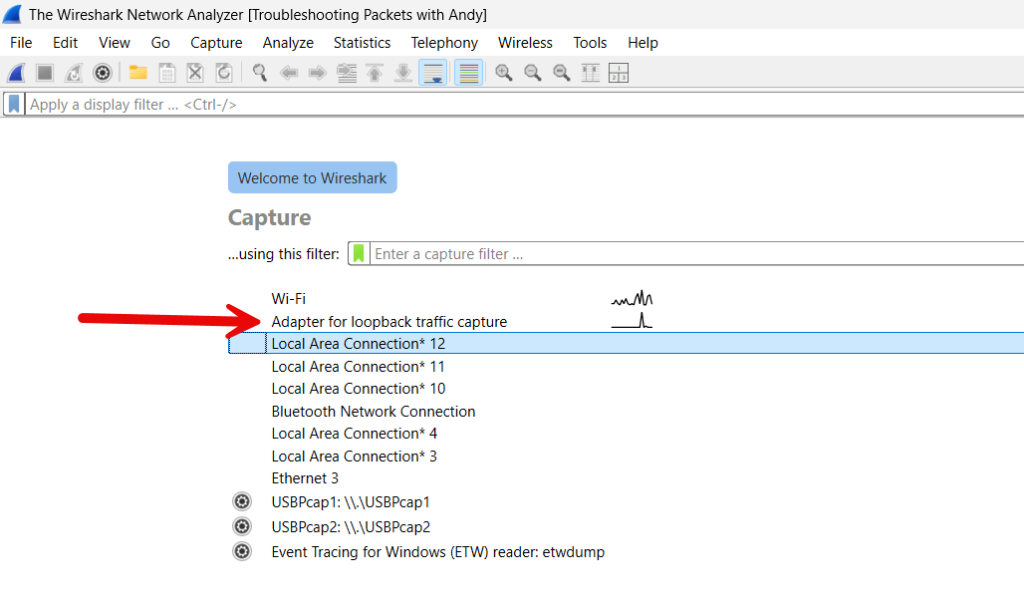
If your Windows machine does not show a loopback adapter , you may need to re-install npcap.
- Download and install Npcap (the packet capture driver used by Wireshark).
- During installation, check the box labeled:
👉 “Support loopback traffic (‘Npcap Loopback Adapter’)” - After installation, open Wireshark.
- You’ll see a new interface called “Npcap Loopback Adapter” in the interface list.
- Select it and start capturing — you’ll now see packets to and from
127.0.0.1or::1.
On Linux
Linux systems expose a built-in loopback interface by default.
- Open Wireshark with capture permissions (see https://wiki.wireshark.org/capturesetup/captureprivileges).
- Look for the interface named “lo” in the capture interface list.
- Start a capture on lo to see traffic between local processes.
- You’ll see packets with source and destination addresses like
127.0.0.1.
On macOS
macOS also includes a loopback interface.
- Start Wireshark.
- Look for the interface “lo0” (the loopback device).
- Begin capturing — you’ll see local traffic just like on Linux.
- Generate local connections to test, such as
ping 127.0.0.1or accessing a local web service.
Some Tips for Effective Loopback Captures
- Use display filters like
ip.addr == 127.0.0.1ortcp.port == 8080to focus on your test traffic. - Loopback traffic does not use ARP or Ethernet headers, so you’ll typically see raw IP packets or pseudo-headers.
- Use npcap (not WinPcap) on Windows — WinPcap does not support loopback captures.
Example Using the Interface
Let’s walk through a loopback capture example step by step, showing how you can observe local traffic in Wireshark (for instance, between your browser and a local web server).
For Windows (using Npcap Loopback Adapter)
Step 1: Verify Loopback Adapter
- Open Wireshark → click Capture → Options.
- Look for an interface named “Npcap Loopback Adapter” or “Adapter for loopback traffic capture”.
- Select it and click Start.
Step 2: Start a Local Web Server
If you have Python installed, open a Command Prompt and run:
python -m http.server 8080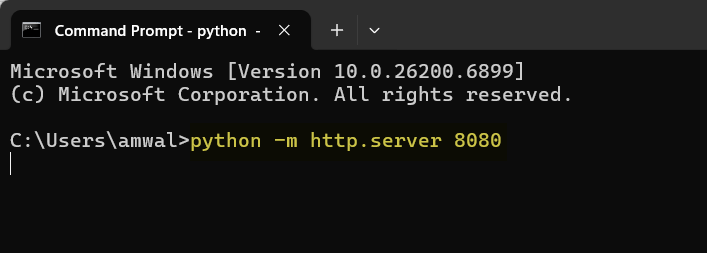
This starts a simple HTTP server on port 8080 using your local directory.
Step 3: Generate Local Traffic
Open your browser and go to:
http://127.0.0.1:8080Wireshark should now show packets on the loopback interface. Add the display filter “tcp.port==8080” and you should see something like this:
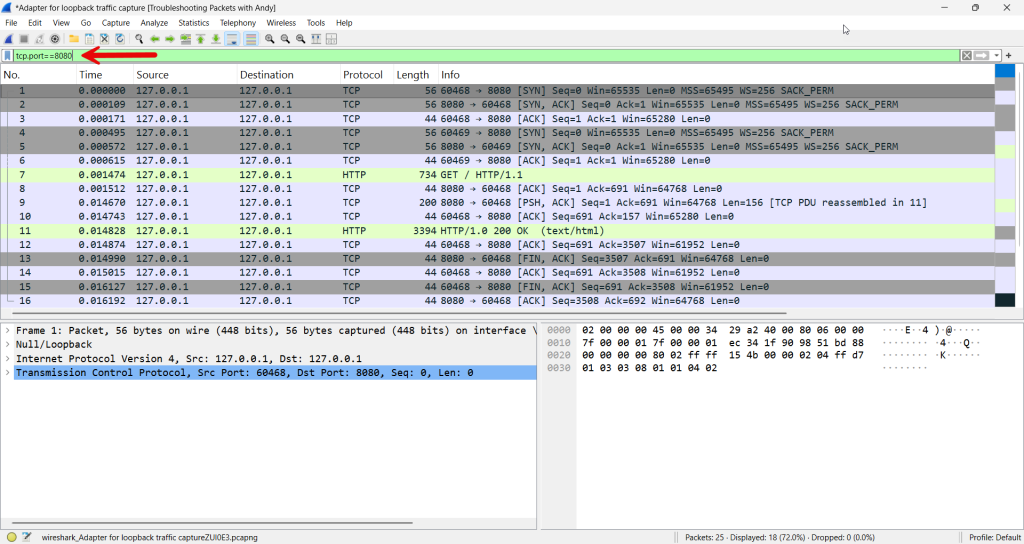
Note the following items:
- TCP handshake (
SYN,SYN/ACK,ACK) - HTTP GET request
- HTTP response with
200 OK
For Linux (interface lo)
- Start capture on the
lointerface. - Run:
python3 -m http.server 8080 - Then in another terminal:
curl http://127.0.0.1:8080 - Wireshark will display:
127.0.0.1 → 127.0.0.1 TCP(connection setup)HTTP GET /and the response.
You can filter similarly:
http || tcp.port == 8080
For macOS (interface lo0)
Same as Linux — capture on lo0, run a local server with Python or Node.js, then connect via browser or curl.
What You’ll Notice in the Capture
- No Ethernet or MAC addresses: Loopback uses a pseudo-header instead of real Ethernet framing.
- Both directions visible: Because both client and server are on the same machine, you’ll see packets in and out on the same interface.
- Timing accuracy: Loopback captures can show extremely precise timing since there’s no physical transmission delay.
Fantastic. To stop the server, simply return to the CMD window and hit CTRL-C. It will stop.
Some Additional Optional Experiments
You can deepen the learning by:
- Capturing localhost DNS queries (
nslookup localhost). - Running two local processes communicating via sockets.
- Observing HTTP/2 or HTTPS traffic on localhost (you’ll see encrypted TLS).
If you would like to help support the continued development of independent networking, broadband, Wi-Fi, VoIP, and packet analysis content, please consider joining our Patreon community where you will gain access to exclusive technical resources, downloadable labs and PCAPs, bonus course content, troubleshooting guides, and additional member-only material. Comments and technical discussion are always welcomed at our Patreon community or on our Discord server. You can also support our work by simply buying us a coffee — every contribution helps us continue creating practical, real-world network science education for professionals and enthusiasts alike.